Wireless Network 2,4Ghz PCI/PCMCIA adapter 100Mbps WL-120/WL-121 Quick Start Guide 1
Introduction The Wireless adapter is an IEEE 802.11G compliant wireless LAN adapter. It fully supports wireless networking under Windows 98, ME, 2000 & XP with a maximum transfer rate of 100Mbps. The Wireless adapter can operate in Ad-Hoc or Infrastructure network configurations. Ad-Hoc mode allows the Wireless Cardbus PC-Card users to join a Basic Service Set (i.e., peer-to-peer mode, without an access point).
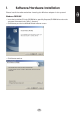
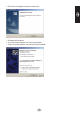
1. Software/Hardware Installation Please install the software before inserting the Wireless adapter in the system! Windows 98SE/ME • Insert the installation CD in the CD-ROM drive, open My Computer/CD-ROM drive and run the setup.exe file located in the “Utility” directory. • Click Next to pass the InstallShield Wizard welcome screen. • Click Next to continue.
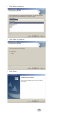
• Click Next to continue. • Click ‘Next’ to continue. • Click Finish.
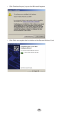
• Shut down the computer. • Insert the wireless adapter and restart the computer. • The hardware will be automatically recognised and installed by Windows 98se/ME. Windows 2000 • Insert the installation CD in the CD-ROM drive, open My Computer/CD-ROM drive and run the setup.exe file located in the “Utility” directory. • Click Next to pass the InstallShield Wizard welcome screen. • Click Next to continue.
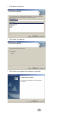
• Click Next to continue. • Click ‘Next’ to continue. • Click Finish to complete the software installation.
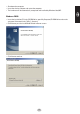
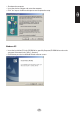
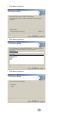
• Shut down the computer. • Insert the wireless adapter and restart the computer. • Click ‘Yes’ to pass the Microsoft Logo test and complete the setup. Windows XP • Insert the installation CD in the CD-ROM drive, open My Computer/CD-ROM drive and run the setup.exe file located in the “Utility” directory. • Click Next to pass the InstallShield Wizard welcome screen.
• Click Next to continue. • Click Next to continue. • Click Next to continue.
• Click Finish to complete the software installation. • Shut down the computer. • Insert the wireless adapter and restart the computer. • Select ‘Install the software automatically (Recommended)’.
• Click ‘Continue Anyway’ to pass the Microsoft Logotest. • Click Finish to complete the installation of the Sitecom Wireless Card.
2. Wireless Configuration Peer to Peer (Ad-Hoc) After installing the software the wireless configuration utility icon will show in the icon tray. Sitecom Wireless Utility-----------------> The wireless utility icon should be blue if the icon is red then the wireless LAN configuration is invalid or incomplete. When the wireless utility icon is yellow then the wireless connection strength is low.
• Fill in a Profile Name (i.e. Sitecom) and click ‘Next’. • Fill in the Network Name (i.e. Sitecom), make sure the Network name, also called SSID, is the same on all wireless adapters. Set the Network Type to ‘Peer to Peer’, set the Transfer Rate to ‘Automatic’ and choose a Channel. For a Peer to Peer connection the same channel and Network Name are required. Click ‘Next’. • Set the Encryption ‘Disable’ until the wireless connection is established and click ‘Next’.
• Enable the ‘IP Setting’ and click ‘Next’. • Disable the DHCP Status. Set the ‘IP Address’ (i.e. 192.168.1.1), incrementing the last digit of the IP Address for each machine. Therefore the IP address of the second machine should be 192.168.1.2. The ‘Subnet Mask’ should be the same (255.255.255.0) for all of the machines. The ‘Default Gateway’ and the ‘DNS Server’ do not have to be filled in. Click ‘Next’. • Click ‘Finish’ to complete the configuration.
• Select the Profile Name and click ‘Connect’. • Check the wireless utility icon in the icon tray and you will see the colour of the wireless utility icon change, blue means it’s connected. • Close the wireless utility by clicking the ‘X’. The wireless utility will stay visible in the icon tray. • Go to chapter 4 to enable File & Printer sharing.
3. Wireless Configuration Infrastructure After installing the software the wireless configuration utility icon will show in the icon tray. Sitecom Wireless Utility-----------------> The wireless utility icon should be blue if the icon is red then the wireless LAN configuration is invalid or incomplete. When the wireless utility icon is yellow then the wireless connection strength is low. • Please double click on the icon or go to Start/Programs/Wireless Network and click the Sitecom Wireless Utility.
• Fill in a Profile Name (i.e. Sitecom) and click ‘Next’. • Fill in the Network Name (i.e. Sitecom), make sure the Network name, also called SSID, is the same on all wireless adapters and Access Points. Set the Network Type to ‘Access Point’, set the Transfer Rate to ‘Automatic’ and click ‘Next’. • Set the Encryption to ‘Disable’ until the wireless connection is established and click ‘Next’.
• Enable the ‘IP Setting’ and click ‘Next’. • Disable the DHCP Status. Set the ‘IP Address’ (i.e. 192.168.1.1), make sure the IP address is in the same range as the Access Point. The ‘Subnet Mask’ should be the same (255.255.255.0) for all of the machines. The ‘Default Gateway’ and the ‘DNS Server’ do not have to be filled in. Click ‘Next’. • Click ‘Finish’ to complete the configuration.
• Select the Profile Name and click ‘Connect’. • Close the wireless utility by clicking the ‘X’. The wireless utility will stay visible in the icon tray. • Go to chapter 4 to enable File & Printer sharing.
4. File and Printersharing Windows 98/ME To enable File and Printersharing on your network, Right click the icon ‘Network Neighbourhood’ on the desktop, choose ‘properties’. Click the ‘file and printersharing” button. Simply click the two boxes you see in the resulting dialog box, then click OK. But before you reboot your computer, you’ll need to check a few other settings. • Click the Identification tab in the Network Control Panel.
Guest Account Windows 2000 When you want to reach a shared file or folder in the network on a Windows 2000 machine, most of the time you are requested for a password. This is due to the fact the so called ‘Guest account’ in Windows 2000 is disabled by default. You can enable the guest account: • Right-click ‘My Computer’, and then click ‘Manage’. • Under ‘System Tools’, double-click ‘Local Users and Groups’ to expand it, and then click ‘Users’.
5. Wireless Configuration Utility You can easily navigate through the sheets by clicking the different tabs. 5.1 Link Information Click ‘More…’ for more information about the wireless connection. Connected to Network This field is used to display the current status of the wireless connection. When the utility shows ‘Connected to network’ it means that the network is available in Infrastructure or Peer to Peer mode.
Network Type Infrastructure mode: The driver will scan all available channels continuously until it finds one or more Access Points that match the Network Name (SSID). At that point it will try to authenticate and associate with the Access Point. Peer to Peer mode: The driver will scan for 5 seconds looking for an existing Ad Hoc network using the same Network Name (SSID). Channel, Link Speed & Encryption The channel and the transmit rate used to connect to an active wireless network.
5.3 Profile Setting The Profile Setting allows users to create profiles for different network environments. Click the ‘New’ button to create new profiles. Click ‘Edit’ for editing existing profiles. Click the ‘Delete’ button for deleting profiles. Network Type This allows you to select ‘Peer to Peer’ mode or ‘Infrastructure’ mode. Peer to Peer: All communication is done from client to client without the use of an Access Point.
64 BIT 128 BIT alphanumeric 5 characters A-Z & 0-9 hexadecimal 10 characters A-F & 0-9 alphanumeric 13 characters A-Z & 0-9 hexadecimal 26 characters A-F & 0-9 IP Setting With this option the wireless adapter can be configured with a static or a dynamic IP address, a default gateway and a DNS Server address. 5.4 About The ‘About’ tab shows the Utility Version, Driver Version, Firmware Version and the MAC Address.