SHUTTLE Home Installation Guide JHK1 Released 4-28-2004.
Congratulations You are one step closer to experiencing Sirius Satellite Radio. Sirius will revolutionize your in-home or vehicle entertainment with: · 100 streams of original programming, including – 60 streams of completely commercial-free music – guaranteed.
Cautions and Warnings 1. Do not install the Shuttle in a position that obstructs viewing of any home entertainment component, such as Television, or stereo system indicators and displays. 2. This unit complies with the interference limits relative to a Class B digital device, applicable under Part 15 of the FCC Rules regarding installation in a residential environment. If the unit is not installed in accordance with these instructions, it could cause harmful interference to radio or television reception.
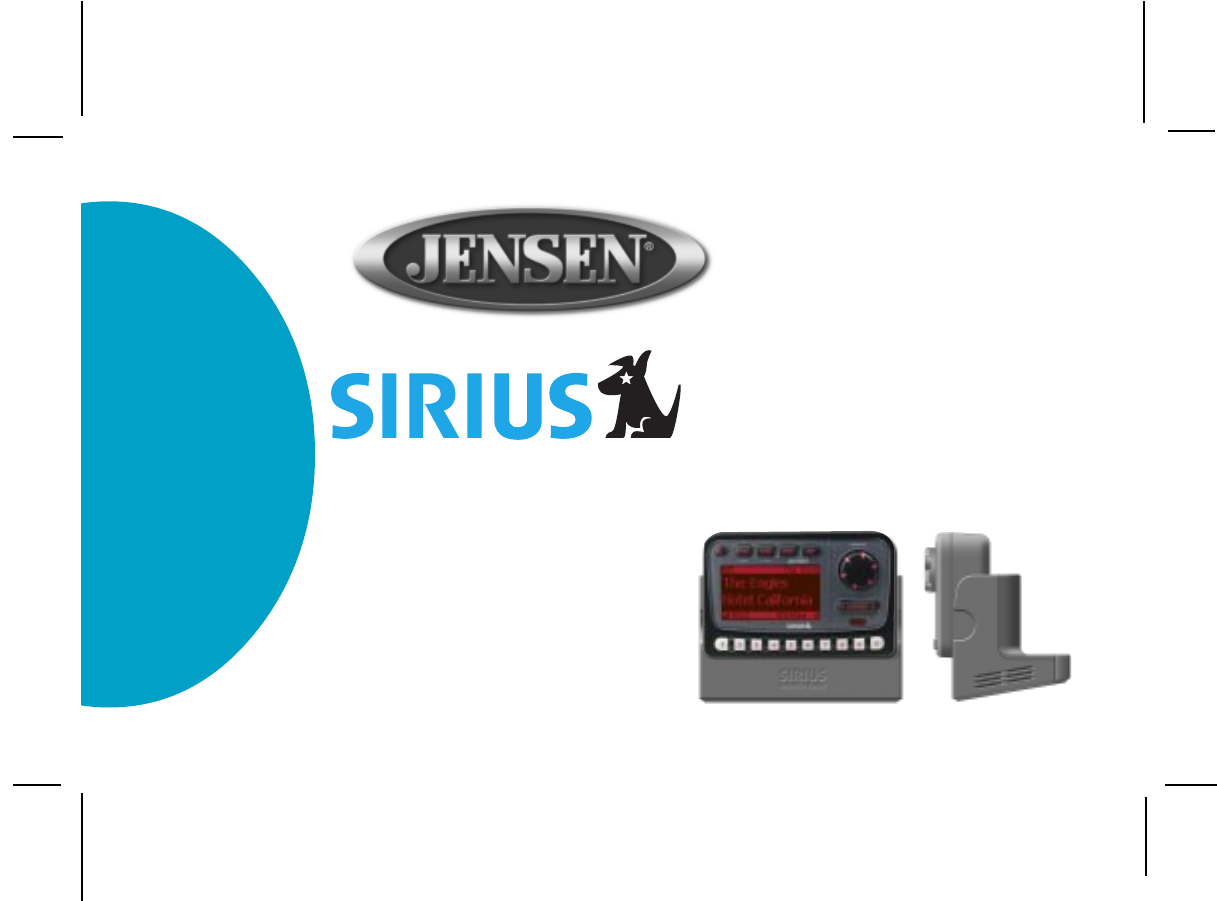
Contents JHK1 Install Manual P/N 1287129 Installation/Wiring Precautions Audio Cable (P/N 112B3293) 1. Make sure the adapter cable is not connected to an AC wall outlet until all interconnections have been made and verified. The adapter power cable should be connected last. 1 pc. Antenna 1 pc. 2. Do not install the unit in the locations exposed to direct sunlight or in areas subject to extreme temperatures. (P/N 118C1129) Cradle JHK1 (P/N 136-3734) 3.
Interconnect Diagram Setting Up and Installing Your Kit NOTE: The SIRIUS® signal can be received and processed virtually anywhere as long as there are no obvious satellite signal obstructions such as high terrain, trees, overhangs, etc. SHUTTLE CRADLE JHK1 1. Cabling Interconnections You can begin to enjoy Sirius® Satellite Radio as soon as the Shuttle and home Kit installation are complete.
b. You can also place the antenna outside (on the roof structure), provided it is clear of any overhead obstructions. NOTE: ANT RF CONNECTOR Because of the orbiting characteristics of the Sirius Satellites, the strength of the received signal may change over time. In most cases however, the signal should be available continuously. If you experience a loss of signal or audio, reposition the antenna inside the home or outside as necessary. 5.
to boost signal strength. In these cases, the antenna can be placed inside the home. Once again, try to achieve clear sky conditions as shown. b. If roof placement is not possible, BETTER reception can be achieved by placing the antenna outside a window, or by mounting it to the side of the house. In either case, try to achieve the best possible clear sky conditions as shown. d. Apply power to the Receiver as outlined in the associated User Guide and obtain an audio output.
g. If the antenna is mounted outside, route the cable from the antenna position to the interior of the home, working the cable through the basement,under a window sill, etc.; make adjustments and take up slack whenever necessary. h. Plug the antenna cable into the ANT connector on the back of the Shuttle. i. Plug the DC Adapter cable jack into the DC12V receptacle on the back of the Shuttle. The antenna should be placed on a relatively flat surface whenever possible. To mount the antenna: j.
c. Apply power to the Shuttle system as outlined in the associated User Guide and obtain an audio output. If no audio is heard, move the antenna to different positions on the surface until an audio output is heard. This is the desired antenna position and should be marked with masking tape or by another nonscratch method. f. d. After determining the optimum position, turn off Shuttle power, disconnect the power adapter from the wall outlet receptacle and disconnect the antenna cable. j.
12 MONTH LIMITED WARRANTY AUDIOVOX CORPORATION (the Company) warrants to the original retail purchaser of this product that should this product or any part thereof, under normal use and conditions, be proven defective in material or workmanship within 12 months from the date of original purchase, such defect(s) will be repaired or replaced with new or reconditioned product (at the Company's option) without charge for parts and repair labor.