ST2C STARMATE REPLAY SIRIUS Satellite Radio Plug and Play User and Installation Guide
CONGRATULATIONS! Your new ST2C Starmate Replay SIRIUS® Satellite Radio Plug and Play lets you enjoy SIRIUS Satellite Radio’s digital entertainment in your vehicle, home, or boat. Use this guide to familiarize yourself with all of ST2C’s features and capabilities. For the latest information about this and other SIRIUS products, please visit www.siriuscanada.ca. Table of Contents Safety Precautions ........................................................... 4 FCC Warning ......................................
Table of Contents (continued) FM Preset Button ...................................................... 37 Menu Options ............................................................. 37 FM Transmitter .......................................................... 38 FM Presets ............................................................. 38 FM On/Off ............................................................... 39 Game Alert ................................................................. 39 Settings ..........
Safety Precautions Warning Take the following precautions to prevent fire and avoid personal injury: • Be sure the Receiver is installed as described in the Installation Guide. • The use suggestions contained in this User Guide are subject to any restrictions or limitations that may be imposed by applicable law—the purchaser should check applicable law for any restrictions or limitations before installing and/or operating this Receiver.
FCC Warning This equipment may generate or use radio frequency energy. Changes or modifications to this equipment may cause harmful interference unless the modifications are expressly approved in this User Guide. The user could lose the authority to operate this equipment if an unauthorized change or modification is made. • Reorient or relocate the receiving antenna. • Increase the separation between the other equipment and the Receiver.
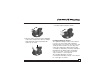
DISP S-SEEK 001 Sirius Hits 1 Starmate Replay ST2C Receiver U2 Vertigo POP 12:00P A BAND P. TUNE 1 2 3 4 5 6 7 8 9 (T it kn o clea ow n pr ior n / un a su rf to ap know ace plyi n of ng emul any ad he sion sive s s.) MEMO MENU Su rfa ce Cle Pre an para ing K tion Package Contents The following items are packaged with the ST2C Starmate Replay. Check the package to be all of the items are included.
Installation Installation of your ST2C Starmate Replay Receiver is easy: 1. Choose a location in your vehicle where you will mount the Receiver. 2. Mount the Receiver to the suction cup mount and attach the suction cup portion of the mount to the vehicle window, or use the velcro strip to mount the Receiver. 3. Install the magnetic antenna on the roof of the vehicle, and route the antenna cable to the Receiver. 4. Connect the power cord for the Receiver to your vehicle’s cigarette lighter. 5.
If you are using the velcro strip for mounting, attach the velcro strip to the back of the mounting plate. Route the cables through the mounting plate underneath the tabs as shown. The cables may be routed across the mounting plate, or routed down to exit at the bottom. Place the Receiver into the mounting plate by first placing the bottom of the Receiver into the tabs at the bottom of the mounting plate (1), and then pivoting the top of the receiver into the mounting plate until it snaps into place (2).
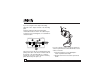
4. Lock the cam lever down as shown. 3. Place the suction cup mount on the windshield, or other area, and press the cam lever straight down towards the suction cup to flatten the suction cup as shown.
Follow these recommendations for best performance from the antenna. Sedan/Coupe: Mount the antenna along the rear centerline of the vehicle roof, located at the rear of the roof near the rear window. Pickup Truck: Mount the antenna along the rear centerline of the cab roof, located at the rear of the roof near the rear window. Convertible: Mount the antenna along the centerline of the trunk lid, with the rubber antenna cable cover/tail directed toward the rear window.
PROTECTIVE MATERIAL (RED SIDE) ANTENNA (UNDERSIDE) ADHESIVE STRIP ANTENNA CABLE RUBBER ANTENNA CABLE COVER/TAIL Connect the rubber antenna cable cover/tail to the antenna cable, making sure that the strain-relief on the antenna seats into the rubber antenna cable cover/tail groove. Route the antenna cable through the wire channel in the rubber antenna cable cover/tail. Do not yet attach the adhesive strip.
Once the antenna cable is routed through the vehicle, and you are satisfied with the cable routing, peel the yellow protective material from RUBBER ANTENNA CABLE COVER/TAIL VEHICLE MOUNTING SURFACE the adhesive strip and adhere the adhesive strip to the rubber antenna cover/tail. Next peel the red protective material from the adhesive strip and press the rubber antenna cable cover/tail firmly into place on the vehicle.
Activating your SIRIUS Subscription Before you can listen to the SIRIUS service, you need to subscribe to the SIRIUS Satellite Radio service. 1. Be sure that the Receiver is correctly installed and that the antenna is oriented to receive the SIRIUS signal. 2. Press the power button to turn Receiver On. After displaying the SIRIUS logo, the Receiver will update the SIRIUS channel line up. The display will show, “UPDATING CHANNELS” and show the status of the update.
again. You may do this from either the Receiver or the remote control. (This SID number is also available on the ST2C packaging.) Write the SID number down in the space provided at the end of this manual. 000 SIRIUS ID SID 012345678912 12:00P A 6. Have your credit card handy and contact SIRIUS toll-free at: 1-888-539-SIRIUS (1-888-539-7474) 7. When you have successfully subscribed to the SIRIUS service, and the Receiver has been updated with your subscription information, an alert will be displayed.
the Receiver into the FM antenna input of your vehicle’s radio. This box will automatically switch off the vehicle’s FM antenna when you turn on your SIRIUS Receiver. Audio Cables - For connecting the audio output of the Receiver into your vehicle’s audio system. Home Kit (STH2C) The optional home kit allows you to enjoy the SIRIUS Satellite Radio’s digital entertainment in your home, by allowing you to take your Receiver from your vehicle into your home.
ST2C Starmate Replay Receiver Basic Operation 1 2 3 4 5 6 MEMO DISP 7 S-SEEK 14 MENU Sirius Hits 1 U2 Vertigo 13 12 11 001 8 POP 12:00P A BAND P.
Controls and Features 1. POWER Button : Turns the Receiver’s power On and Off. 2. Rewind Button: Used to rewind through a broadcast saved in Instant Replay. 3. Play/Pause Button: Pause Function: Used to pause a broadcast for Instant Replay. Play Function: Used to play a broadcast saved in Instant Replay. 4. Fast Forward Button: Used to fast forward through a broadcast saved in Instant Replay. 5. MEMO (Memory) Button (S-Seek Function): Saves and recalls artist names, song titles, and sports teams.
Remote Control 2 1 3 MUTE 4 16 5 6 7 15 14 13 12 11 MENU DISP BAND MEMO 10 1 2 3 4 5 6 7 8 9 + 8 – 9 0 Installing Batteries in the Remote Control 1. Remove the battery cover. 2. Install CR2025 battery. (+ positive side is up) 3. Replace the battery cover. 18 1. 2. 3. 4. 5. 6. Power Button : Turns the Receiver power On and Off. Category Previous/Next Buttons: Navigates through categories. MUTE Button: Mutes the audio.
After you have successfully activated your SIRIUS subscription, and the Receiver has received the subscription information from the SIRIUS signal, the default display screen will be displayed.
to tune to the highlighted channel. When a new channel is selected, the display will revert to the default display screen for the new channel. To exit the channel list mode without changing to a different channel, press and hold the DISP button for 1½ seconds, until the default screen is displayed.
through the available channels in each category to find the channel to which you want to listen. When you have found the channel you wish to listen to, highlight the channel using the channel up and down buttons and press the select button to tune to the channel. The new channel will begin playing and the display will revert to the default display screen for the new channel.
preset button in which you wish to store your favorite channel, until you hear a beep. The band and preset number will then be displayed in the lower right corner of the display screen to confirm that the channel has been stored. 001 001 Category 12:00P A1 Note: If the preset button already has a channel stored in it, the preset will be replaced by the newly stored channel. Using Channel Presets The active band of presets is displayed in the lower right corner of the default display screen, A, B or C.
presets are grouped and displayed by bank and preset number, i.e., A-1, A-2...B-1, B-2, etc. Empty presets are not displayed. 3. To view the channel presets in the channel list mode, where you can view 4 presets at once, momentarily press and hold the DISP button for approximately one second until the channel list mode is displayed. Repeated momentary pressing and releasing of the DISP button will sequence the display between listings of artist names, song titles, and back to channel names.
stored in memory. If you have saved a sports team (or teams) in memory, at the time Receiver is initially powered on, you will be alerted if your sports teams are playing in a game being broadcast. Also, while listening to your SIRIUS receiver, should one of your teams begin to play a game, you will be alerted. 001 display a menu to choose to store the artist name or the song title.
100 Channel Name Artist Stored Artist Name Store Title Song? Song Category 12:00P 100 Channel Name StoreName Artist? Artist Stored SongSong Title A Category 12:00P selection to memory. The next screen will ask which kind of alert you wish to have. A Alert Type 2. For Sports Games: If the current tuned channel is an NFL, NBA, NHL, or College play-by-play sports broadcast, momentarily press and release the MEMO button.
100 Channel Name 100 Channel Name Category 12:00P A Category 12:00P A 3. To ensure that no duplicate entries are stored in memory, the Receiver will check the stored memory list to ensure that the alert about to be stored is not already stored in memory. If a duplicate entry is found, an “Unable to Store” screen will be displayed for 1 second. 001 Channel Name Category 12:00P 001 Channel Name Artist Name X Used/Y Empty Song Title Category 12:00P A A 5.
cancel saving the alert, the Receiver will revert to the last active display mode. If you have chosen to replace an existing alert, a listing of all the alerts stored in memory will be displayed. Artist Artist Sports Artist X/Y Replace Name/ Song Tit Name Team Name/ Song Tit Using the channel up and down buttons, highlight the alert that you would like to overwrite and press the select button to store the new alert.
2. Use the channel up and down buttons to find the alert which you wish to delete and press the select button. 3. A screen displaying “Delete”, “Seek On”, and “Seek Off” will be displayed. Memory Recall Seek On Seek Off Delete 4. Use the channel up and down buttons to highlight the “Delete” option, and press the select button. A delete confirmation screen will appear.
The Receiver then displays the S-Seek Alert or My Game Zone screen, which displays a list of the current matches. No alert is provided for the currently selected channel. Memory Recall S-Seek On S-Seek Off Delete 3. To enable S-Seek alerts, use the channel up and down buttons to highlight the “Seek On” option and press the select button. The SSeek function is now enabled.
Jump Button The Receiver has a special preset button called the Jump button, which is identified by the icon. The Jump button is used to quickly tune to a channel that is accessed frequently and temporarily such as a musicl channel, news channel, a sports channel, or any channel at all. Pressing the Jump button allows you to quickly tune to the specific channel you have programmed into the Jump button, and then tune back to the original channel by pressing the Jump button again.
Refer to the Game Alert section in the Menu Options section of this manual for instructions on programming your favorite sports teams into the Receiver. You can also use the S-Seek feature to add Game Alerts for sports teams. See the section, Storing Artist Names, Song Titles, and Sports Teams to Memory for more information. Instant Replay The Receiver has a feature called Instant Replay which stores the audio of the channel to which you are listening for later playback.
REPLAY LIST Live Artist Artist Artist REPLAY LIST Live Song Title Song Title Song Title • Fast Forward button. The fast forward button forwards you through the stored audio. Pressing and releasing the Fast-Forward button forwards to the start of the next song or program in the stored audio, and playback automatically begins.
Note: Depending upon where in a particular broadcast the channel was selected, the start of a song or program may not be available in memory. If this occurs, the playback will start from where the audio began to be stored. Pressing and holding the Rewind button for one second rewinds playback in 10 second intervals, which increase to 15 and then 30 second intervals the longer the Rewind button remains pressed. Playback begins immediately when the button is released.
When the Instant Replay mode is active, status information is shown at the bottom of the Receiver’s display screen. The Instant Replay mode icon that is displayed at the bottom left of the screen indicates the current mode. Pause mode. This indicates that the Receiver is paused and muted. Play mode. This indicates that you are in the Instant Replay playback mode, listening to stored audio. Fast Forward mode. This indicates that you are fast forwarding through the stored Instant Replay audio. Rewind mode.
Progress Bar Showing Amount of Memory Filled End of Stored Audio Beginning of Live Broadcast 001 Ch. Name -00:20:03 Artist Name Song Title A diamond-shaped Play Position indicator is superimposed over the Progress Bar which provides a visual indicator of the current playback position in the Instant Replay memory. Play Position Indicator 001 Ch.
playing back the stored audio. You can use the Fast-Forward button to skip ahead or exit the Instant Replay mode, and begin listening to the live broadcast again. Should you press the Play/Pause button to stop the playback, the play position indicator will stop moving and continue to provide a visual indication of your current position in the Instant Replay memory. When the Instant Replay memory is 10 seconds from becoming full, two beeps will be heard (if the Confirmation Tone option is enabled).
FM Preset Button The Receiver has a special button called the FM Preset button, which is identified by the icon. When the FM Preset button is pressed, the Receiver turns on the built-in FM transmitter and begins transmitting on the next frequency from the FM frequency preset list. A screen will be displayed for 3 seconds showing the currently selected FM frequency. When the FM transmitter is turned on, an FM radio tuned to the same FM frequency will receive the currently tuned SIRIUS broadcast.
Menu Options FM Transmitter Game Alert Settings Time Based Features transmitter On and Off. FM Transmitter FM Presets FM On/Off To select a menu option, use the channel up and down buttons to highlight the option you wish to adjust, and press the select button. If a selection is not made within 10 seconds, the Receiver will exit the menu options screen, and revert to the last active display mode.
FM On/Off with the currently selected FM frequency for the preset. 88.1 MHz 88.3 MHz 88.5 MHz 88.7 MHz 3. Use your FM radio to locate quiet FM frequencies where there is no interference from adjacent FM stations. These are the frequencies which should be added to the FM Presets list. 4. Using the channel up and down buttons, highlight the frequency you wish to select for the preset and press the select button. The FM frequency will then be stored in the preset.
Sports teams which you have selected and which are currently playing will be displayed in a category called “My Game Zone”. You may select one sports team from each sports league and the college category using the Game Alert option, however, more teams may be chosen by using the Memory (MEMO) function. (See the section titled, Memory (MEMO) and Song Seek (S-Seek) Functions for more information about adding additional teams.) To choose sports teams to add for game alerts, do the following: 1.
scores are updated for the chosen team. To exit the Game Alert menu, press the MENU button. Settings The following sections explain each of settings menu options in the order in which they are displayed. Settings Jump Setting Display Options Memory Options Auto Select To select a menu option, use the channel up and down buttons to highlight the option you wish to adjust, and press the select button. Jump Settings The Jump setting controls the actions of the Jump button.
Jump Setting Traffic: NONE JumpSet The channel selected is now assigned to the Jump button. To exit the Jump settings menu, press the MENU button. At any time while listening to a channel, the channel may be assigned to the Jump button by simply pressing and holding the Jump button for 2 seconds. Display Options The Receiver’s display screen can be adjusted for brightness and contrast using the Display Options.
Memory Options Auto Memory Search Clear All Memory Automatic Memory Search To turn the automatic memory search On or Off, do the following: 1. Use the channel up and down buttons to highlight “Auto Memory Search”, and press the select button. 2. Use the channel up and down buttons to highlight either “On” or “Off”, and press the select button. Auto Memory Search On Off To exit the Memory Options menu, press the MENU button.
tune to the highlighted channel without you having to press the select button. This will allow you to quickly listen to all the available programming in any displayed channel list. The default setting for Auto Select is Off, meaning that you must press the select button to tune to a channel in a listing. To change Auto Select setting to On or Off, use the channel up or down buttons to highlight “On” or “Off”, and press the select button.
The Receiver has the ability to lock out with password protection any channels you do not want others to access without your permission. A locked channel will not appear in the channel list. Parental Control Lock/Unlock Edit Code When access to a locked channel is attempted using the direct channel entry method, the “Enter Code” screen is displayed and the channel cannot be accessed until the correct code is entered.
Code” prompt will be displayed. Enter your four digit code and press the select button to continue. Enter Code # ____ 4. When the correct code has been entered, a listing of channels will be displayed. Use the channel up and down buttons to navigate to the channel you wish to lock or unlock, and press the select button. A previously locked channel will have the word “Lock” displayed to the right of the channel name. 001 002 003 004 Lock/Unlock Channel Name Channel Name Channel Name Lock Channel Name 5.
1. Use the channel up and down buttons to highlight “Edit Code”, and press the select button. 2. At the prompt, enter the four digit Parental Control code. New Code # ____ 5. You will then be prompted to confirm the new code by entering it again. Enter Code Confirm Code # ____ 3. If you did not enter the correct code, a message will be displayed alerting you that the wrong code was entered, and you will be prompted again to enter the code. Enter Code Wrong Code 4.
If you have forgotten your Parental Control code, call SIRIUS Customer Service for help. Time Based Features These settings allow for adjustment of the following features of the Receiver: Clock - Sets the clock format, time zone, and daylight savings time function. Alarm - Sets an alarm for a specific time. Program Alert - Sets the Receiver to tune to a specific channel at a specified time. Auto Shutdown - Sets the Receiver to turn off at a specified time.
highlight either “12 hour” or “24 Hour”, and press the select button. Format 12 Hour 24 Hour To exit the Clock menu, press the MENU button. Time Zone To change the time zone of the Receiver, do the following: 1. Use the channel up and down buttons to highlight “Time Zone”, and press the select button. 2. Use the channel up and down buttons to highlight the proper time zone for your location, and press the select button.
Alarm Set Alarm Alarm Time Set Alarm To turn the alarm On or Off, do the following: 1. Use the channel up and down buttons to highlight “Set Alarm”, and press the select button. 2. Use the channel up and down buttons to highlight “Alarm On” or “Alarm Off”, and press the select button. Set Alarm On Off To exit the Set Alarm menu, press the MENU button. Alarm Time To set the time of the alarm, do the following: 1.
Program Time/Day To program the time and day when the receiver will tune to the specified channel, do the following: 1. Use the channel up and down buttons to highlight “Program Time/Day”, and press the select button. 2. At the “Program Time/Day” screen, use the channel up and down buttons to highlight “Time”, and press the select button. 4. When you have selected the desired time, press the select button to set the time and exit. 5.
use the channel up and down buttons to navigate to the channel which you wish to select for the Program Alert feature. Use the category previous and next buttons to navigate between categories. When the channel is displayed, press the select button. 001 Channel Name Artist Name Song Title Category 12:00P A To exit the Channel Number menu, press the MENU button. Program Alert On/Off To turn the Program Alert feature is On or Off, do the following: 1.
To enable or disable the Auto Shutdown feature, do the following: 1. Use the channel up and down buttons to highlight “Auto Shutdown”, and press the select button. 2. Use the channel up and down buttons to highlight “Enabled” or “Disabled”, and press the select button. Auto Shutdown Enabled Disabled To exit the Auto Shutdown menu, press the MENU button. Sleep Mode The Receiver can be set to turn off automatically after a selected period of time, 15, 30, 45, or 60 minutes.
Signal Indicator SAT - + TER - + 2. Two 10 segment horizontal bar graphs will be displayed with a “-“ sign to the left and a “+” sign to the right. SAT indicates the satellite signal strength while TER indicates the terrestrial signal strength, if a terrestrial signal is available. To exit the Signal Indicator menu, press the MENU button. Factory Default The Factory Default option will restore most every feature of the Receiver to the original factory settings.
To activate the Factory Default feature, and restore the features of the Receiver to the factory defaults, do the following: 1. Use the channel up and down buttons to highlight “Factory Default”, and press the select button. 2. Use the channel up and down buttons to select “Yes” to restore all settings to the settings from the factory, or select “No” to leave them as-is and return to the Menu Options menu. Restore Settings? Yes No Are You Sure? Yes No 4.
Troubleshooting This section lists several common problems and suggested solutions. If, after trying the suggested solutions listed here, you are still unable to resolve the problem you’re having with your Receiver, contact your installer, dealer, or retailer for more help. Problem Cause and Suggested Solution Receiver does not power on Blown fuse, or the power cable is not properly connected. Check for a bad fuse and check power cable connection.
Specifications Satellite Frequencies ............................................................................................. 2322.293/2330.207 MHz Terrestrial Frequencies ......................................................................................................... 2326.250MHz Power Requirements ............................................................................... 9-16 Volts, Negative Ground, DC Audio Output .........................................................................
12 MONTH LIMITED WARRANTY SIRIUS Canada Inc. (the “Company”) warrants to the original retail purchaser of this product that should this product or any part thereof, under normal use and conditions, be proven defective in material or workmanship within 12 months from the date of original purchase, such defect(s) will be replaced with new or reconditioned product (at the Company’s option) without charge for parts and labor.
Please record the SIRIUS ID (SID) in the space provided below: SIRIUS ID: SIRIUS Customer Service: 1-888-539-7474 customercare@siriuscanada.
SIRIUS Canada Inc. 2 St. Clair Ave. West Suite 1100 Toronto, Ontario M4V 1L6 1-888-539-7474 www.siriuscanada.