
Installation manual


Page 20
Removing the old carpet
Removing Broadloom Carpet
Removing broadloom carpet is often the most difcult part of the process. Cuts must be made around
all panels and xed objects such as ling cabinets. If le cabinet extends to oor, removing them will
make the job go faster.
Be very careful around wiring! If there’s enough slack in the wiring, ease the wires away from panel being
careful not to unplug them. Cut the carpet as close to the panel as possible. If there is little or no slack
in the wiring, gather the wires as close to the panel as possible before cutting out the carpet from under
the desk/worksurface. Cut the carpet with one hand while restraining the wire mass with the other. Cut
carpet into small sections. Remove the carpet from workstations keeping dirt and debris in the carpet
being removed not on the oor. The end result should be a ribbon of broadloom under the panel with
the wire gathered on and along the ribbon. The ribbon of remaining carpet can be removed before or
during the carpet installation. If the job is extra dirty and dusty take the time to vacuum before removing
the ribbon of old carpet from under the workstation. This will make the installation of new carpet much
easier and faster.
Removing Carpet tile
The process of removing carpet tile is very similar to that of removing broadloom carpet. One basic
difference is that you are not cutting any carpet out from under workstations, so the risk of severing a
wire is less. Do not try to remove one tile and simply replace it with a new one.
Do not pass go until you know what is below.
Do not pass go until you know exactly what is expected in terms of oor preparation and cost. Scraping,
patching and leveling compounds greatly reduces productivity, hence adding greatly to the cost. The
best-case scenario involves replacing carpet tile with carpet tile over a raised oor. No prep is required
and the rip-up is easy. The worst-case scenario shuts the building down due to the fracturing of vinyl
asbestos tile during rip-up.
Neatness Counts
Aggressive rip-up can cause unnecessary dust. To control the amount of dust generated keep the
broadloom folded as much as possible. It is best to roll-up broadloom waste, so the dust stays contained
within the carpet. Also do not sweep the oor with a broom. Always use a vacuum with lter making sure
to clean the oor thoroughly. Cleanup should begin as soon as areas become open. This will allow you
to begin spreading glue in the areas you have already cleaned.
Follow Manufacturer’s Recommended Installation Instructions
Different backing systems may have different oor preparation requirements. Remember from a
manufacturer’s viewpoint, if the product is defective or curls, it will always be your oor prep that is at
fault. Getting signed approval for your prep the rst few nights can be an invaluable insurance policy.
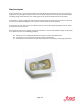
Spreading Adhesive
Once the oor is vacuumed, the adhesive can be spread. Use only the manufacture’s recommended
adhesive. The best method for spreading is a medium nap 9” roller (some retailers sell adhesive rollers).
Keep the adhesive 6” away from the furniture, walls, wire and computers/oor mounted equipment.
Wait for the adhesive to fully setup before you proceed. The use of a fan will speed up the setup time
of the adhesive. If you do not wait you could end up working in wet glue which you could get on yourself,
your shoes and then the new carpet.
f This would be a good time to take a lunch break.