
Product Manual

25
Regular Maintenance
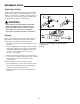
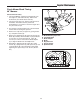
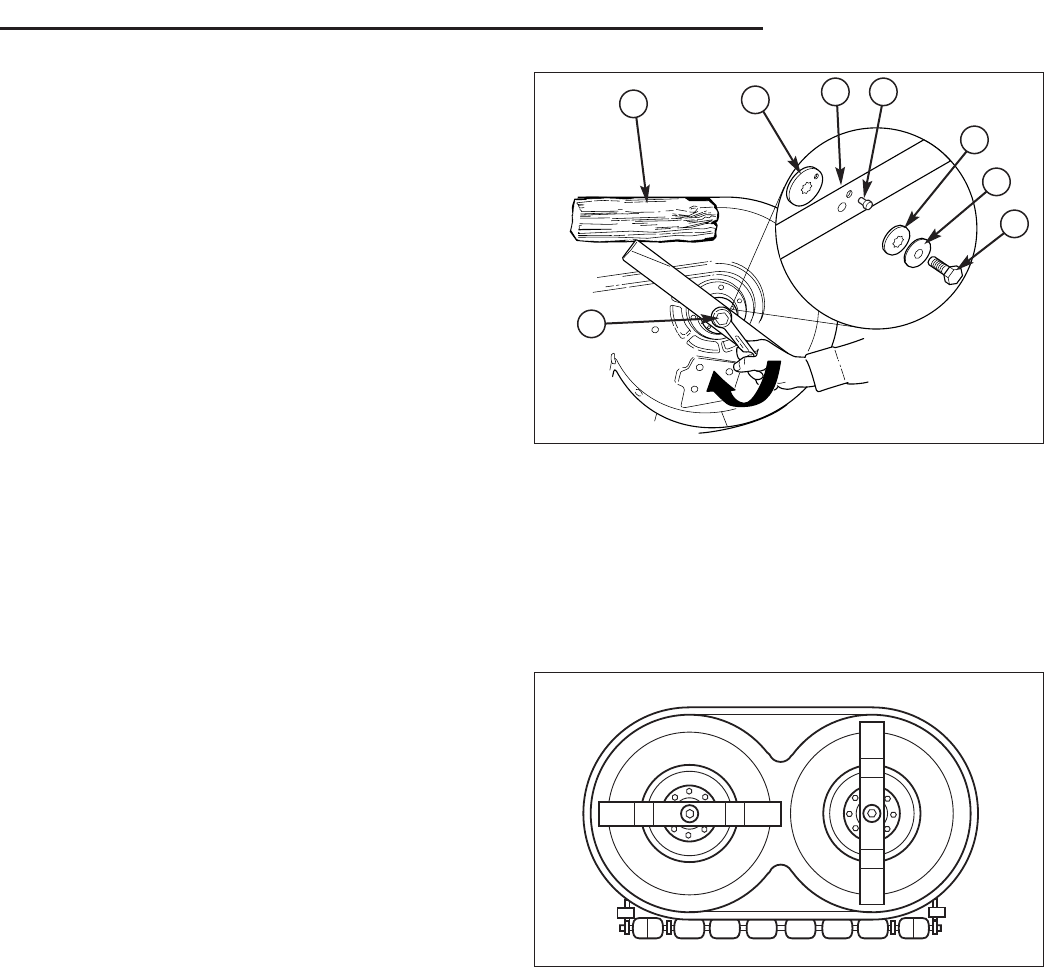
Figure 26. Check Blade Timing
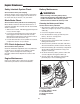
A
B
C
D E
G
F
A
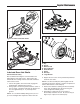
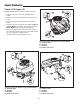
Figure 25. Blade Installation - 40” Mowers
A. Blade Mounting Capscrew
B. 4x4 Wood Block
C. Blade Adapter
D. Blade
E. Alignment Pin
F. Spring Washer
G. Spline Washer
Check Mower Blade Timing -
40” Mowers
Service Interval: Yearly
1. Turn the PTO OFF, engage the parking brake, turn
the engine off, and remove the key. Remove the
mower deck (see “Mower deck removal”).
2. Turn the mower deck over and check the position of
the blades. The blades must be positioned
perpendicular to each other as shown in Figure 26. If
not, proceed to step 3.
3. Use a block of wood (B, Figure 22) to prevent blade
rotation while loosening the capscrew.
4. Remove the capscrew (A, Figure 25), spring washer
(F), and spline washer (G).
5. Remove the alignment pin (E, Figure 25). Rotate the
blade (D) manually until the blades are perpendicular
to each other as shown in Figure 26. It may be
necessary to remove and rotate the blade adapter
(C) to align the blade hole and adapter hole.
6. Reinstall the alignment pin (E, Figure 25), spline
washer (G), spring washer (F) and capscrew (A). Use
a wooden block (B) to prevent blade rotation while
tightening the capscrew (A) to 61-75 N.m (45-55 ft.
lbs.).