
Operation Manual

8
EN
y Neck: Stroke downwards.
U
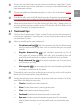
After treatment, wash the treated area with cold water to remove remaining
debris and gently pat dry. Apply a toner, serum or cream to minimize your
pores and soothe your skin for the optimal ecacy of your treatments.
U
Light bruising and redness is completely normal after treatments and
should subside within 24 hours. Eective dermabrasion treatments gently
remove the outer layer of skin which may cause slight discomfort and
redness.
C
Stop using the device immediately if you develop any abnormal reactions
such as itching, uncomfortable inammation, or scratches.
6.2 Attaching the tip
a
Make sure the device is switched o and unplugged before attaching or
changing the tip.
a
Always make sure a lter and O-ring are in place. Refer to the chapter
“Replacing the lter” or “Replacing the O-ring” for replacement if necessary.
1. Attach the desired tip (
8
/
9
/
10
/
11
) to the device.
2. Make sure the tip is rmly in place before use.
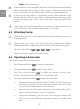
6.3 Operating in Auto mode
Auto mode is only for facial treatments.
1. Press the power button
5
to switch on the device.
2. Press the mode button
3
to select “Auto mode” .
3. Press the control buttons
6
to select the desired intensity level.
Level 1 is the lowest level; while level 3 is the highest level.
4. Press the start/pause button
4
to begin the treatment.
y Treat the facial area indicated on the LCD display. The LCD display also
shows the countdown of the treatment time for each facial area.
You will hear 2 beeps when the time elapses.
y Move to the next facial area indicated on the display after each 2
beeps until the treatment cycle is completed.
y During the treatment, you can press the Start/pause button and
then press the control buttons anytime to switch to another facial
area.
Revit Prestige Canada 4390A ED343-02.indd 8 10/06/2018 14:00:38