
Installation guide


4
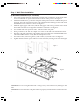
Step 1: Wall Plate Installation
A) Wood Stud Installation (16" on center)
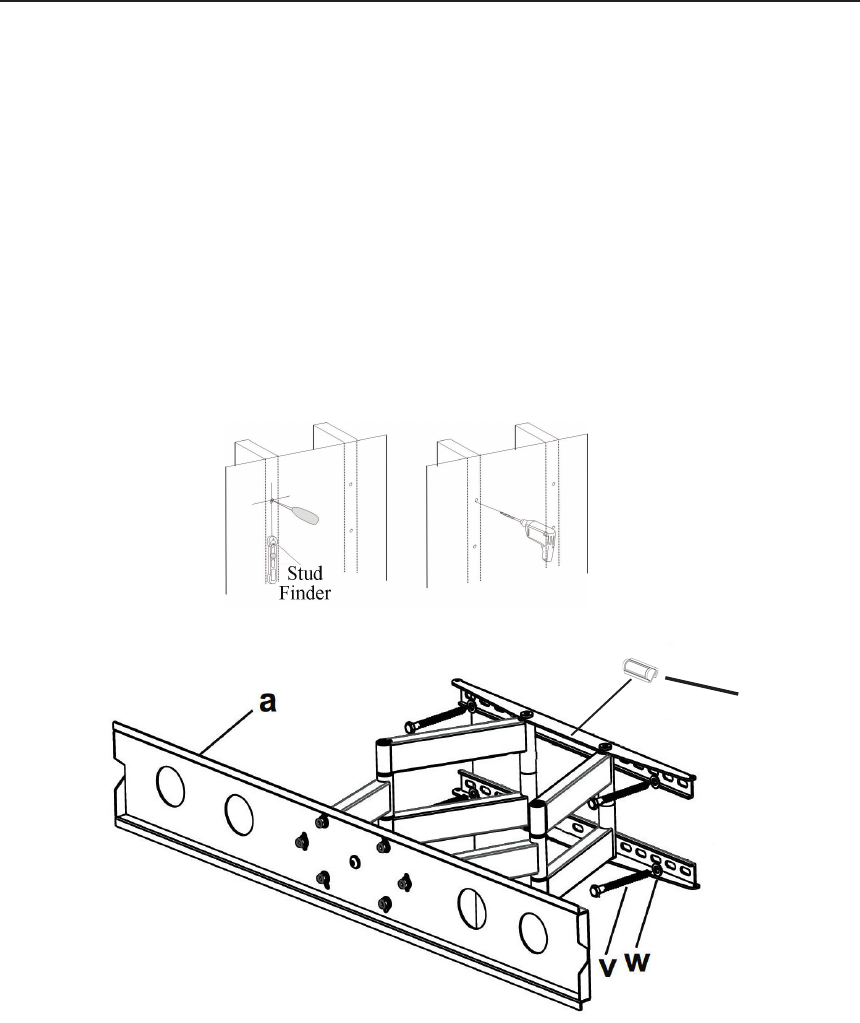
1. Use a high quality electronic stud finder (commercially available) to locate dead center
of two wood studs 16" apart and mark the location with a pencil. See Figure 1.
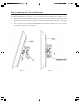
2. Mount the bubble level (y) onto the wall plate at the position shown. With the help of an
assistant, place the wall plate onto the wall in the desired mounting location and check
the bubble level to ensure it is level. See Figure 2.
3. Mark the right (upper and lower) and the left (upper and lower) positions of the small
horizontal slots that are in alignment with the wood studs. See Figure 2.
4. You should mark four positions total. Take down the wall plate.
5. Next, pre-drill a 5/32" hole to a depth of 3" in the wood stud at each marked location.
6. Place the wall plate against the wall and line up the mounting slots with the drilled holes.
Check the bubble level to verify that the wall plate is level.
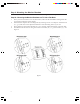
7. For each location, insert a lag bolt (v) and washer (w) into the wall. See Figure 2.
8. Tighten the bolt with an open ended or socket wrench by turning clockwise until tight.
Figure 2
CAUTION: Do not over tighten the bolts - doing so may cause unnecessary damage to the
wall.
CAUTION: Do not release the wall plate until it is properly mounted and secured to the wall.
Figure 1
y