
User guide


• www.signwarehouse.com • SignWarehouse, Inc. • 2614 Texoma Drive, Denison, TX 75020
•Toll Free Phone: 1-800-899-5655 •Local Phone: 903-462-7700 •Fax: 1-800-966-6834
4: Ethernet Setup Cont’d
4.8
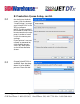
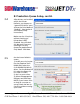
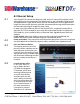
TCP/IP Settings: Click the small
drop-down arrow at the right of
the port window for the Queue
you want to change. From the
drop-down menu, choose TCP/IP
(network device). This will open
the Port settings window. Here
you will type in the IP address for
the printer. Click the LPR radio
button, then click OK.
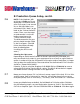
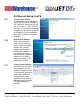
Then close the Queue Manager window and send a nozzle check to make sure the
port settings have been changed correctly. If the nozzle check file is sent, you have
correctly changed the port settings and can disconnect the USB cable from the PC.
It is advisable to leave it connected to the back of the printer because you will need
to use the USB connection to update the waste ink pad status, which should be
done regularly. See section 21 for instructions on changing the waste ink pad and
updating the pad status in JetCUT.
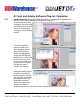
5: Corel and Adobe Software Plug-ins: Installation
5.1
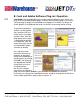
JetCUT is designed to work both with JetPRO software and with leading raster and
vector design applications. To facilitate seamless design-to-print workflow with
Corel and Adobe applications, JetCUT comes with plug-ins. Once these are
activated, your JetCUT Queues will appear as File/Print options in CorelDRAW,
Adobe Illustrator, or
Photoshop. You may
be prompted to install
plug-ins during the initial
software installation. If
not, or if you missed the
opportunity to do so and
would like to add them
afterward, that can be
done once the Queues
are setup (See section
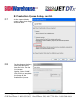
3). Just open the Queue
Manager and click the Install button in the Control Panel column. This launches the
plug-in installer, which adds the JetCUT or JetPRO plug-in to any CorelDRAW,
Illustrator or Photoshop software already installed on your PC.