
User guide


• www.signwarehouse.com • SignWarehouse, Inc. • 2614 Texoma Drive, Denison, TX 75020
•Toll Free Phone: 1-800-899-5655 •Local Phone: 903-462-7700 •Fax: 1-800-966-6834
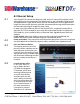
4: Ethernet Setup
Your PrismJET DTx printer has Ethernet, USB, and wi-fi connectivity options. Both
USB and Ethernet are supported. The default port in the standard installation and
setup documents is USB, which works well for standard print and cut applications.
Large files may not RIP correctly with USB. We recommend using the Ethernet port
for consistent printing of image files over 15mb.
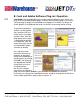
In order to use the Ethernet port on the PrismJET DTx, a separate setup utility is
required. This file is located on your setup disc and can be found in the Resource
Files folder on your installation disc, or obtained from SignWarehouse Technical
Support.
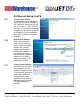
Install JetPRO. Before the Ethernet setup can be successfully completed, the
JetPRO software must be installed using the standard USB driver.
Power and Cables: Turn the printer on and connect the printer to the PC using both
the USB cable and an Ethernet crossover cable, available from SignWarehouse.
4.1
4.2
4.3
4.4
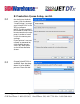
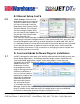
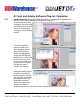
Launch the Net utility:
In this case, we’re us-
ing an Epson Net Util-
ity. When the program
is launched, you’ll see a
warning indicating that
an active firewall may
interfere with the soft-
ware’s ability to connect
with the printer. Bear this
in mind and consult with
your IT administrator if
you have connectivity
issues due to internal
firewalls or AV software.
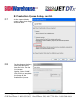
Press the Ethernet Button:
The control panel on your DTx
printer includes a button that en-
ables Ethernet and wireless con-
nectivity. Press this before launch-
ing the Net utility. An amber light
will illuminate indicating that the
printer is ready to connect to a
network.