
User Manual

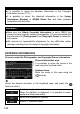


Table Of Contents
- PACKAGE CONTENTS / ACCESSORIES
- TABLE OF CONTENTS
- SAFETY PRECAUTIONS
- HANDLING PRECAUTIONS
- DESCRIPTION OF THE PARTS
- MONITOR DISPLAY DURING SHOOTING
- BASIC OPERATION AND QUICK REFERENCE
- PREPARATION
- BASIC OPERATION
- ADVANCED OPERATION
- SETTING THE WHITE BALANCE (WB)
- SETTING THE SENSITIVITY (ISO EQUIVALENCY)
- IMAGE FILE SETTING
- SELECTING THE METERING MODE
- AF/AEL BUTTON
- EXPOSURE COMPENSATION
- AUTO BRACKETING
- SFD MODE (SUPER FINE DETAIL)
- COLOR MODE
- CUSTOM BRACKETING
- TONE CONTROL
- COLOR SPACE
- AUTO ROTATE
- CUSTOM MODE
- USING THE EXTERNAL FLASH
- USING Eye-Fi CARD (Eye-Fi Connected)
- REVIEWING AND DELETING IMAGES
- OTHER REVIEWING FEATURES
- CHANGING OTHER SETTINGS
- CONNECTING TO A COMPUTER OR TV
- REFERENCE

131
TO CHANGE FILE NAMES
File name of images can be selected from either “SDIM” or “SDQ_”.
Select the setting from [ Camera Settings] (P. 30) → [File Name].
SDIM (Default)
File name will be “SDIMxxxx.xxx”.
SDQ_
File name will be “SDQ_xxxx.xxx”.
The number in the file name will be continuous even after changing the
setting from SDIM to SDQ or vice versa.
When [Adobe RGB] is selected from [ Capture Settings] (P. 30) →
[Color space], the file name will consist of “_SDI” instead of “SDIM”, and
become “_DQ_” instead of “SDQ”.
ATTACH COPYRIGHT INFORMATION
It is possible to save the [Photographer] and [Copyright] information in the
Exif data.
[Photographer] [Copyright]: Respectively, it is possible to enter up to 48
single-byte characters and symbols.
1
Select from [ Camera Settings] (P. 30) → [Copyright Information].
2
In the Copyright Information screen, select either [Photographer] or
[Copyright Owner] and follow the steps for [Entering Information] in the
next page.
3
Once the relevant information has been
entered, use the buttons to scroll to
[Attach Copyright Information] and
select [On]. Copyright information will
embed in each image from then on.