
User Manual


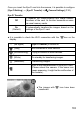


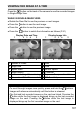


Table Of Contents
- PACKAGE CONTENTS / ACCESSORIES
- TABLE OF CONTENTS
- SAFETY PRECAUTIONS
- HANDLING PRECAUTIONS
- DESCRIPTION OF THE PARTS
- MONITOR DISPLAY DURING SHOOTING
- BASIC OPERATION AND QUICK REFERENCE
- PREPARATION
- BASIC OPERATION
- ADVANCED OPERATION
- SETTING THE WHITE BALANCE (WB)
- SETTING THE SENSITIVITY (ISO EQUIVALENCY)
- IMAGE FILE SETTING
- SELECTING THE METERING MODE
- AF/AEL BUTTON
- EXPOSURE COMPENSATION
- AUTO BRACKETING
- SFD MODE (SUPER FINE DETAIL)
- COLOR MODE
- CUSTOM BRACKETING
- TONE CONTROL
- COLOR SPACE
- AUTO ROTATE
- CUSTOM MODE
- USING THE EXTERNAL FLASH
- USING Eye-Fi CARD (Eye-Fi Connected)
- REVIEWING AND DELETING IMAGES
- OTHER REVIEWING FEATURES
- CHANGING OTHER SETTINGS
- CONNECTING TO A COMPUTER OR TV
- REFERENCE

103
Once you insert the Eye-Fi card into the camera, it is possible to configure
[Eye-Fi Setting] → [Eye-Fi Transfer] in [ Camera Settings] (P. 30).
Eye-Fi Transfer
Off
It disables the communication and image transfer
functions of the card. Its function becomes as same
as usual memory cards.
On
(Default)
It automatically transfers the images, based on the
settings of the Eye-Fi card.
It is possible to check the Wi-Fi connection with the icon on the
display.
―
(No signal)
[Eye-Fi Transfer] is turned off.
(Gray)
Not connected to other devices.
(White Blinking)
Trying to connect to other devices.
(White)
On standby for transferring images.
(Animation)
Transferring images.
Error in the communication of the Eye-Fi card.
(Please reboot the camera. If the same icon
keeps appearing, it might be the malfunction of
the camera.)
The images with icon have been
transferred.