
User Manual


.
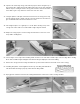
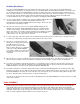
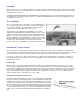
46. Tape the die-cut Lite-Ply canopy sides in their proper locations along the top of
the fuselage sides. Slide former F-2A down between the canopy sides until flush
with the top of F
-2 and glue it to the canopy sides. Extreme care must be taken to
insure that no glue seeps down onto former F-2 or the fuse sides.
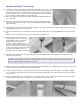
47.
Using the pattern on the plan, make the front former for the canopy from scrap
Lite-Ply and glue in place. Again, extreme care must be taken to insure that no
glue is allowed between the former and the fuse sides.
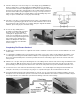
48.
Cut and glue in place cross-grain pieces of 3/32" balsa sheeting on top of the
canopy sides. Trim off the excess balsa.with a single-edge razor blade
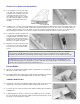
49.
Retape the canopy in place on the fuselage and sand the nose block to exact
shape with a sanding block.
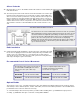
50.
The fuselage is now ready for final sanding. Sand off all Tee-
Lock stubs and round the edges of the fuselage with a sanding
block. Start out with 150 grit sandpaper and switch to 220 grit sandpaper for the final sanding.
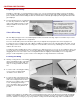
51.
Remove the canopy from the fuselage and add 1/8" sq. balsa reinforcement to the inside corners of the canopy.
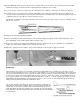
52.
Following this pattern, sand a slight bevel in the top of the wing hold down block.
This bevel allows the wing to properly seat itself in the wing saddle.
53.
Epoxy glue the 3/8"x5/8"x1
-
5/8" basswood wing hold down block into notches in the fuselage doublers.