
Scanner User Manual


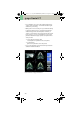
Table Of Contents
- User Documentation
- Scan and Reconstruction
- Dose Information
- Workflow Information
- Application Information
- Head
- Neck
- Shoulder
- Thorax
- Abdomen
- Pelvis
- Spine
- Upper Extremities
- Lower Extremities
- Vascular
- Specials
- Children
- Overview
- Hints in General
- HeadRoutine_Baby
- HeadRoutine_Child
- HeadSeq_Baby
- HeadSeq_Child
- InnerEar
- SinusOrbi
- Neck
- ThoraxRoutine_Baby
- ThoraxRoutine_Child
- ThoraxHRSeq_Baby
- ThoraxHRSeq_Child
- Abdomen_Baby
- Abdomen_Child
- Spine_Baby
- Spine_Child
- ExtrHR_Baby
- ExtrHR_Child
- HeadAngio
- HeadAngio08s
- CarotidAngio
- CarotidAngio08s
- BodyAngio
- BodyAngio08s
- NeonateBody
- syngo 3D
- syngo Fly Through
- syngo Dental CT
- syngo Osteo CT
- syngo Volume Evaluation
- syngo Dynamic Evaluation

syngo Fly Through
265
Navigation of the Endoscopic Volume
•Manual Navigation
Click with the right mouse button in the Fly segment
to activate the SmartSelect menu.
The following controls are available:
– auto-navigation
– push/pull
– rotate around viewing point
–rotate view
Adjust the viewing direction and select push/pull.
Click and hold the left mouse button.
Move the mouse up or down to navigate through the
endoscopic volume manually.
• Auto Navigation
Adjust the initial viewing direction.
Activate the SmartSelect menu
Select the function auto-navigation.
Click and hold with the left mouse button. Give the
mouse a small upward push and then hold it steady.
The software will automatically detect the centerline
and navigate through the endoscopic volume without
any user intervention.
To stop or change the direction of the navigation,
release the mouse and adjust the viewing direction
accordingly before proceeding further.
C2-025.630.01.01.02_APPLICATIONGUIDE_SPIRIT.book Page 265 Friday, April 8, 2005 9:55 AM