
User Manual
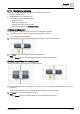

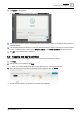
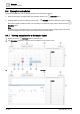

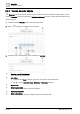
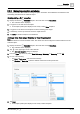
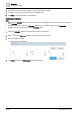
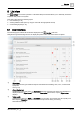
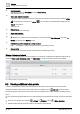
Table Of Contents
- 1 About this document
- 2 Overview
- 3 Plant view
- 4 Alarms
- 5 Scheduler
- 6 List view
- 7 Trends
- 8 Reports
- 9 Documents
- 10 General settings
- Index

Scheduler
Modifying the Schedule default
5
32
| 64
A6V11211557_en--_g
Using the expanded modification controls
1. Tap the switching point to open the switching point widget.
The widget heading displays the current switching point time and the current value or setting.
2. Refer to the following figures and legend to complete the desired procedure.
3. Tap Save to save your modifications.
Note
Tapping
Cancel discards all changes made since the schedule was last saved.
Expanded analog switching point widget.
Expanded binary or multistate switching point widget.
①
Modify the time
Drag the switching point to the desired time. Use the up-and-down arrows to adjust the time in one-
minute increments.
②
Delete the switching point
Tap to remove the current switching point from the database.
③
Command controls
Enter a new value (analog object) or select a new setting (binary or multistate object). For analog
objects, the minimum / maximum range for the object displays above this field.
④
Return to default
Select
Return to default
to return the object to the
Schedule default
. For more information, see the
Modifying the Schedule default [➙ 32] section.
5.2 Modifying the Schedule default
The Schedule default is the value to which the schedule controls the referenced object when either of the
following situations occurs:
● A switching point is not in control. This would happen on any day during the period of time before the first
switching point is scheduled to occur.
● A switching point’s value is set to Return to default. For more information, see the switching point widget
examples in the
Using the expanded modification controls [➙ 32] section.
Modifying the Schedule default
Use this procedure to modify the default value or setting for switching points that are added to the schedule.
A schedule is displayed in the work area.