
User Manual

Graphic features
Plant view Tools
4
A6V11604297_en--_e
37 | 196
(Optional)
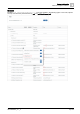
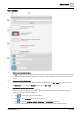
Adding graphic components
1. Drag-and-drop graphic components from the COMPONENTS pane.
2. Drag-and-drop the appropriate data point from the EQUIPMENTS pane onto the component.
3.
(Optional)
Right-click the component and select TOOLS > RELATIVIZE.
Select the binding options to create a relative reference and click APPLY.
(Optional)
Adding smart labels
1. Drag-and-drop a numeric point from the EQUIPMENTS pane.
2.
(Optional)
Select the smart label, right-click and select TOOLS > RELATIVIZE.
Select the binding options to create a relative reference and click APPLY.
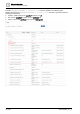
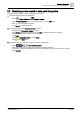
Saving the graphic
1. Click to save your changes and SAVE to confirm the file name and location.
2. Close the tab to close Graphics Builder.
The new graphic is listed in the Graphics section of the Plant view work area.
Continue with creating a thumbnail image and enabling the graphic so that it can be viewed by room users.
Thumbnails [➙ 146]
Enable / disable graphics and kiosks [➙ 40]
4.1.2 Editing a graphic
The process for editing a graphic is context-sensitive.
● You can display a list of graphics in the Plant view and select one or more graphics to edit.
● You can edit the graphic you are currently viewing.
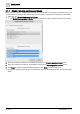
Editing a graphic
Note
Use the following procedure to edit custom graphics. For working with supersample graphics, see Optimizing
supersample graphics.
1. Do one of the following:
– Select > > Configure graphics > in the Plant view to display a list of graphics. Select the
graphic(s) to edit and click Edit.
– Display the graphic you want to edit and then select > > Configure graphics > .
Graphics Builder opens each selected graphic in a new tab.
2. Modify the selected graphic(s).
3. If necessary, click in the menu bar to display your changes in Graphics Builder.
4. Click and SAVE to save your changes.
5. Close the tab to close Graphics Builder.