
User Manual


Commissioning
Operating and monitoring features
2
18 | 196
A6V11604297_en--_e
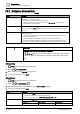
NOTICE
Corporate network restrictions may prevent you from using the configuration
settings outlined in this section.
Please clarify the network security policies at each site.
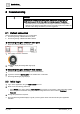
1. Select > > SMTP settings to display the SMTP settings from the project database.
2. Use the information in the following table to update the settings and then click Apply.
The Test connection dialog box displays.
3. To send a test email, enter an email address in the Recipient field and click Test. Otherwise, click Cancel to
finish the configuration.
4. If the test fails, click Edit to review the settings and fix any errors. If the settings are correct, contact your IT
department.
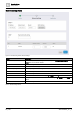
Setting
Description
SMTP server
The name of the SMTP server being used to route emails. For example, smtp.gmail.com.
User name
The user name of an account that is allowed to send emails using the SMTP server. For example,
username@gmail.com.
Password
The password for the specified account that is allowed to send emails. For security, the actual characters
do not display in this field.
Sender
The email address from which all Desigo Control Point emails are sent. For example,
server@sample.com.
Port number
Port used by the SMTP server. Ports 465 (default) and 587 are supported. Contact your IT department
for the proper settings at your site.
Note
There are no restrictions on the port for the SMTP configuration. However, many ISPs and hosting
providers block or restrict SMTP connections on port 25 due to security risks.
SSL and Plain text/TLS radio
buttons
● SSL uses the SSL security protocol when sending emails.
● Plain text/TLS sends emails without SSL encryption.
Table 5: SMTP settings dialog box.
Possible next step: Configuring FTP [➙ 18]
2.8.4 Configuring FTP
This procedure configures Desigo Control Point to save data to an FTP server.
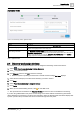
1. Select > > FTP settings to display the FTP settings from the project database.
2. Use the information in the following table to update the settings and then click Apply.
The FTP settings dialog box displays.
3. To test the FTP settings, click Test, enter the file path for the test and click Apply. Otherwise, click Cancel to
finish the configuration.
4. If the test fails, click OK to review the settings and fix any errors. If the settings are correct, contact your IT
department.