
User Manual

Graphics engineering
Using supersample graphics
6
A6V11604297_en--_e
145 | 196
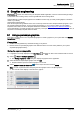
Modifying the data point binding
This procedure creates a Relative by navName binding for the graphic components.
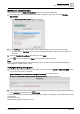
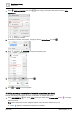
1. Individually select each component and smart label in the graphic, right-click, and select TOOLS >
RELATIVIZE.
The Component binding options dialog box displays.
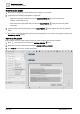
2. In the Top Equip section, select a location in the building hierarchy where the graphic will be used.
The tool uses the Top Equip as the root when describing the relative location of the point within the
hierarchy.
3. Select the Relative: By navName radio button and click Apply.
4. Click to save your changes and Save to confirm the file name and location.
Note
Once you’re comfortable with the data point binding process, consider using the procedure Modifying the
binding option for multiple points [➙ 178].
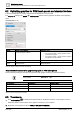
Verifying the binding in the graphic
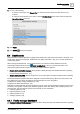
1. Individually select each component or smart label, right-click and select TOOLS > VIEW BINDINGS to view
the type of binding used. For example:
(point or shadowPoint) and navName=="Setpoint for cooling" is a relative binding.
baUniqueId=="9a0cffe8a0088543bfe4734dd93630bff4302fa7" is an absolute binding.
2. See Verifying relative binding queries [➙ 67] for the procedure to compare the graphic component bindings
to the navName tags displayed in the List view.
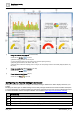
Continue with creating a thumbnail image and assigning the graphic to the Desigo Control Point device so that it
can be viewed.
Thumbnails [➙ 146]
Enable / disable graphics and kiosks [➙ 40]