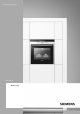
>HQ@ ,QVWUXFWLRQ PDQXDO +% *% %XLOW LQ RYHQ
Ú Table of contents e[nuoIrs]ctimanul Important safety information.....................................................4 Causes of damage .............................................................................5 Your new oven ............................................................................6 Control panel .......................................................................................6 Buttons and display............................................................................
: Important safety information Read these instructions carefully. Only then will you be able to operate your appliance safely and correctly. Retain the instruction manual and installation instructions for future use or for subsequent owners. This appliance is only intended to be fully fitted in a kitchen. Observe the special installation instructions. Check the appliance for damage after unpacking it. Do not connect the appliance if it has been damaged in transport.
Risk of electric shock! ■ Incorrect repairs are dangerous. Repairs may only be carried out by one of our trained after-sales engineers. If the appliance is faulty, unplug the mains plug or switch off the fuse in the fuse box. Contact the after-sales service. ■ The cable insulation on electrical appliances may melt when touching hot parts of the appliance. Never bring electrical appliance cables into contact with hot parts of the appliance. ■ Penetrating moisture may cause an electric shock.
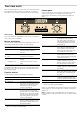
Your new oven Here you will learn about your new oven. The control panel and the individual operating controls are explained. You will find information on the cooking compartment and the accessories. Control panel Here you will see an overview of the control panel. All of the symbols never appear in the display at the same time. Depending on the appliance model, individual details may differ. & Control knobs The control knobs are retractable.
Temperature selector Use the temperature selector to set the temperature, grill setting or cleaning level. Setting Meaning Indicator lamp While the oven is heating up, the indicator lamp above the temperature selector is lit. When the optimum time for placing the dish in the oven has been reached and the oven is maintaining the temperature, the lamp is no longer lit. Ú Off position The oven does not heat up. The indicator lamp never lights up during grilling and cleaning.
Optional accessories You can purchase optional accessories from the after-sales service or specialist retailers. You will find a comprehensive range of products for your oven in our brochures and on the Internet. The availability of optional accessories and the option for ordering these online varies from country to country. Please see the sales brochures for more details. Not all optional accessories are suitable for every appliance. When purchasing, please always quote the exact designation (E-no.
After-sales service products You can obtain suitable care and cleaning agents and other accessories for your domestic appliances from the after-sales service, specialist retailers or (in some countries) online via the eShop. Please specify the relevant product number. Cleaning cloths for stainless-steel surfaces Product no. 311134 Reduces the build-up of dirt. Impregnated with a special oil for perfect maintenance of your appliance's stainless-steel surfaces.
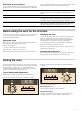
Rapid heating With rapid heating, your oven reaches the temperature selected particularly quickly. Use rapid heating when temperatures above 100 °C are selected. The following types of heating are suitable: ■ ■ ■ : 3D hot air % Top/bottom heating ; Pizza setting To ensure an even cooking result, do not place your dish in the cooking compartment until rapid heating is complete. 1. Set the type of heating and temperature. 2. Press the h button briefly. The c symbol lights up in the display.
Changing the cooking time Use the @ or A button to change the cooking time. After a few seconds, the change is adopted. If the timer has been set, press the 0 button beforehand. Cancelling the cooking time Use the A button to reset the cooking time to 0:00. After a few seconds, the change is adopted. The cooking time is cancelled. If the timer has been set, press the 0 button beforehand. Checking the time settings If several time-setting options are set, the relevant symbols are illuminated on the display.
Childproof lock The oven has a childproof lock to prevent children switching it on accidentally. The @ symbol appears in the display. The childproof lock is activated. The oven will not react to any settings. The timer and clock can also be set when the childproof lock has been activated. Deactivating the childproof lock Press and hold the h button for approx. four seconds. Activating the childproof lock The function selector must be on the zero setting. The @ symbol goes out in the display.
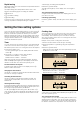
Self-cleaning During self-cleaning, the oven heats up to approx. 500 . This burns off residues from roasting, grilling or baking and you only need to wipe the ashes from the cooking compartment. Insert the left and right-hand accessory holders. You can choose from three cleaning levels. Level Degree of cleaning Cooking time 1 gentle approx. 1 hour, 15 minutes 2 medium approx. 1 hour, 30 minutes 3 intensive approx. 2 hours The heavier and older the dirt, the higher the cleaning level should be.
Setting a later end time The end time of the self-cleaning programme can be delayed. In this way, self-cleaning can run overnight, for example, so that you can use your oven during the day. Make the settings as described in steps 1 and 2. Before the oven starts, use the @ or A button to set a later end time. The oven switches to standby. The display shows the time at which self-cleaning will end and the N arrow is next to the y symbol.
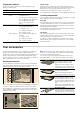
Refitting the rails Attaching the door 1. First insert the rail into the rear socket, press it to the back Reattach the oven door in the reverse sequence to removal. slightly (figure A), 2. and then hook it into the front socket (figure B). $ % 1. When attaching the oven door, ensure that both hinges are inserted straight into the opening (figure A). 2. The notch on the hinge must engage on both sides (figure B). $ The rails fit both the left and right sides.
Removing and installing the door panels Installation To facilitate cleaning, you can remove the glass panels from the oven door. During installation, make sure that the lettering "top right" is upside down at the bottom left of both panels. When removing the inner panels, pay attention to the sequence in which the panels are removed. In order to reassemble the panels in the correct sequence, use the numbers that appear on each panel. 1. Insert the lower panel at an angle towards the back (fig. A). 2.
Troubleshooting Malfunctions often have simple explanations. Refer to the table before calling the after-sales service as you may be able to remedy the fault yourself. Malfunction table If a dish doesn't turn out as well as you had hoped, refer to the section Tested for you in our cooking studio, where you will find plenty of cooking tips and tricks. : Risk of electric shock! Incorrect repairs are dangerous. Repairs may only be carried out by one of our trained after-sales engineers.
After-sales service Our after-sales service is there for you if your appliance needs to be repaired. We will always find the right solution in order to avoid unnecessary visits from a service technician. Please note that there will be a fee for a visit by a service technician in the event of a malfunction, even during the warranty period. E number and FD number Please find the contact data of all countries in the enclosed customer service list. When calling us, please give the product number (E no.
Accessories Level Temperature in °C Cooking time in minutes Potato gratin Ovenproof dish 2 160-180 60-80 Lasagne Ovenproof dish 2 180-200 40-50 Pizza, thin base Universal pan 3 190-210 15-25 Pizza, deep-pan Universal pan 2 180-200 20-30 Chips Universal pan 3 200-220 20-30 Chicken wings Universal pan 3 220-240 20-30 Fish fingers Universal pan 3 220-240 10-20 Crispy bread rolls Universal pan 3 180-200 10-15 Dishes using Hot air eco ‘/’ Bakes Frozen products Meat P
Shelf heights for baking on 3 levels: Baking tins ■ Baking tray: level 5 It is best to use dark-coloured metal baking tins. ■ Universal pan: level 3 ■ Baking tray: level 1 Baking times are increased when light-coloured baking tins made of thin metal or glass dishes are used, and cakes do not brown so evenly. Baking trays that are placed in the oven at the same time will not necessarily be ready at the same time. The tables show numerous suggestions for your dishes.
Cakes on trays Accessories Level Type of heating Temperature in °C Cooking time in minutes Plaited loaf with 500 g flour baking tray 2 % 170-190 25-35 Stollen with 500 g flour baking tray 3 % 160-180 60-70 Stollen with 1 kg flour baking tray 3 % 150-170 90-100 Strudel, sweet universal pan 2 % 190-210 55-65 Pizza baking tray 2 % 200-220 25-35 universal pan + baking tray 3+1 : 180-200 40-50 Tarte flambée (preheat) universal pan 2 % 280-300 10-12 Börek Universal
Baking tips You wish to bake according to your own Use similar items in the baking tables as a guide. recipe. How to establish whether sponge cake is baked through. Approximately 10 minutes before the end of the baking time specified in the recipe, stick a cocktail stick into the cake at the highest point. If the cocktail stick comes out clean, the cake is ready. The cake collapses. Use less fluid next time or set the oven temperature 10 degrees lower. Observe the specified mixing times in the recipe.
Meat Weight Accessories and ovenware 1.0 kg covered Level Type of heating Cooking time Temperature in °C, grill set- in minutes ting 2 Beef Pot-roasted beef Fillet of beef, medium % 200-220 100 1.5 kg 2 % 190-210 120 2.0 kg 2 % 180-200 140 2 % 210-230 60 2 % 200-220 80 uncovered 1 4 220-240 60 wire rack + universal pan 5+1 ( 3 15 uncovered 2 1.0 kg uncovered 1.5 kg Sirloin, medium 1.
Poultry The weights indicated in the table refer to oven-ready poultry (without stuffing). Place whole poultry on the lower wire rack breast-side down. Turn after Z of the specified time. For duck or goose, pierce the skin on the underside of the wings. This allows the fat to run out. Poultry will turn out particularly crispy and brown if you baste it towards the end of the roasting time with butter, salted water or orange juice.
Bakes, gratins, toast with toppings How well cooked the bake is will depend on the size of the ovenware and the height of the bake. The figures in the table are only average values. Always place ovenware on the wire rack. If you are grilling directly on the wire rack without ovenware, you should also insert the universal pan at level 1. This keeps the oven cleaner.
Dish Accessories Level Type of heating Temperature in °C Cooking time in minutes Fish fingers universal pan 2 ;/6 220-240 10-20 Chicken goujons, chicken nuggets universal pan 3 ;/6 200-220 15-25 universal pan 3 ;/6 190-210 30-35 Processed portions, frozen Strudel, frozen Strudel Special dishes 4. Preheat the cooking compartment as indicated. At low temperatures, : 3D hot air is equally useful for producing creamy yoghurt as it is for proving light yeast dough. 5.
Preserving 4. Seal the jars with the clips. For preserving, the jars and rubber seals must be clean and intact. If possible, use jars of the same size. The information in the table is for round, one-litre jars. Place no more than six jars in the cooking compartment. Caution! 1. Insert the universal pan at level 2. Arrange the jars on it so Do not use jars that are larger or taller than this. The lids could crack. 2. Pour ½ litre of hot water (approx.
Test dishes These tables have been produced for test institutes to facilitate the inspection and testing of the various appliances. In accordance with EN 50304/EN 60350 (2009) and IEC 60350. Baking Baking on 2 levels: Always insert the universal pan above the baking tray. Baking on 3 levels: Insert the universal pan in the middle. Piped biscuits: Baking trays that are placed in the oven at the same time will not necessarily be ready at the same time.
Siemens-Electrogeräte GmbH Carl-Wery-Straße 34 81739 München Germany *9000919486* 9000919486 45 930628