Built-in oven HB676GB.1 siemens-home.
en Table of contents no i t cur t sen I 8 Intended use . . . . . . . . . . . . . . . . . . . . . . . . . . . . . 4 ( Important safety information . . . . . . . . . . . . . . . 5 General information . . . . . . . . . . . . . . . . . . . . . . . . . . . 5 Halogen lamp. . . . . . . . . . . . . . . . . . . . . . . . . . . . . . . . 6 Cleaning function . . . . . . . . . . . . . . . . . . . . . . . . . . . . . 6 ] Causes of damage . . . . . . . . . . . . . . . . . . . . . . . . 6 F Sabbath mode . . . . . . .
en Intended use Produktinfo Additional information on products, accessories, replacement parts and services can be found at www.siemens-home.com and in the online shop www.siemens-eshop.com 4 8Intended use Read these instructions carefully. Only then will you be able to operate your appliance safely and correctly. Retain the instruction manual and installation instructions for future use or for subsequent owners. This appliance is only intended to be fully fitted in a kitchen.
Important safety information (Important safety information General information no i t amro f n i y t e f as t na t ropmI : Warning Risk of fire! Combustible items stored in the cooking compartment may catch fire. Never store combustible items in the cooking compartment. Never open the appliance door if there is smoke inside. Switch off the appliance and unplug it from the mains or switch off the circuit breaker in the fuse box. Risk fire! is created when the appliance ■ A of draught door is opened.
en Causes of damage Halogen lamp : Warning Risk of electric shock! When replacing the cooking compartment bulb, the bulb socket contacts are live. Before replacing the bulb, unplug the appliance from the mains or switch off the circuit breaker in the fuse box. Cleaning function : Warning Risk of fire! ■ Loose food residues, grease and meat juices may catch fire during the cleaning function. Before starting the cleaning function, remove coarse dirt from the cooking compartment and from the accessories.
Environmental protection 7Environmental protection ■ Your new appliance is particularly energy-efficient. Here you can find tips on how to save even more energy when using the appliance, and how to dispose of your appliance properly. no i t ce t orp l a t nemnor i vnE ■ ■ ■ For longer cooking times, you can switch the appliance off 10 minutes before the end of the cooking time and use the residual heat to finish cooking.
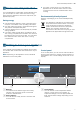
en Getting to know your appliance Controls The individual controls are adapted for the various functions of your appliance. You can set your appliance simply and directly. Buttons Here you can find a short explanation of the various buttons. Buttons on/off menu l/ 0 c Start/Stop Menu Information Childproof lock Time-setting options Rapid heat up Temperature indicator The temperature indicator bars show the heating phases or residual heat in the cooking compartment.
Getting to know your appliance en Types of heating In order for you to find the correct type of heating for your dish, we have explained the differences and scopes of application here. Types of heating 4D hot air : Temperature 30-275 °C Use For baking and roasting on one or more levels. The fan distributes the heat from the ring heating element in the back panel evenly around the cooking compartment. For traditional baking and roasting on one level. Especially suitable for cakes with moist toppings.
en Accessories Interior lighting When you open the appliance door, the interior lighting switches on. If the door remains open for longer than 15 minutes, the lighting switches off again. For most operating modes, the interior lighting switches on as soon as the operation is started. When the operation has finished, the lighting switches off. Note: You can set the interior lighting not to come on during the operation in the basic settings. Cooling fan The cooling fan switches on and off as required.
Accessories en Locking function The accessories can be pulled out approximately halfway until they lock in place. The locking function prevents the accessories from tilting when they are pulled out. The accessories must be inserted into the cooking compartment correctly for the tilt protection to work properly. When inserting the wire rack, ensure that lug ‚ is at the rear and is facing downwards. The open side must be facing the appliance door and the outer rail must be facing downwards ¾.
en Before using for the first time Pull-out system, 1 level The pull-out rails at level 2 allow you to pull the accessories out further without them tipping. Pull-out system, 2 levels The pull-out rails at levels 2 and 3 allow you to pull the accessories out further without them tipping. HZ638170 Self-cleaning HZ638270 Self-cleaning Pull-out system, 3 levels The pull-out rails at levels 1, 2 and 3 allow you to pull the accessories out further without them tipping.
Operating the appliance 1Operating the appliance en 2. Touch the required operating mode. You have already learnt about the controls and how they work. Now we will explain how to set your appliance. You will learn about what happens when you switch the appliance on and off, and how to select the operating mode. Depending on the operating mode, different options are available. 3. Use the rotary selector to change the selection. Depending on the selection, change further settings. 4.
en Time-setting options To ensure an even cooking result, do not place your food in the cooking compartment until rapid heat up is complete. Making settings Ensure you have selected a suitable type of heating. The temperature must be set to above 100 °C, otherwise the rapid heating function cannot be started. 1. Set the type of heating and temperature. 2. Press the c button. PLQ V 7RS ERWWRP KHDWLQJ OTime-setting options Your appliance has different time-setting options.
Time-setting options en Cooking time 1. Touch the "End If you set the cooking time for your meal, the operation stops automatically once this time has elapsed. The oven stops heating. Prerequisite: A type of heating and a temperature have been set. For example: Setting for 4D hot air, 180 °C, cooking time 45 minutes. 1. Press the 0 button. The time-setting options menu opens. ꑘ 7LPHU 2. Set the cooking time using the rotary selector. ꑖ PLQ V ꑖ PLQ V ꑘ 7LPHU ꑗ 2.
en Childproof lock AChildproof lock Your appliance is equipped with a childproof lock so that children cannot switch it on accidentally or change any settings. kco l f o rpd l i hC QBasic settings There are various settings available to you in order to help use your appliance effectively and simply. You can change these settings as required. sgn i t es c i saB Activating and deactivating Changing settings You can activate and deactivate the childproof lock when the appliance is switched on or off.
Sabbath mode en Brand name logo Display Do not display Fan run-on time Recommended Minimum Pull-out system Not retrofitted Retrofitted Sabbath mode Switched on Switched off Factory settings Restore Do not restore *) Included, depending on appliance model Caution! For shelves and single rails: "Not retrofitted" setting. For sets of two or three rails: "Retrofitted" setting. Note: Changes to the language, button tone and display brightness settings take effect immediately.
en Cleaning function .Cleaning function You can use the "Self-cleaning" operating mode to clean the cooking compartment effortlessly. The cooking compartment is heated up to a very high temperature. Residues from roasting, grilling and baking will burn. You can choose from three cleaning settings. no i t c nu f gn i nae l C Setting 1 2 3 Cleaning level Light Medium Intensive Duration Approx. 1 hour, 15 minutes Approx. 1 hour, 30 minutes Approx.
Cleaning agent en You can set the cleaning to run overnight In the section "Time settings", you can find out how to delay the end time. This allows you to use the oven at any time throughout the day. ~ "Time-setting options" on page 14 Once the cleaning function has ended Once the cooking compartment has cooled down, wipe off the ash that has been left behind in the cooking compartment and around the appliance door with a damp cloth.
en Rails Accessories Hot soapy water: Soak and clean with a dish cloth or brush. If there are heavy deposits of dirt, use a stainless steel scouring pad. -------- Notes ■ Slight differences in colour on the front of the appliance are caused by the use of different materials, such as glass, plastic and metal. ■ Shadows on the door panels, which look like streaks, are caused by reflections made by the interior lighting. ■ Enamel is baked on at very high temperatures.
Appliance door en 2. Then insert the rail into the front socket „, until the rail also rests against the cooking compartment wall here, and press it downwards … (figure "). 1 2 D F E G qAppliance door With good care and cleaning, your appliance will retain its appearance and remain fully functional for a long time to come. This will tell you how to remove the appliance door and clean it.
Appliance door en 2. Open the appliance door fully. Fold both locking levers closed again (figure "). 2I Removing the door from the appliance 1. Open the appliance door slightly. 2. Press on the right and left side of the cover (figure !). 3. Remove the cover (figure "). 1 2 3. Close the cooking compartment door. Removing the door cover The stainless steel inlay in the door cover may become discoloured. To carry out thorough cleaning, you can remove the cover. 1. Open the appliance door slightly. 2.
Trouble shooting en 1. Insert the intermediate panel at the bottom into the retainer and push it in firmly at the top (figure !). 2. Push both retainers downwards (figure "). 5. Press the front panel at the bottom until it clicks audibly into place (figure %). 6. Open the appliance door again slightly and remove 1 7. Screw both screws back in on the left and right. 8. Put the cover back in place and press on it until it clicks audibly into place (figure &). 2 the tea towel. 3.
Customer service en Maximum operating time exceeded Glass cover Your appliance automatically ends the operation if no duration has been set and the setting has not been changed for a long time. The point at which this occurs depends on the temperature or grill setting that has been set. A message appears on the display on the appliance to say that the operation is being ended automatically. The operation is then cancelled. To use the appliance again, first switch it off.
Dishes en PDishes You can use the "Dishes" operating mode to prepare a wide variety of food. The appliance chooses the optimal setting for you. s eh s i D Information on the settings ■ ■ ■ ■ ■ ■ The cooking result depends on the quality of the food and the size and type of cookware. For an optimal cooking result, use food that is in good condition and chilled meat only. For frozen food, use food straight out of the freezer only.
en Tested for you in our cooking studio JTested for you in our cooking studio ■ Here, you can find a selection of dishes and the ideal settings for them. We will show you which type of heating and temperature are best suited to your dish. You will get information on suitable cooking accessories and the height at which they should be placed in the oven. You will also get tips about cookware and preparation methods.
Tested for you in our cooking studio oven, you can reduce the indicated baking times by several minutes. Preheating is necessary for selected dishes, and this is indicated in the table. If you wish to follow one of your own recipes when baking, you should use a similar baked item in the table as a reference. You can find additional information in the tips on cakes and small baked items attached to the settings table. en Remove unused accessories from the cooking compartment.
en Tested for you in our cooking studio Dish Accessories/cookware Shelf posi- Type of tion heating Temperature in °C Small cakes, 2 levels Baking tray + universal pan 1+3 150* Small cakes, 3 levels Baking trays + universal pan 5+3+1 140* 35-55 Muffins Muffin tray 3 170-190 15-20 Muffins, 2 levels Muffin tray 3+1 160-180* 15-40 Small yeast cakes Baking tray 3 160-180 25-35 Small yeast cakes, 2 levels Baking tray + universal pan 1+3 150-170 25-40 Puff pastry Baking tray 3
Tested for you in our cooking studio Cakes baked in a tray or tin are too brown at the back. The whole cake is too dark. The cake is unevenly browned. You were baking on several levels. The items on the top baking tray are darker than those on the lower baking tray. The cake looks good, but is not cooked properly in the middle. The cake cannot be turned out of the dish when it is turned upside down. en Place the baking tray in the middle of the accessories, not directly against the back wall.
en Tested for you in our cooking studio Preheating is necessary for selected dishes, and this is indicated in the table. Some food turns out better if it is baked in several stages. These dishes are indicated in the table. The setting values for bread dough apply to both dough placed on a baking tray and dough placed in a loaf tin. If you wish to follow one of your own recipes when baking, you should use a similar baked item in the table as a reference.
Tested for you in our cooking studio Baking on one level When baking on one level, use the following shelf positions: ■ Tall baked items: Level 2 ■ Flat baked items: Level 3 Baking on several levels Use 4D hot air. Baked items that are placed into the oven on trays or in baking tins/dishes at the same time will not necessarily be ready at the same time.
en Tested for you in our cooking studio Dish Accessories Shelf posi- Type of tion heating Temperature in °C Cooking time in mins.
Tested for you in our cooking studio Types of heating used: ■ : 4D hot air ■ % Top/bottom heating ■ ■ en ; Pizza setting , coolStart function Bakes & soufflés Accessories/cookware Shelf posi- Type of tion heating Temperature in °C Bake, savoury, cooked ingredients Ovenproof dish 2 200-220 Bake, sweet Ovenproof dish 2 170-190 40-60 Lasagne, fresh, 1 kg Ovenproof dish 2 160-180 50-60 Lasagne, frozen, 400 g* Wire rack 2 - - Potato gratin, raw ingredients, 4 cm deep Ovenproof dish 2
en Tested for you in our cooking studio for this reason. Try using the lower values at first. You can increase the temperature next time if necessary. The setting values are based on the assumption that unstuffed, chilled, ready-to-roast poultry is placed into a cold cooking compartment. By doing so, you can make energy savings of up to 20 per cent. If you preheat the oven, the indicated cooking times will be reduced by several minutes.
Tested for you in our cooking studio Pour up to ^ litres of water into the universal pan, depending on the size and type of the meat. Dripping fat and meat juices will be caught. You can make a sauce using these juices. This will also result in less smoke and ensure that the cooking compartment stays cleaner. Slide the universal pan into the oven at the indicated shelf position with the wire rack attached. Ensure that the wire rack is correctly positioned on the universal pan.
en Tested for you in our cooking studio Types of heating used: ■ % Top/bottom heating ■ ■ Dish Accessories/cookware Pork Joint of pork without rind, e.g. neck, Cookware, uncovered 1.5 kg Joint of pork with rind, e.g. shoulder, 2 kg Wire rack 4 Circulated air grilling ( Grill, large area Shelf posi- Type of tion heating Temperature in °C Grill Cooking setting time in mins.
Tested for you in our cooking studio The roast looks good but the juices are too clear and watery. The meat gets burned during braising. Grilled food is too dry. en Next time, use a larger roasting dish and add less liquid if necessary. The roasting dish and lid must fit together well and close properly. Reduce the temperature and add more liquid when braising if necessary. Do not add salt to the meat until after it has been grilled. Salt draws water from the meat. Do not pierce the food when turning.
en Tested for you in our cooking studio Remove unused accessories from the cooking compartment. This will achieve the best possible cooking results and energy savings of up to 20 per cent. Types of heating used: ■ % Top/bottom heating ■ 4 Circulated air grilling ■ ( Grill, large area Dish Accessories/cookware Shelf posi- Type of tion heating Temperature in °C Grill Cooking setting time in mins. Fish Fish, grilled, whole 300 g, e.g. trout Wire rack 2 170-190 - 20-30 Fish, grilled, whole 1.
Tested for you in our cooking studio Types of heating used: ■ : 4D hot air ■ ■ en ( Grill, large area , coolStart function Dish Accessories Shelf posi- Type of tion heating Temperature in °C Grill Cooking setting time in mins.
en Tested for you in our cooking studio Greaseproof paper Only use greaseproof paper that is suitable for the selected temperature. Always cut greaseproof paper to size. Recommended setting values Here, you can find specifications for various dishes. The temperature and baking time are dependent on the quantity and composition of the dough. Different settings ranges are indicated for this reason. Try using the lower values at first. A lower temperature results in more even browning.
Tested for you in our cooking studio en Dish Accessories/cookware Shelf posi- Type of tion heating Temperature in °C Cooking time in mins. Fish Fish, braised, whole 300 g, e.g. trout Cookware, covered 2 190-210 25-35 Fish, braised, whole 1.5 kg, e.g.
en Tested for you in our cooking studio Type of heating used: . Slow cooking ■ Dish Cookware Shelf posi- Type of tion heating Searing time Temperain mins. ture in °C Cooking time in mins. Poultry Duck breast, 400 g Cookware, uncovered 2 6-8 80* 60-120 Chicken breast fillet, 200 g each Cookware, uncovered 2 5-7 90* 60-90 Turkey breast, boned, 1 kg Cookware, uncovered 2 . . . 8-10 90* 150-210 Cookware, uncovered 2 .
Tested for you in our cooking studio Recommended setting values In the table, you can find settings for drying various foodstuffs. The temperature and cooking time are dependent on the type, moisture, ripeness and thickness of the food to be dried. The longer you leave the food to be dried, the better it will be preserved. The thinner the slices are, the quicker the drying process en will be and the more aromatic the dried food will remain. Setting ranges are indicated for this reason.
en Tested for you in our cooking studio Type of heating used: : 4D hot air ■ Preserving Cookware Vegetables, e.g. carrots 1-litre preserving jars Shelf posi- Type of tion heating 1 : Vegetables, e.g. cucumbers 1-litre preserving jars 1 : Stone fruit, e.g. cherries, damsons 1-litre preserving jars 1 : Pomes, e.g. apples, strawberries 1-litre preserving jars 1 : Proving dough You can prove yeast dough in your appliance more quickly than at room temperature.
Tested for you in our cooking studio Type of heating used: ■ en : 4D hot air Dish Accessories Shelf posi- Type of tion heating Temperature in °C Cooking time in mins. Bread, bread rolls Bread & bread rolls general Baking tray 2 : 50 40-70 Cake Cake, moist Baking tray 2 50 70-90 Cake, dry Baking tray 2 : : 60 60-75 Keeping warm ■ You can keep cooked dishes warm using the "Keeping warm" heating type.
en Tested for you in our cooking studio Dish Accessories Shelf posi- Type of tion heating Temperature in °C Small cakes, 3 levels (Preheat for 5 minutes) Baking trays + universal pan 5+3+1 140* Cooking time in mins.
6
BSH Hausgeräte GmbH Carl-Wery-Straße 34, 81739 München, GERMANY siemens-home.