
User Manual


Configuring application templates
Application configuration
5
10 | 16
A6V11526405_en--_b
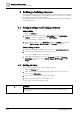
5 Configuring application templates
1. Select Building > Building structure > Add devices > Add application template.
2. Click Import application type, and select an *.s1ca file in your computer.
a The selected application type is added to the library.
3. Select an application template from your project or an application type from
your library. Click Add template to project.
4. The template opens in Configuration > Application configuration.
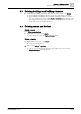
5.1 Application configuration
Each configuration section shows a set of configurable features.
● Configuration sections for on-board I/O's
Configuration sections like On-board output or On-board input assign an on-board
I/O to a feature.
● Configuration sections for network peripheral devices
DXR1.E10..
The KNX PL-Link device configuration section assigns a networked field device to
a feature. The assigned KNX PL-Link devices are listed in the Network peripheral
devices table.
DXR1.M09.. and DXR1.E09..
You can select the room operator units in Accessories.
● Configuration sections for discipline and coordination functions
Configuration sections for discipline functions or coordination functions activate the
required project functions. You can subsequently configure specific features
(application functions).
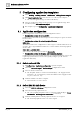
5.1.1 Select on-board I/Os
1. In Configuration > Application configuration, open the template.
2. Select the On-board output or On-board input configuration section.
3. Select an I/O for each feature.
a The discipline feature is activated automatically (i.e., the Supply air VAV
position Y1, Y2; 3-position may activate the HVAC feature Supply air VAV
12, press, duct area, ctr.).
4. Continue until I/O selection is complete.
a On-board I/O's are now selected.
5.1.2 Select KNX PL-Link device
1. Select the KNX PL-Link device configuration section.
2. Select the network peripheral device.
a The corresponding discipline feature is activated automatically (i.e. Room
coordination > Room operator unit interface is activated).
3. Continue until all planned network peripheral devices are assigned.
a The network peripheral devices are now assigned.