
User Manual


Operating Reference
Scheduling
3
A6V10415471_en_a_40 239 | 352
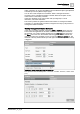
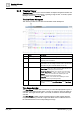
Preset Time Periods
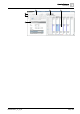
You can click the Zoom to Preset Time Period icon on the Timeline Viewer toolbar
to select how much of the timeline is visible at once. The choices are 12 hours, 1
day, 3 days, 1 week, 2 weeks, or 1 month.
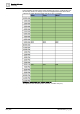
The Timeline Viewer accepts a maximum of 50 schedules. The fewer schedules
you view, the more options you have with the preset time periods. The more
schedules you view, the fewer options you have with the preset time periods.
View Details in the Timeline Viewer
By moving your cursor over an entry in the Timeline Viewer, you can view schedule
details, but you cannot edit them. Double-clicking a schedule’s details, however,
sends the selection to the Default tab where you can edit the schedule.
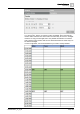
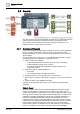
Color Indicators
A gray interval indicates that nothing has been scheduled for that period, and the
schedule is in its default mode of operation. Other colors in the intervals indicate
that something has been scheduled.
● If colors are assigned to the schedule from the text table, they will appear in the
Timeline Viewer.
● If colors are not assigned to the schedule from the text table, they will default to
blue.
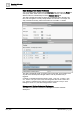
Interval Types
Intervals are classified as one of four types:
● Default—not scheduled intervals (gray)
● Normal—scheduled intervals (solid colors)
● Exception—scheduled overrides to the normal schedule intervals (color-coded
hatch marks)
● Inactive—not active interval (gray hatch marks)
This section provides the general reference information on timeline viewer. To get
started with procedures, navigate to the step by step [➙ 74] section for timeline
viewer.