
User Manual


Getting Started
Basic Procedures
1
20 | 352 A6V10415471_en_a_40
Silence the Audio Alert Resound
w The audio alert resumes after 24 hours because a previously-acknowledged
event has still not been fully processed (closed) by then.
w A message also displays on the Summary bar. For example, 24 hours
Trouble resound: click here to silence.
l Click the text of the message to silence the audio alert resound.
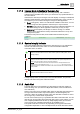
Display the About Page
w You want to view system information such as the Desigo CC version.
1. In the Summary bar, select Menu > About Page or click the company logo.
a The About dialog box displays, and shows general information about the
software.
2.
(Optional)
If you work on an installed client station, click System Info.
a The System Information window displays detailed information about the
client computer.
3. Click OK.
Move a System Window to a Second Monitor
When an additional monitor is available, you can move any system window, such
as, System Manager, Investigative/Assisted Treatment, Help or Event List (in some
client profiles only), from the default monitor to a second monitor. The Summary
bar cannot be moved.
w Desigo CC is running as an installed client or Windows pp client on a computer
connected to two monitors.
w You want to move a window from the default monitor to the second monitor.
For example, you want to move the System Manager window.
1. Click Restore Down in the window.
a The window restores down, you can move it to another monitor, and the
icon changes to Maximize .
2. Drag the window from the default monitor to the second monitor, and click
Maximize .
a The window displays on the second monitor. If you minimize the window that
displays on the second monitor, the corresponding icon displays in the
Windows taskbar of the default monitor. If you maximize the window again, it
displays on the monitor where you previously minimized it.
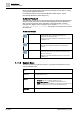
Print from the System Menu
w A printer was previously configured on the Desigo CC server.
1. In the Summary bar, select Menu > Print.
a The Printouts selection dialog box displays.
2.
(Optional)
In the Printouts selection dialog box, do the following:
– Clear the check boxes that correspond to the system application printouts
you do not want to generate.
– Click Move up or Move down to change the printout order.
3. Click Preview.
4.
(Optional)
In the Print Preview dialog box, do the following:
– Use the zoom icon on the toolbar to zoom in/out and check the output.
These toolbar controls only affect the preview, not the printout itself.