
User Manual


Operating Step
-
by
-
Step
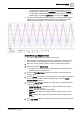
Trends
2
132 | 352 A6V10415471_en_a_40
Time filter
1. Navigate to the Time column and click the inverted triangle icon.
2. On the menu, position your mouse pointer over Time Filter. A sub-menu with
the Hours and Minutes options displays.
3. Depending on the filtering criteria to be applied, perform any of the following
steps:
– To filter data on the basis of number of hours - Position your mouse pointer
over the Hours menu and select the relevant option.
– To filter data on the basis of number of hours - Position your mouse pointer
over the Hours menu and then select the relevant option.
a The Filtered Data section displays the information.
Add New Entries
1. Click Add .
NOTE: You can also add a new row by right-clicking on the row and selecting
Add Trend Entry from the options.
a The Add Trend Entry dialog box displays.
2. Complete the Date and Time, Value, and Comment fields.
3. Click OK.
4. Modify the Time filter to a range in which the date and time of the value to be
added is present.
5. Click Run .
a The Filtered Data section refreshes and a new row with the specified values is
added to the grid.
NOTE: The comments entered are logged in the activity log.
Edit Entries
1. Select the data entry row to be modified in the Filtered Data section and click
Edit .
a The Edit Trend Entry dialog box displays.
2. Modify the value and add comments.
NOTE: The comments entered are logged in the activity log.
3. Click OK.
4. Click Run .
a The Filtered Data section refreshes to display the updated value for the
selected row.
NOTE: You can also modify a row by right-clicking the row and selecting Edit
Trend Entry from the options.
Delete Entries
1. Select the entry to be deleted.
NOTE: Multi-select is allowed.
2. Press Delete .
a The Delete Trend Entry dialog box displays.