
User Guide


9
Reports
Saving a Report Definition
278
Siemens User Guide Version 2.1 A6V10415471_en_a_21
Building Technologies 2015-07-15
9.7.13.2 Customizing a Font
1. Select a label or a table in a Report Definition.
2. From the Reports ribbon, click the Layout tab.
The Font group box displays.
3. Do one of the following to apply a font, font style, or font size.
– Click the drop-down arrow in the Font group box.
– Right-click the report element, and select Font.
The Font dialog box displays.
4. Select the font type, font size, and font style as desired.
5.
(Optional)
Select the Underline check box to apply it to the label. The Underline
option is unavailable when you select a table in the Report Definition.
6. Click OK.
9.7.13.3 Applying Color
1. Select a label or a table in a Report Definition.
2. Click Color .
3. Do one of the following:
– Select a predefined color (in square boxes).
– Click the More Color option and choose a custom color in the More Color
dialog box.
4. Click OK.
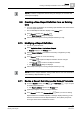
9.8 Saving a Report Definition
You have configured a Report Definition and want to save it.
1. In the Reports toolbar, click Save .
The Save Object As dialog box displays.
2. In the view structure that displays, select the destination folder in which to save
the Report Definition. The destination folder can be the main Reports folder.
3. Type the Name for the Report Definition. There should be no space between
the words.
4. Enter a description in the Description field. By default, when you click the
Description field, the same text contained in the Name field displays. You can
optionally modify this text.
NOTE: Click Flag to display a field for each language available in the
system; modify the text for each language.
5. Click OK to confirm (or Cancel to abort).
If confirmed, the Report Definition is saved.