
User Guide


Reports
9
Configuring a Report Definition
277
Siemens User Guide Version 2.1
A6V10415471_en_a_21
Building Technologies 2015-07-15
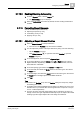
9.7.12.5 Enabling/Disabling Auto-scaling
1. From the Reports ribbon, click the Layout tab.
The Auto-scaling group box displays.
2. Select the Auto-scaling check box. By default, the Auto-scaling mechanism is
enabled.
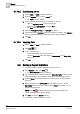
9.7.13 Formatting Report Elements
You can format the report elements by:
Adjusting the position [➙ 277]
Customizing a font [➙ 278]
Applying color [➙ 278]
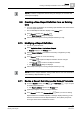
9.7.13.1 Adjusting a Report Element Position
1. Select a Report element in a Report Definition.
The menus in the Position group box become available.
2. You can adjust the position of the report element by doing one of the following:
– Use the Position group box.
– Click Dialog Launcher or right-click and select Position to open the
Position dialog box.
3. To set the alignment, click the required alignment type.
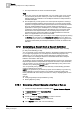
4. To set the Indentation, type the values in the Left or Right field (for Left and
Right Indentation respectively). If the Center alignment is selected, then both
these fields are unavailable.
5. To set the spacing, type values in the Before and After fields.
6. To set the width, first select the Width check box and then type in the value in
the Width field.
7. To set the height, first select the Height check box and then type in the value in
the Height field. The height option is unavailable for labels.
8. Click OK.
Tips
All fields in the Position group box and Position dialog box accept only integer
and floating point values.
A negative value entered highlights the text field in red. Placing the cursor over
this field informs you that the value must be greater than or equal to 0 unit (cm
or inch – location dependent).
For logos and plots, the width-height aspect ratio is maintained, so that if you
change one the other gets adjusted automatically as per the aspect ratio.
While
inserting logos the original aspect ratio of the image is maintained.