
User Guide


7
Scheduler
BACnet Scheduling
164
Siemens User Guide Version 2.1 A6V10415471_en_a_21
Building Technologies 2015-07-15
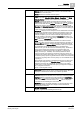
7.4.3.2 Adding a BACnet Schedule
1. In System Browser, select Application View > Schedules > BACnetSchedules.
2. From the Setup tab, select the Default value and the Data type, and then
complete the remaining fields.
3. Drag objects from the System Browser that you want associated with the
schedule, and drop them into the Outputs tab.
4. Complete the resulting display of fields as needed.
5. From the Scheduler toolbar, click Save .
6. Complete the Name field.
7. From the Field Device drop-down list, select the panel you want this schedule
associated with.
8. Click OK.
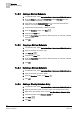
7.4.3.3 Copying a BACnet Schedule
1. In System Browser, select Application View > Schedules > BACnetSchedules.
2. Open the schedule you want to copy.
3. Click Save As .
4. Complete the Name field.
5. From the Field Device drop-down list, select the panel you want this schedule
associated with.
6. Click OK.
7.4.3.4 Deleting a BACnet Schedule
1. In System Browser, select Application View > Schedules > BACnetSchedules.
2. Open the schedule you want to delete.
3. From the Scheduler toolbar, click Delete .
4. Click OK.
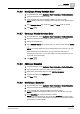
7.4.3.5 Adding a Weekly Schedule Entry
1. In System Browser, select Application View > Schedules > BACnetSchedules.
2. Open the schedule to which you want to add a new weekly schedule entry.
3. Right-click in the schedule area, and click Add New Weekly Schedule Entry.
4. Complete the fields in the Schedule Entries tab.
5. Click Save .
6. Click OK.