
Home Theater Server User Manual

Chapter 10 - Create/Edit
Notification Class
102
Siemens Industry, Inc. 125-3584T
To change the order of the columns, click and hold the column and move it to the
desired location within the table.
Using the Notification Class Editor
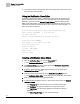
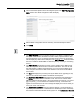
If a Remote Destination is added to a Notification Class object, all recipients in the
Remote Destinations table will receive an e-mail notification of the alarm condition.
Notification will come from the Sender’s E-mail Address field as configured in the
SMTP Configuration Editor. The e-mail notification will indicate the
time local to the
field panel
, as well as the field panel name, point system name, point descriptor, “to”
state, event value, and priority:
From: MichaelS@fwrd.rd.net [mailto:MichaelS@fwrd.rd.net]
Sent: Friday, September 09, 2011 4:29 AM
To: Smith, Michael
Subject: Building Automation Alarm Notification
Field panel name :EPXCM80
Time Stamp :09:29:17 SEP-09-2011 FRI
Point system name :mm
Point Descriptor :
To State :*A1*unACK
Event Value : 100.0
Priority :BN08
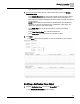
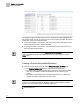
Creating a Notification Class Object
1. Click the Notification Class icon from the Create/Edit bar.
The Notification ClassEditor window displays.
2. Click Select a Panel at the top of the left pane of the Notification Class Editor
window to display available panels.
3. Select the desired panel by clicking the panel name in the left pane of the
Notification Class Editor window.
4. Click the + button at the bottom left of the Notification Class Editor window.
The Notification Class Editor window displays a new Notification Class object.
5. Enter the new Notification Class object information.
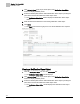
6. To add a network destination, click the + button at the bottom left of the Network
Destinations table.
- In the Process ID cell, enter the process ID. The default value is 600.
- In the Recipient cell, enter the recipient via the drop-down choices.
- In the Valid Days cell, choose the valid days by checking the desired
checkboxes.
- In the From Time-To Time cell, enter the desired times.