
User's Manual

ALFOplus 24GHz (North America) - Release 01.05.0x - MN.00395.E - 004 71
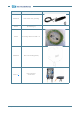
8.6 REQUIRED TOOLS FOR MOUNTING (NOT SUPPLIED)
• N.2 13mm torque wrench
• N.1 15 mm torque wrench
• N.1 17 mm torque wrench
•N.1 3 mm Allen wrench.
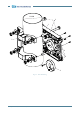
8.7 INSTALLATION PROCEDURE
Installation procedure proceeds according to the following steps:
• According to antenna polarization (vertical or horizontal), assemble the antenna and support brack-
et.
Warning: These instructions are fully detailed in a separate manual “Antennas - Code: MN.00249.E”
depending on the type of used antenna.
• Installation of the ODU
• Installation onto the pole of the supporting bracket
• ODU grounding.
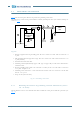
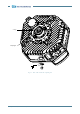
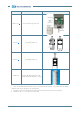
8.7.1 Standard coupling kit
The standard coupling kit is mounted on ALFOplus by means of four screws.
Coupling kit assembly procedure
See Fig.31 - Put the standard coupling kit on the ODU. Align the four holes of the coupling kit with the four
nut screws on the ODU. Insert and tighten the four screws.
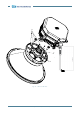
8.8 INSTALLATION ONTO THE POLE OF THE ODU WITH INTEGRAT-
ED ANTENNA
8.8.1 ODU (Standard Lock)
Mounting kit
• Centring ring and relevant screws
•M10 bolts
• ODU with O-ring and devices for ground connection