
Service manual

Shure LX2 Hand-Held Transmitter
12
Preliminary Tests
25D1006 (CG)
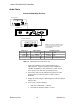
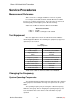
Tested Units
If the system components pass the RF and Audio tests, then the sys-
tem is functioning correctly and does not require tuning and alignment.
Disassembly and Assembly
! CAUTION !
Observe precautions when handling this static-sensitive device.
Disassembly
To access the printed circuit boards of the unit, open the case:
1. Make sure the PWR/OFF switch is in the OFF position.
2. Unscrew the battery cup to access and remove the battery.
3. Unscrew the microphone cartridge and grille assembly.
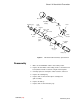
4. If removal of the microphone-transmitter subassembly is neces-
sary, use snap ring pliers to remove the retaining ring from inside
the microphone handle.
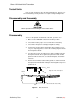
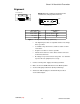
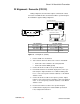
5. To remove the bezel, carefully insert a small screwdriver into the
microphone handle. Press against the plastic bezel tab and lift
upward. Remove the bezel, associated nameplate, and switch
actuators.
6. Remove the transmitter subassembly (audio, rf, and head circuit
board) from the handle while noting the internal guides they were
positioned on.
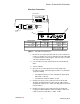
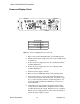
Right side view of microphone
Bezel
Handle
Tab
Circuit board subassembly
Tab
Figure 6. Bezel Removal