
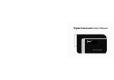
User's Manual


8
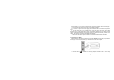
6. Setting Date and Time:
Press OK button. Then press Right Direction key to enter Setup Menu. Press Up and
Down Direction key to select ‘Date & Time’ option. Then press Right Direction key and the
current system date and time are displayed on the LCD screen.
To change the date and time, use the Direction key: Up or Down to adjust, Right key to
move the cursor, OK button to confirm, then OK button to Exit setup mode.
To leave the date and time unaltered, press Left key and then OK key to Exit setup mode.
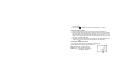
7. Indicators / LED lights:
Busy light - the light will turn on when the camera is busy recording video, capturing
photo, processing data, or being connected to computer.
LED light – this supporting light may be used when recording video/ pictures in dark
environment. Please note that this lamp is effective for short distances only.
Self Timer light – indicates that the camera Self Timer has been activated.
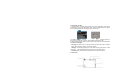
8. Video mode: