
Product guide


10
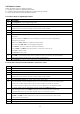
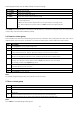
2.2 Create a scene
Step
Description
1
Select the desired fixtures.
2
Move the faders to adjust the lighting effects.
3
Press Program to enter programming mode.
4
Select sc1, sc2 or sc3 to store the scene.
5
Select a number from 1--16 to store the scene.
6
After saving the scene into the number button, it will automatically exit the programming mode.
Note:
The LED indicators of the faders with manual output will be lit or flashing (output value = 0). The values will
all be saved into the scene. However, if the LED indicators are of, they will not be saved. If you don’t
want to save the value of a certain channel, press and hold release and the push the fader to release
the channel, the LED indicator of the fader will dim. It is recommended to release the unnecessary
channels to avoid unexpected lighting effects.
If the display prompts error while saving a scene, it means there is an existing scene running in the number
button, or a new scene is blank not for save.
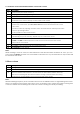
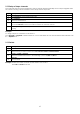
2.3 Run a scene
Step
Description
1
Select sc1, sc2 or sc3 in which the scene is stored.
2
The LED indicators of the number buttons with existing scenes will rapidly flash.
3
Select a number button to run a scene. Once selected, the LED indicator of the number button will
light. This means the scene is running. The LED indicators of the faders will be lit. The brightness will
Depend on the output value.
Note:
If the running scene is using channels that are also active in manual control, the output will be controlled
by the value of the manual control. To activate the scene channel value, you’ll have to release the
manual output: press and hold release and then push the fader to release manual output.