
User manual

17
Ordercode: 30276
QFX Compact Light FX Set
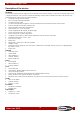
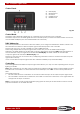
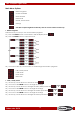
Control Panel
A) LED display
B) MODE button
C) UP button
D) DOWN button
E) ENTER button
Fig. 05
Control Mode
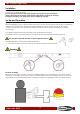
The fixtures are individually addressed on a data-link and connected to the controller.
The fixtures respond to the DMX signal from the controller (when you select the DMX address and save it,
the controller will display the saved DMX address the next time).
DMX Addressing
The control panel on the front side of the base allows you to assign the DMX fixture address, which is the
first channel from which the QFX Compact Light FX Set will respond to the controller.
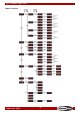
Please note when you use the controller, the unit has 27 channels.
When using multiple QFX Compact Light FX Sets, make sure you set the DMX addresses right.
Therefore, the DMX address of the first QFX Compact Light FX Sets should be 1(001); the DMX address of
the second QFX Compact Light FX Set should be 1+27=28 (28); the DMX address of the third QFX
Compact Light FX Set should be 28+27=55 (55), etc.
Please, be sure that you do not have any overlapping channels in order to control each QFX Compact
Light FX Set correctly.
If two or more QFX Compact Light FX Sets are addressed similarly, they will work similarly.
Controlling:
After having addressed all QFX Compact Light FX Set fixtures, you may now start operating these via your
lighting controller.
Note: After switching on, the QFX Compact Light FX Set will automatically detect whether DMX-512 data
is received or not. If there is no data received at the DMX-input, the ”LED” on the control panel will not
flash.
The problem may be:
• The XLR cable from the controller is not connected with the input of the QFX Compact Light FX Set.
• The controller is switched off or defective, the cable or connector is detective, or the signal wires are
swapped in the input connector.
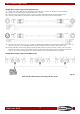
Note: It is necessary to insert an XLR termination plug (with 120 Ohm) in the last fixture in order to ensure
proper transmission on the DMX data link.