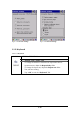
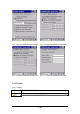
Figure 3-57 Internet Settings Figure 3-58 Internet Settings 3.2.11 Keyboard Table 3-32 Keyboard ICON ITEM & FUNCTION “Repeat” Tab :( Figure 3-59) To change the amount of time between depressions before repetition starts, adjust the Repeat delay slider To change the repeat rate, adjust the Repeat rate slider. Test your new setting. Tap “ OK” to exit the “Keyboard” Tab.
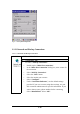
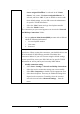
Figure 3-59 Keyboard Properties 3.2.12 Network and Dial-up Connections Table 3-33 Network and Dial-up Connections ICON ITEM & FUNCTION “Connection” Tab : To create a “Dial-up Connection”: Double-tap the “Make New connection”. In the “Make New Connection” dialog box, enter a name for the connection. Select “Dial-Up Connection”. Select the “Next” button. Select the modem you want use. Select “Configure” Under “Connection Reference”, use the default settings provided.
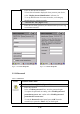
Select “TCP/IP Settings”. In the “General” tab, ensure “Use Server-assigned IP address” is selected. In the “Name Servers” tab, ensure “Use Server-assigned addresses” is selected, and select “OK”. If you are unable to connect with these default settings, see your ISP or network administrator for specific TCP/IP information. Select the “Next” button and type the telephone number. Select the “Finish” button.
Figure 3-60 Network and Dial-up Connections Figure 3-61 Network and Dial-up Connections Figure 3-62 Network and Dial-up Connections Figure 3-63 Network and Dial-up Connections 3-42
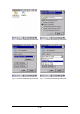
Figure 3-64 Network and Dial-up Connections Figure 3-65 Network and Dial-up Connections Figure 3-66 Network and Dial-up Connections Figure 3-67 Network and Dial-up Connections 3-43
Figure 3-68 Network and Dial-up Connections Figure 3-69 Network and Dial-up Connections Figure 3-70 Network and Dial-up Connections Figure 3-71 Network and Dial-up Connections 3.2.
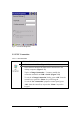
Fill in or edit the data as desired. To have this information displayed when you start your device, select “Display Owner Identification” at Power On. To set up identification for remote networks, see Setting up identification for remote networks. “Network ID” Tab: (Figure 3-73) Enter the user name, password, and domain name you use to log on to remote network. Figure 3-72 Owner Properties Figure 3-73 Owner Properties 3.2.
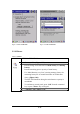
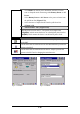
Figure 3-74 Password Properties 3.2.15 PC Connection Table 3-37 PC Connection ICON ITEM & FUNCTION “PC Connection” Tab : (Figure 3-75) Select the first checkbox to enable direct connections to the desktop computer. (Figure 3-75) Tap the “Change Connection…” button to modify the connection method from USB or Serial. (Figure 3-76) To exit the “Change Connection” dialog, press “OK” from the control bar, or press the key on the keypad.
Figure 3-75 PC Connection Figure 3-76 PC Connection 3.2.16 Power Table 3-38 Power ICON ITEM & FUNCTION “Battery” Tab : (Figure 3-77) Provide change level indicators for Main battery and Backup battery. Provide remaining power capacity of main battery. If a “Main Batteries very Low” warning message shows, the remaining battery life is around 30 minutes to SC600 shuts down.
The Scheme Tab allows you to determine the time to switch state to Suspend mode when using either Battery Power or AC Power. Select Battery Power or AC Power as the power scheme from the pull-down list.( Figure 3-78) Select the time to suspend mode from the pull-down list.
Figure 3-79 Power Figure 3-80 Power Figure 3-81 Power 3.2.17 Regional Settings Table 3-39 Regional Settings ICON ITEM & FUNCTION “Region” Tab : (Figure 3-82) Select the desired location/language. Review the Appearance samples in the bottom half of the screen. Select the Tab at the top for any settings you wish to change, Options to modify include Number, Currency, Time, and Date.
Figure 3-82 Regional Settings 3.2.18 Remove Programs Table 3-40 Remove Programs ICON ITEM & FUNCTION “Remove Programs” Tab : Only user installed programs can be removed. Select the program you wish to remove from the list and press “remove” button.
3.2.19 Storage Manager Table 3-41 Storage Manager ICON ITEM & FUNCTION “Storage Manager” Tab : (Figure 3-83) To change Storage properties control panel default settings: Insert. Compact Flash(CF) or Secure digital (SD) storage card into the unit. Select Start > Settings > Control Panel > Storage Properties From the “Storage Info” pull-down list, select the desired storage device. You can also format, dismount, and create partitions on storage devices using this control panel.
3.2.20 Stylus Table 3-42 Stylus ICON ITEM & FUNCTION “Double-Tap” Tab : (Figure 3-84,Figure 3-85) Double-tap the checkerboard grip at a comfortable speed. Double-tap clapboard to test your settings The function is OK if the figures are changed from Figure 3-84 to Figure 3-85. To tap “OK” to exit the Stylus Properties.
Figure 3-86 Stylus Properties Figure 3-87 Stylus Properties 3.2.21 System Table 3-43 System ICON ITEM & FUNCTION “General” Tab : (Figure 3-88) To show: Firmware information Information about Processor type, Memory size, Expansion card “Memory”: (Figure 3-89) Move the slider to adjust memory allocation. Default storage memory is normally is normally set to about 8MB with the reminder assigned to Program memory. Press the “OK” key on the Keypad.
To close the Device Name, press the “OK” button, or press the key on keypad. “Copyrights” Refer to this tab for specific copyright data. As a user, you are Tab: (Figure3-91) responsible to read this statement.
3.2.22 Volume & Sounds Properties Table 3-44 Volume & Sound ICON ITEM & FUNCTION “Volume” Tab : (Figure 3-92) The factory default for Volume is the forth level. You can adjust the volume to your environment and comfort. Set the volume by adjusting the slider from Soft to Loud, or press Right or Left edge of Navigation keys “Sounds Enable the desired sounds for key clicks, screen taps, notifications, and applications.
3.3 Taskbar and Start Menu Table 3-45 Taskbar and Start menu ICON Taskbar and Start Menu ITEM & FUNCTION “General” Tab : In this tab, You can change the position of the Taskbar and Start menu Is always on top or not Auto hide or not Show Clock or not “Advanced Tap the “Clear” button to remove the contents of the Documents Menu. Enable “□ □ Expand Control Panel” ” to list all icons of ” Tab: Control Panel from top to bottom.
Chapter 4. Communication 4.1 Installing & Setting Up Microsoft ActiveSync 4.1.1 Installing Microsoft ActiveSync on the Host PC Microsoft ActiveSync is a file transfer tool to synchronize the files on a PC with the files on your PDT. To install Microsoft ActiveSync, complete the following steps on the PC: 1. Go to the Microsoft Windows CE.NET website and download the latest current version of ActiveSync: http://www.microsoft.com/mobile/pockeypc/downloads/ . 2.
Only devices that have a partnership with a desktop computer can synchronize information between the two computers. For more information on partnerships, please refer to your Microsoft ActiveSync documentation or help file. Transferring Files: To transfer files, complete the following steps on the host PC: Select Start> Programs >Communication > (Serial, or USB) Activesync.
4.2.2 ActiveSync File Synchronization ActiveSync files synchronization requires an ActiveSync partnership between the PDT and the Host PC. Refer to “Setting up a Partnership”, above: Select the files in the synchronization configuration for the PDT partnership. Select Tools > Options from the ActiveSync command bar to configure the synchronization options. Place the file to be synchronized in the Synchronization folder created you’re My Documents directory. Defaults to the desktop.
Chapter 5. Software Applications 5.1 Introduction The PDT includes Calculator, Inbox,….. You can switch to any software program by tapping the Start Menu. 5.2 Software Applications 5.2.1 Calculator It can process the basic numeric calculation with “+”, “-“ “*” and “/“.
To setup “Inbox”: Select Start> Programs> Inbox to open it. Select Service> Options from the command bar. Drag the dialog to show the right edge to configure e-mail. Select “Add…” (Note 1) In the “Service Type” list, select POP3 Mail or IMAP4 Mail. (POP3 is the most common mail protocol for ISPs).Enter a unique name for e-mail service in the “Service name” field. This name cannot be changed later. Select “OK”. The Mail Service Setup wizard appears after you add a service.
address in the box. Set general preferences: If you are adjusting the setting of an existing service, select Service> Options, select the service you are using, select Properties, and then select Next. In the General Preferences dialog box, choose any of the following setting settings, all of which are optional: Disconnect service after actions are performed: Select to automatically disconnect from the server upon completion of all pending actions. This option minimizes connect time and cost.
meeting requests when getting full copies of messages. This setting applies whether you have chosen to download full copies of messages by default, or you selectively download full copies of messages by opening the message and selecting Services> Get Full Copy Limitations apply. Get file attachments (POP3 only): Select to download and save message attachments when getting full copies of messages. This option may use significant RAM and slow download time.
from your mail service or exit Inbox. Immediately: Deletes messages as soon as you select File> Delete. Manual: Deletes messages when you select File> Empty Deleted (local) Note: If you are working offline, messages that have been deleted from the device the next time you connect. Empty the Deleted (local) folder: Select File> Empty Deleted (local). This permanently deletes messages in the Deleted (local) folder.
Rename a folder: Select the folder you want to rename. Select File> Folder> Rename Folder. Type the new name for the folder. Notes: Default folders, such as Inbox, can’t be renamed. Folders you create for IMAP4 mail servers can’t be renamed. Synchronize folders while connected: When you synchronize folders, the contents of your device folders and mail server folders are compared and updated. New mail messages are downloaded, and messages in your device Outbox folder are sent.
The message is not sent and is saved in the inbox folder of the active service. Reply to or forward a message: Open the message, and then select Compose> Reply to Sender, Reply to All, or Forward. Enter your response. Select File> Send. Tips: Selections in the Options dialog box determine whether the original text is included. To see more header information, select the inverted triangle in the lower-right corner of the header area. Select the triangle again to collapse the header area.
full copies of messages by default. When finished, select Services> Connect to disconnect. You also need to disconnect your dial-up connection by double-tapping the icon in the status bar and selecting Disconnect. Notes: Receiving entire messages consumes storage memory. The size column in the Inbox list view displays the local size and server size of a message.
connect. You can also set Inbox to download attachments automatically when you get a full copy of a message. For more information, see Receive attachments. Open an attachment: With the message open, double-tap the attachment’s icon at the bottom of the message. If you don’t see this pane, select File> Attachments> Show Attachments. Store an attachment: Select Service> Options> Storage tab. Select to store attachments on internal RAM or a storage card.
Figure 5-1 Inbox 5.2.3 Internet Explorer With Internet Explorer, you can view Web or intranet Web pages on your device. You will need to use a modem or WLAN to connect to an Internet server provider (ISP) or network. 5.2.3.1 Connect to the Internet Before you can view Web pages, you must set up a remote connection to your ISP or network. 5.2.3.2 Start Internet Explorer Open Internet Explorer by selecting Start > Programs > Internet Explorer.
To achieve more screen real estate in Internet Explorer, you can hide the Status bar and View menu. From the top menubar, go to View > Hide Toolbars. Once it is hidden, you must cold reset to access these features again. Refer to 2.7.2 “Cold Reset “for more information. 5.2.3.4 Set up a proxy server Proxy servers are often used when connecting to the Internet through a local network, such as a corporate network, for added security. Select View > Internet Options > Connection Tab.
To view your favorite Web sites, select Favorites and the Web site you want to view. Note: To organize your Favorites list, select Favorites > Organize Favorites. 5.2.3.10 Browse Web pages To move to a page you have previously view, select View > Back To move to the next page (provided you have viewed it previously), Select View > Forward. To return to your Home page, select View > Go > Home. 5.2.3.11 Refresh current page Select View > Refresh. 5.2.3.
Go to the document where you want to place the information and select the location. Select Edit > Paste. 5.2.3.18 Select security Options Select View > Internet Options > Security tab Select the security protocols you want. 5.2.3.19 Change the font size Select View > Text Size and select the desired size. 5.2.4 Media Player The PDT comes with Media Player for Windows CE.NET installed. Open Media Player by selecting Start > Programs > Media Player from the desktop.
Communicate using Session Initiation Protocol (SIP) or Hotmail contacts Windows Messenger supports. Communication with your colleagues in the enterprise with a SIP based communications service. You can also talk to your Hotmail contacts using the .NET Messenger. 5.2.6 Microsoft WordPad You can create and edit documents and templates in WordPad, using buttons and menu commands that are similar to those used in the desktop version of Microsoft Word. You can work with files Normal or Outline view.
a paragraph, enter ^p. For a tab stop, enter ^t. Select the replacement options you want. Select Find Next. On the Find/Replace toolbar, select the appropriate button. Move, copy, or delete text Select the text you want to move, copy, or delete. To move or delete text, select the Cut button. To copy the text, select the Copy button. To paste the information, move the insertion point to the desired location, and select the Paste button. Notes: To undo an action, select Edit > Undo.
Select desired text. Select the Bold, Italic, or Underline button. To change the color, select Format > Font and select the color you want from the Color list. Adjust the paragraph alignment Select the paragraph you want to align. Select the Align Left, Center, or Align Right button. Note: To see more formatting options, select Format > Paragraph. Indent a paragraph Select the paragraph you want to indent. Select Format > paragraph.
Assign and change outline levels Select View > Outline. Select the appropriate buttons on the toolbar. 5.2.6.5 Inserting Symbols Place the insertion point where you want to insert the symbol. Select Tools > Insert Symbols. Select the symbol you want, and then select Insert. Tips: If you select a different font ( or subset of a font), a different set of Symbols will be displayed. 5.2.6.6 Printing a Document Select File > Print. Select the printing options you want.
Changes caused by Word document conversion Formatting Borders and Shading Borders and shading are not displayed in WordPad, but are restored when converted back to a Word document. Shading is not restored when used in a table, but simple borders are restored. Character formatting Bold, italic, strikethrough, superscript, subscript, and hidden text are retained and displayed. Other effects are changed or removed. Colors Colors are retained and mapped to colors available on your device.
OLE Objects OLE Objects are removed during conversion. Revisions marks, annotations, and comments Revision marks are visible but cannot be changed. Annotations and documents are removed during conversion. 5.2.7 Remote Connection Using Remote Desktop Connection, you can log on to Windows Terminal Server and use all programs installed on this server. For example, instead of running Microsoft Pocket Word, you can run the desktop version of Microsoft Word. 5.2.7.
5.2.7.3 Disconnecting and Ending a Session In the Remote Connection window, select Start > Shutdown. Select Log Off > OK. 5.2.8 Windows Explorer Windows Explorer works almost the same on your PDT as it does on your PC. See the topics below for information about the difference in Windows Explorer on your device. 5.2.8.1 Navigating in File View Go forwards and Back To go to the previous folder, select Go > Back. To go to the next folder (which you have just viewed), select Go > Forward.
Tips: To open a favorite file or folder, select Favorites and then select the folder. To organize your favorites, select Favorites > Organize Favorites. Transfer a file using infrared To send a file, select it, line up the infrared ports, and select File > Send To > Infrared Recipient. To receive a file, line up the infrared ports, and select File > Receive. 5.2.8.4. Creating Desktop Shortcuts Display the file or Web page for which you want to create a Shortcut. Select File > Send to.
5.3.2 DiskOnChip Location To access the contents of DiskOnChip storage: Double-tap the My Computer icon on the desltop. Double-tap the DiskOnChip icon to view DiskOnChip. Figure 5-6 DiskOnChip 5.3.3 DiskOnChip Size The size of the DiskOnChip will vary, depending on the size of system firmware. Inside the DiskOnChip directory, tap File > Properties. The DiskOnChip Properties dialog: The number following Free is the amount of memory currently available on your device.
Appendix A 2D Barcode Setting A.1 Setup Tab Function Explaining: Item Symbology Setup Function Explaining Selecting the Symbology Setup menu item causes the symbology setup dialog to be displayed. This dialog consists of a symbology drop down list, plus four buttons and a message box. Decoder Setup Selecting the decode menu item displays the decode options dialog box.
Item Function Explaining Config file is saved as it appears on the screen instead of how it was received. Restore Config This selection restores the Config from any file. The Config From File file is full size, uncompressed, and unprocessed. Exit Selecting Exit shuts down the Application Program. A.1.1 Symbology Setup Selecting the Symbology Setup menu item causes the symbology setup dialog to be displayed. This dialog consists of a symbology drop down list, plus four buttons and a message box.
A.1.2 Decoder Setup Function Explaining: Item No Read Timeout Function Explaining Maximum time (in milliseconds) that the imager will attempt to decode before declaring a “No Decode” condition. If attempting to decode using the trigger key, the imager quits decode attempts even if the trigger key remains depressed. You will not be able to start a new decode using the trigger until after the trigger is released. The timeout also applies to the decode operation of the imaging technology.
Item Function Explaining Center Window Center Window indicates the percent-age of width and height of the center decode rectangle, relative to the entire image. The limits are 0-100%. The defaults are20x20 (128x96 pixels). Display Symbol Information The Display Symbol Information option enables/disables display of decoded symbol information, which includes the AIM ID, SymID (Code ID), and symbol modifier.
Item Label Function Explaining 1 ~5 sec Alternate second number of Continuous Scan. Prefix Type the desired label prefix in this text box Suffix Type the desired label suffix in this text box A.2. Update Tab Function Explaining: Item Function Explaining Firmware Revision When this item is selected, the imager is queried for the Flash New Firmware This item allows new engine firmware to be installed into the imager.
Item Function Explaining restart takes approximately 30 seconds. The application insures that the unit will not enter suspend mode during that time. Note: It is very important that the device remains awake during this time. Failure to do so can cause the scan engine to become unusable. A.3. Symbologies List A.3.
A.3.2 Codabar Function Explaining: Item Explaining Symbol Enable Enable this barcode Check Char/Digit Enable The scanner reads barcode data with a check digit. If not checked, the bar code will be read as though no check digit was present. Check Char/Digit Transmit The scanner will only read Codabar bar codes printed with a check digit, and will transmit this character at the end of the scanned data. This setting is only valid if check char/digit is enabled.
A.3.3 Code 11 Function Explaining: Item Explaining Symbol Enable Enable this barcode. Check Char/Digit Enable This option sets whether 1 or 2 check digits are required with Code 11 barcode. Message Length The minimum and maximum length ranges for the barcode are 1-80. Check Digits Required Default = Two Check Digits.
A.3.4 Code 128 Function Explaining: Item Symbol Enable Message Length Explaining Enable this barcode The minimum and maximum length ranges for the barcode are 0-80.
A.3.5 Code 39 Function Explaining: Item Explaining Symbol Enable Enable this barcode Check Char/Digit Enable The scanner reads barcode data with a check digit. If not checked, the barcode will be read as though no check digit was present. Check Char/Digit Transmit The scanner will only read Code 39 barcode printed with a check digit, and will transmit this character at the end of the scanned data. This setting is only valid if check char/digit is enabled.
Item Append Mode Enable Explaining If this box is checked, the scanner can append the data from several Code 39 barcode together before transmitting them to the host computer. When this function is enabled, the scanner stores those Code 39 barcode that start with a space (excluding the start and stop symbols), and doesn’t immediately transmit the data. The scanner stores the data in the order in which the barcode are read, deleting the first space from each.
A.3.6 Code 49 Function Explaining: Item Symbol Enable Message Length Explaining Enable this barcode The minimum and maximum length ranges for the barcode are 1-81.
A.3.7 Code 93 Function Explaining: Item Symbol Enable Message Length Explaining Enable this barcode The minimum and maximum length ranges for the barcode are 0-80.
A.3.8 Composite Codes Function Explaining: Item Explaining Symbol Enable Enable this barcode. Enable UPC-A/EAN-13 Composite Whether want to scanning UPC-A/EAN-13 Composite codes. Message Length The minimum and maximum length ranges for the barcode are 1-2435.
A.3.9 Data Matrix Function Explaining: Item Symbol Enable Message Length Explaining Enable this barcode The minimum and maximum length ranges for the barcode are 1-1500.
A.3.10 EAN-8 Function Explaining: Item Explaining Symbol Enable Enable this barcode Check Char/Digit Transmit The output of the check digit at the end of the scanned data. Enable 2 Digit Addenda Option allows decoding and outputting of a 2 digits addendum on the end of all scanned EAN-8 data. Enable 5 Digit Addenda Option allows decoding and outputting of a 5 digits addendum on the end of all scanned EAN-8 data. Addenda Required Only reads EAN-8 barcodes that have addenda.
A.3.11 EAN-13 Function Explaining: Item Explaining Symbol Enable Enable this barcode Check Char/Digit Transmit The output of the check digit at the end of the scanned data. Enable 2 Digit Addenda Option allows decoding and outputting of a 2 digits addendum on the end of all scanned EAN-13 data. Enable 5 Digit Addenda Option allows decoding and outputting of a 5 digits addendum on the end of all scanned EAN-13 data. Addenda Required Only reads EAN-13 barcodes that have addenda.
A.3.12 Interleaved 2 of 5 Function Explaining: Item Explaining Symbol Enable Enable this barcode Check Char/Digit Enable The scanner reads barcode data with a check digit. If not checked, the barcode will be read as though no check digit was present. Check Char/Digit Transmit The scanner will only read Interleaved 2 of 5 barcodes printed with a check digit, and will transmit this character at the end of the scanned data. This setting is only valid if check char/digit is enabled.
A.3.13 MaxiCode Function Explaining: Item Symbol Enable Message Length Explaining Enable this barcode The minimum and maximum length ranges for the barcode are 1-150.
A.3.14 MicroPDF417 Function Explaining: Item Symbol Enable Message Length Explaining Enable this barcode The minimum and maximum length ranges for the barcode are 1-366.
A.3.15 OCR-A, OCR-B, US Currency Use this section to program the imager to read machine readable fonts used in optical character recognition (OCR). The imager reads 6 to 60 point OCR typeface. OCR Mode OCR-A OCR-B U.S. Currency Serial Number (Money) MICR E-13B SEMI Font You can either select an OCR default, or create your own custom template for the type of OCR format you intend to read.
Note: Setting the template and check character options are essential for OCR reading. OCR Off turns off all OCR capability in the scanner, so the scanner will be able to scan linear, stacked, matrix, and composite bar codes, but not OCR fonts. In addition, any OCR templates you have created are erased. The 8 digit default templates are reinstated for any future use of the OCR-A, OCR-B, or U.S. Currency fonts. If you select OCR-A, OCR-B, or U.S. Currency you can scan characters in that font.
r multi row indicator All other characters represent themselves. Spaces can be used. Note: In MICR E13 B templates, TOAD characters (capital letters T, O, A, and D), represent Transit, On Us, Amount, and Dash. Note: OCR templates default to eight digits, no check character. To Add an OCR Template 1. Turn on the OCR font you want to read. 2. Begin building the template. Scan the Enter OCR Template symbol. 3. Scan the characters for the string.
OCR Template. This would let you read any string of three digits, “ABC,” then any string of three digits, for example: Adding Spaces You may also need to put spaces in your template. Example: You need to read three digits, space, three specific characters (ABC), space, three digits. The template would be: To create this template, you would enable the OCR-A font. Scan the Enter OCR Template symbol.
d two more times. Scan Save OCR Template. This would let you read either type of format, for example: You can string together as many templates as you need. OCR Template Codes Note: Reading more than three rows of OCR is not recommended. Contact the factory if you have an application that requires reading four or more rows of OCR. † One or more two-digit numbers and Save are required after reading this programming symbol. Refer to the Programming Chart on the inside the back cover of this manual.
ASCII Conversion Chart (Code Page 1252) A-26
ASCII Conversion Chart (Code Page 1252) A-27
OCR Programming Chart A-28
Programming Chart A-29
A-30
A.3.16 PDF417 Function Explaining: Item Symbol Enable Message Length Explaining Enable this barcode The minimum and maximum length ranges for the barcode are 1-2750.
A.3.17 Postnet Function Explaining: Item Explaining Symbol Enable Enable this barcode Check Char/Digit Transmit The scanner will only read US Postnet bar codes printed with a check character, and will transmit this character at the end of the scanned data.
A.3.18 QR Code Function Explaining: Item Symbol Enable Message Length Explaining Enable this barcode The minimum and maximum length ranges for the barcode are 1-3500.
A.3.19 Reduced Space Symbology Function Explaining: Item Explaining RSS Expanded Enable Enable RSS Expanded code RSS Limited Enable Enable RSS Limited code RSS 14 Enable Enable RSS 14 code Message Length The minimum and maximum length ranges for the barcode are 4-74.
A.3.20 UPC-A Function Explaining: Item Explaining Symbol Enable Enable this barcode Check Char/Digit Transmit The output of the check digit at the end of the scanned data. Enable 2 Digit Addenda Option allows decoding and outputting of a 2 digits addendum on the end of all scanned UPC-A data. Enable 5 Digit Addenda Option allows decoding and outputting of a 5 digits addendum on the end of all scanned UPC-A data. Addenda Required Only reads UPC-A barcodes that have addenda.
A.3.21 UPC-E Function Explaining: Item Explaining Symbol Enable Enable this barcode Check Char/Digit Transmit The output of the check digit at the end of the scanned data. Enable 2 Digit Addenda Option allows decoding and outputting of a 2 digits addendum on the end of all scanned UPC-E data. Enable Expanded UPC-E Enable UPC-E Expanded code Enable 5 Digit Addenda Option allows decoding and outputting of a 5 digits addendum on the end of all scanned UPC-E data.
A.3.22 UPC-E1 Function Explaining: Item Explaining Symbol Enable Enable this barcode Check Char/Digit Transmit The output of the check digit at the end of the scanned data. Enable 2 Digit Addenda Option allows decoding and outputting of a 2 digits addendum on the end of all scanned UPC-E1 data. Enable Expanded UPC-E Enable UPC-E Expanded code Enable 5 Digit Addenda Option allows decoding and outputting of a 5 digits addendum on the end of all scanned UPC-E1 data.
A.3.23 ISBT Function Explaining: Item Symbol Enable Explaining Enable this barcode A.3.
A.3.
A.3.26 Australian Post Function Explaining: Item Explaining Symbol Enable Enable this barcode Send Bar Width Data Australian Post is a 4-state symbology that was designed with a non-defined user area. The user can define how that area field is interpreted. Most systems have dedicated decoders that don’t know how to decode a symbology that is not defined.
A.3.27 IATA 2 of 5 Function Explaining: Item Symbol Enable Message Length Explaining Enable this barcode The minimum and maximum length ranges for the barcode are 1-48.
A.3.28 Codablock F Function Explaining: Item Symbol Enable Message Length Explaining Enable this barcode The minimum and maximum length ranges for the barcode are 1-2048.
A.3.
A.3.30 Planet Code Function Explaining: Item Explaining Symbol Enable Enable this barcode Check Char/Digit Transmit The scanner will only read Planet barcodes printed with a check character, and will transmit this character at the end of the scanned data.
A.3.
A.3.32 MSI Function Explaining: Item Explaining Symbol Enable Enable this barcode Check Char/Digit Transmit The scanner will only read MSI barcodes printed with a check character, and will transmit this character at the end of the scanned data. Message Length The minimum and maximum length ranges for the barcode are 4-48.
A.3.
A.3.34 Mayrix 2 of 5 Function Explaining: Item Symbol Enable Message Length Explaining Enable this barcode The minimum and maximum length ranges for the barcode are 1-80.
A.3.35 Korean Post Function Explaining: Item Symbol Enable Message Length Explaining Enable this barcode The minimum and maximum length ranges for the barcode are 2-80.
Appendix B Phone Tools (GSM/GPRS) B.1 Using the Phone Features Use the PDT to make and receive telephone calls and send and receive SMS (Short Message Service) messages. Your mobile phone service provider may provide other useful services such as voice mail. The phone can also be used to connect to an Internet Service Provider (ISP) or work network so you can browse the Web and read e-mail.
2. Insert the SIM card (with the gold side facing the inside of the slot) into the SIM slot. 3. Using 4 ~ 4.5 kgf-cm torque to fix the screws for GSM End Cap. Note: Repeat the same steps to remove the SIM card from the SIM tray.
B.1.3 Start Before: 1. You need to tap the phone icon in the system tray twice. 2. It opens a GPRS power control window. 3. You need to select Enable GSM/GPRS and tap the OK button. 4. Thereafter you might need to input a PIN code and tap the OK button if you have setting the PIN code.
B.2 Interface layout Depending on options available and the capabilities of your PDT, the main interface enables you to: - Look up all your messages using the Inbox, Outbox and Sent icons. - Create and send SMS messages. - Make a phone call using the Dialer, which also enables you to access SMS functions. - Manage several Phonebooks. - Navigate the Internet. Notes: When you start the application for the first time, the communication settings configuration screen is displayed automatically.
Depending on the type of message, in order to send, see properties, move, resend, display, annotate or delete a message on the list: 1. Select the message and hold the selection with the stylus for a few seconds until a context menu is displayed. 2. Select the desired option. 3. Depending on the option selected, follow the usual procedure or click Cancel or the OK icon, located in the top right-hand corner of the screen, to return to the main interface.
Depending on the type of message, in order to send, see properties, move, resend, display, annotate or delete a message on the list: 1. Select the message and hold the selection with the stylus for a few seconds until a context menu is displayed. 2. Select the desired option. 3. Depending on the option selected, follow the usual procedure or click Cancel or the OK icon, located in the top right-hand corner of the screen, to return to the main interface.
To send, see properties, transfer, and display, annotate or delete a message from the list: 1. Select the message and hold the selection with the stylus for a few seconds until a context menu is displayed. 2. Select the desired option. 3. Depending on the option selected, follow the usual procedure or click Cancel or the OK icon, located in the top right-hand corner of the screen, to return to the main interface.
If the drop-down list is empty and you would like to import contacts from your mobile phone, select the Tools > Retrieve phonebook menu. B.2.2 Icons and menus Display icons Clicking the icon located at the bottom of the screen and which symbolizes two arrows on a blank page, displays the fast access icons for available functions (which are as follows, from left to right: send and receive SMS messages, add a new contact in your Phonebook, Dialer, Internet connection). Click this icon again to hide them.
New menu Click on the New menu at the bottom of the screen, then select: - SMS: To create and send an SMS message. - Phonebook: To create a phonebook. - Phonebook Contact: To add a contact to your phonebook. Tools menu Click on the Tools menu at the bottom of the screen, then select: - Retrieve SMS: The application collects the SMS messages and places them in the Inbox. - Retrieve phonebook: To download a phonebook: the one in your mobile phone or the one in your SIM card, or both. - Check cellular status..
- SMS: to configure the SMS transmission and reception options. - My text: to record words or sentences you frequently use so they can quickly be added to a SMS message. - Dialer: to define the dialer settings. - Advanced settings: to configure Log events and the 'Close' option in the Tools menu. - Security: to modify the PIN code of your SIM card. First launch 1. At the first launch, the communication settings configuration screen is displayed.
3. Select Connection type being used. 4. Click the OK icon located at the top right-hand corner of the screen to confirm. The Terminal button enables you to dialog directly with the modem via AT commands (like with Microsoft Hyper Terminal). The Status button returns information on your equipment. B.3.1 System Extensions PhoneTools system extensions are specific extensions for the Contacts application and the Today screen.
● Call: to make a phone call to the selected contact. ● Copy to the SIM: to copy the properties of the selected contact into your SIM phonebook. ● Send SMS: to send a SMS to the selected contact. B.4 Dialer The Dialer module simulates the operation of a mobile phone in your personal assistant. It enables you to: ● make calls in various ways: - by directly selecting an entry in the Contacts folder of your digital assistant. - by selecting from a Fast calls list you will have pre-programmed.
B.4.1 Accessing the dialer ● Starting from the main interface, select the Tools menu then the Dialer option. The dialer initializes your communications equipment then displays signal strength and battery level, as well as the name of your service provider. The keyboard will be enabled once the initialization stage is complete. B.4.2 Making a voice call 1. Access the dialer and use one of the following methods: ● Direct entry, dial the number using the keys on the numeric keypad.
● Again, click the green button without entering any number. A listing of the last numbers dialed appears. Select the number you wish to call, then click the Call button. 2. The number and name of the person being called (if not withheld) is displayed in the top frame during the call. 3. To end the call, click on the icon showing a red receiver. Call duration will then be displayed and an entry in the Dialer log created.
B.4.3 Receiving a call Ringer The dialer issues a ringing sound to alert you to a caller trying to reach you. The tune played at this time can depend on how the caller is recorded in your Contacts folder. You can in fact specify contacts in your folder (Work, Friends, Family, etc.) and list your callers in one of them. Refer to the user manual for your digital assistant for further information on this subject. The application may be configured to play different tunes depending on the category of the caller.
B.4.4 Logs The application records dates, durations and caller identifiers as the dialer is used, dividing them into three categories: missed calls, received calls and outgoing calls. You can look up details of these lists by pressing the Logs button. This will take you to a tabbed box listing the calls logged by category and, under the Voice counters tab, the various cumulative totals recorded, with a facility for resetting the counters. B.
3. Select the type of call to which a ringer is to be assigned in the first drop-down menu in the Events field: Incoming call, or Receive an SMS. 4. If you have selected Incoming call, a second drop-down list will be displayed listing the various categories specified in Contacts. Select the category to which you would like to associate a tune. 5. Select the ringer in the Associated sound drop-down menu. 6. Use the Play and Stop buttons to test the selected ringer.
Service Center is displayed. If it is not the number sent by your network operator, you can change it manually. 3. You can also use the Automatic detection button for the application to interrogate your equipment and configure these settings. 4. Enter the number for the answering machine suggested by your network operator. It will be used by the dialer. 5. Click OK to confirm. Configuring SMS messages 1. Starting from the main interface, select Tools > Settings and click the SMS link.
Receiving: Transferring SMS messages received: they may be either copied or moved from the communications equipment to the digital assistant. If you opt for the "copy" mode (option unchecked), messages received will accumulate in the communications equipment until it fills up and you risk losing messages to come. In this case you can always delete them from the application's inbox. 2. Click OK to confirm.
the Next button. If you have more than one recipient, enter their numbers then press the Add button (arrow pointing downwards) to add them to the list. ● From Phonebook: if your message recipients are recorded in the Contacts folder of your assistant, click the Contacts button and select your recipients and their numbers. Click OK next to add them to the Recipient list. 3. Enter the text of the message in the frame displayed. A character and SMS counter displays the relevant sizes as entry proceeds.
sender, date and time of sending are displayed. If the inbox contains a number of messages, it is possible to go directly from one to the next from the same dialog box. 3. Click OK to return to the main screen. Note: Unread messages appear in bold. Click a message to read it. Replying to an SMS message 1. In the Inbox, select the message you want to answer. 2. Hold the selection until a context menu is displayed in which to select the Reply option, otherwise select Tools > Reply.
B.6 Phonebook management PhoneTools enables you to create phonebooks, import contacts recorded in your mobile phone (memory + SIM card) and thus bring your various phonebooks into line. Creating a phonebook 1. Select New>Phonebook. 2. Enter the phonebook name. 3. Click OK. Adding a contact 1. Click the Phonebooks icon then select from the drop-down list the phonebook to which you wish to add a contact. 2. Select New > Phonebook Contact or click . The Cell phonebook entry window is displayed. 3.
Managing the phonebooks 1. Click the Phonebooks icon then select the Phonebook management button (> sign) next to the phonebook drop-down list. The Phonebook management window opens displaying the list of all your phonebooks. 2. Click one of the following buttons, depending on what you wish to do : ● Create : to create a phonebook. ● Delete : to delete the selected phonebook. The confirmation pop-up is displayed. Click Yes. ● Rename : to rename the selected phonebook.
2. Select Tools>Retrieve phonebook. 3. When prompted by the program, select the memory where the phonebook you want to download is stored. 4. Click OK. Your phonebook is downloaded. Transferring a phonebook to your mobile phone 1. In the Phonebooks folder (click the Phonebooks icon), select the phonebook to be transferred. 2. Select Tools>Transfer to cellular. 3. When prompted by the application, select the memory to which the phonebook is to be transferred. 4. Click OK. Your phonebook is transferred. B.
Creating and changing access configurations Accessing the connections list 1. Starting from the main interface, select Tools > Settings. 2. Click the Internet connection link. The dialog box displays a list of network access configurations handled by the application. From this list you will be able to create, change and delete your configurations. Creating an access configuration 1. Access the connections list. 2. Select the New option from the list.
containig all parameters for use over "high speed" networks, such as GPRS. In order to avoid overwriting a pre-programmed configuration on your mobile, select a free storage profile using its context ID. 6. If your network operator is recognized by the application, the Use standard settings box is checked by default. Uncheck it if you want to specify the settings manually and click Next : - Specify the APN or number, Name and Password settings as required.