
Instructions
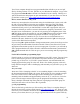

3) Now that we have a program loaded and the Backplot program running, let’s take a
break and test our setup. Make sure that [ESTOP] is active with the button highlighted
and execute [Run].
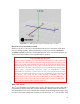
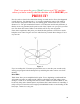
4) Observe that the programmed moves can be viewed in the Backplot box and the
viewing area can be controlled with a variety of controls. This is very useful in checking
out the programs you’ll be writing in the upcoming lessons. The line of the program that
is highlighted in red in the lower area of the control panel is the line of code that is being
processed by the control as the computer runs the program. Note that the EMC program
is processing more than a single line of code at the same time; therefore, this line should
only be considered "approximate."
How to make a file for our programs
It’s possible to create a new file and have it end up in the wrong folder never to be seen
again. If you use this method, you will always have your new programs in the proper
folder. If you are using a computer supplied by Sherline, you’ll find the file called “0-
new.” The instructions in sections D) and E) below describe how to change “3dtest.ngc”
to “0-new.” Since Sherline owners will have this file already provided for them, they can
skip sections D) and E) when they come to them and go on to section
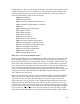
1) To create a new file or work with any existing programs remember you have to be in
the [AUTO] mode. Notice that a new line of commands appears along the bottom in this
mode. The [Open] button is located in the along this row. Note: the method I’m
describing in A) to E) below is to set up your computer for future use and isn’t the
necessary steps you’ll use in the future.
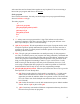
A) With power to the stepper motors turned off [Open] the existing program
called 3dtest.ngc.*
*This file comes with EMC. If you are using a computer supplied by Sherline,
you should instead open the file called 0-new. The instructions in sections D) and
E) below describe how to change 3dtest.ngc to 0-new. Since Sherline owners will
have this file already provided for them, they can skip sections D) and E)
when they come to them and go on to section 2).
B) Go to the Pop-in [Editor] command and open along the top row.
C) The window will display the entire program.
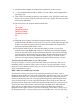
D) For those of you who do not have a Sherline-supplied computer we are now
going to create a file we will call “0-new.” (If you have a Sherline computer with
the 0-new file already on it, open it and go to section 2) below.) First go back to
the [Editor] window by right-clicking your mouse. By having a “0” as the first
character of the file name it will always keep this file at the beginning of the
program list. This makes it easy to find, because you are going to use it again and
again. From the [Edit] window, use [File] then [Save as] (located along the top of
the edit window) to save our existing program as 0-new.
E) Next, highlight (with the mouse button held down drag the cursor across the
entire area you wish to highlight) and delete (press enter) the existing program
with your mouse. Replace that program by typing “Save as another file name.”
31