
Instructions

drawn on the screen. While viewing your tool path from beneath, for example, the
movements may appear to be opposite of how you have defined them in your program.
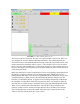
Feedhold and Feedrate Override
You can operate feedrate override and feedhold in any mode of operation. Override will
change the speed of jogs or feedrate in manual or MDI modes. A feedhold will be
initiated if you click the [FEEDHOLD] button or if you press the pause button on the
keyboard. Once in feedhold, the same actions will return you to the speed the machine
was moving before the feedhold.
You can adjust feedrate override by grabbing the slider with your mouse and dragging it
along the groove. You can also change feedrate a percent at a time by clicking in the
slider’s groove. In auto mode you can also set feed override in 10% increments by
pressing the top row of numbers on your keyboard. The number 1 will set feed rate
override to 10 percent of programmed or jog speed. The number 9 will set 90 percent.
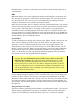
NOTE: Do not enter a value higher than 100 for the Feed Override, as the program will
stop and you will get the error message “axis 0* following error.” (*The number
indicated could be 0, 1, 2 or 3 depending on the axis selected.)
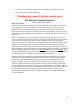
Messages
The message display located under the axis positions is a sort of scratch pad for the EMC.
If there are problems it will report them there. If you try to home or move an axis when
the [ESTOP] button is pressed, you’ll get a message that says something about
commanding motion when the EMC is not ready. If an axis faults out for something like
falling behind, the message pad will show what happened.
If you want to remind yourself to change a tool for example, you can add a line of code to
your program that will display in the message box. Example: (msg, change to tool #3 and
press resume) will display “change to tool #3 and press resume” in the message box. The
“msg,” comma included is the command to make this happen; without “msg,” the
message wouldn’t be displayed in the message box.
To erase messages, simply click the message button at the top of the pad or hold down
[Alt] and press [m].
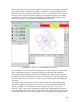
Manual Mode
Manual mode shows a set of buttons along the bottom of the right-hand column. A green
button labeled “ALL ZERO” has been added to designate the present position as the
home position. I felt that a machine of this type would be simpler to operate if it didn’t
use a machine home position. This button will zero out any offsets and will home all axes
right where they are.
Axis Focus (Active)
Axis focus is important in manual mode. Notice that in Figure 1 above you can see a line
or “groove” around the X-axis position display. This groove says that X is the active axis.
It will be the target for jog moves made with the plus and minus jog buttons. You can
change axis focus by clicking on any other axis display. You can also change axis focus
in manual mode if you press its name key on your keyboard. Case is not important here.
25