
Instructions


The “1:1” means you’re working on program one, block
number one. The first movement in this example will move
the table 90 degrees clockwise. To change this amount, type
the number keys. You can press
[NXT] to move the cursor
to the right or [PRV] to move the cursor to the left.
You can indicate whether you want the table to move
clockwise or counterclockwise. To enter a counter-
clockwise direction, press the [MINUS] key. This will place
a minus sign before the degree amount, indicating reverse
travel. If you press the [MINUS] key again, the minus sign
will be removed and the direction will be clockwise.
(Note that it is also possible to change the default direction
of travel from clockwise to counterclockwise. See the
Settings mode for details.)
When the screen shows the movement you wish, press the
[ENTER] key to enter (and store) your selection.
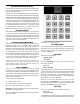
The screen will then display something similar to this:
Block 1:1
Feed rate: 15
This means that the feed rate for this programmed block is
15 degrees per second. The number you enter will be the
fastest rate the table will reach during a move. The SLOW
rate (the rate it starts at each time) depends on what you
entered for SLOW in the Settings Mode. You can change
the feed rate to anything between 1 and 50 degrees per
second.
When the screen shows the feed rate you wish to use,
press [ENTER] again. The LCD screen will then display
something similar to:
Block 1:1
Pause
You can tell the controller to pause after each block or
continue to the next block. If you tell it to pause, you must
hit the
[NXT] key during program execution before it will
advance. To set the current program block to pause, press
the [ 7 ] key (marked “slow”). To set the current program
block to NOT pause, press the [ 9 ] key (marked “fast”).
After setting the PAUSE parameter how you want it, hit the
[ENTER] key. The LCD screen will then display something
similar to:
Block 1:2
Degrees: 000.000
This indicates that you’re ready to program the movement
for block number 2 in the first program. You can now define
the block size, feed rate, and pause status just like you did
for the first block.
When you’ve entered all of the program blocks you wish,
terminate the program by entering a movement of “000.000”
and a pause or no pause. This tells the controller to stop
asking for new input and prepares to run the program
you’ve just entered.
Insert and Delete
When entering a program you may make a mistake, or you
may wish to modify a program after it has been entered.
You can INSERT and DELETE program blocks to correct
or modify an existing program. To access the INSERT
and DELETE functions, press the
[MODE] key while the
controller is waiting for you to enter the number of degrees
for any program movement. (You can’t use INSERT or
DELETE after entering the degree size.) The LCD screen
will then display something similar to:
Block 1:5
Insert?
You can now insert a new movement at this point in the
program by hitting the
[ENTER] key. The LCD screen
will display something similar to:
Block 1:5
Wait...
After a few seconds the word “Wait...” will go away and
you will be able to enter a movement for the new, inserted
position.
If you do not INSERT a program block but rather press the
[MODE] key a second time, the controller will display:
Block 1:5
Delete?
You can now delete the current program block by hitting
the [ENTER] key. The LCD screen will display something
similar to:
Block 1:5
Wait...
After a few seconds the word “Wait...” will go away and
the previous settings for that program block will have
been removed and replaced by the settings for the next
program block.
If you do not INSERT or DELETE a program block, but
rather press the
[MODE] key a third time the controller
will display:
Block 1:5
Exit?
You can now terminate the programming session entirely by
pressing the
[ENTER] key. Or, if you press the [MODE]
key a fourth time, the controller will return to the editing
mode.
The Loop Command
If you press the [MODE] key at the very start of a new
block the display will read
Block 1:1
Begin Loop?
This means that the instructions entered from this point
to the point that an “End Loop” is entered, in the same
manner, will be repeated for as many times as entered after
entering the command “End Loop.” The “End Loop” can
-6-