
User's Manual Part 1


8 of 35 9 of 35
input. See the relevant Mode section for details of how to use each listening
mode.
The Common local controls for sound volume, Mute and Play/Pause are
available in all listening modes.
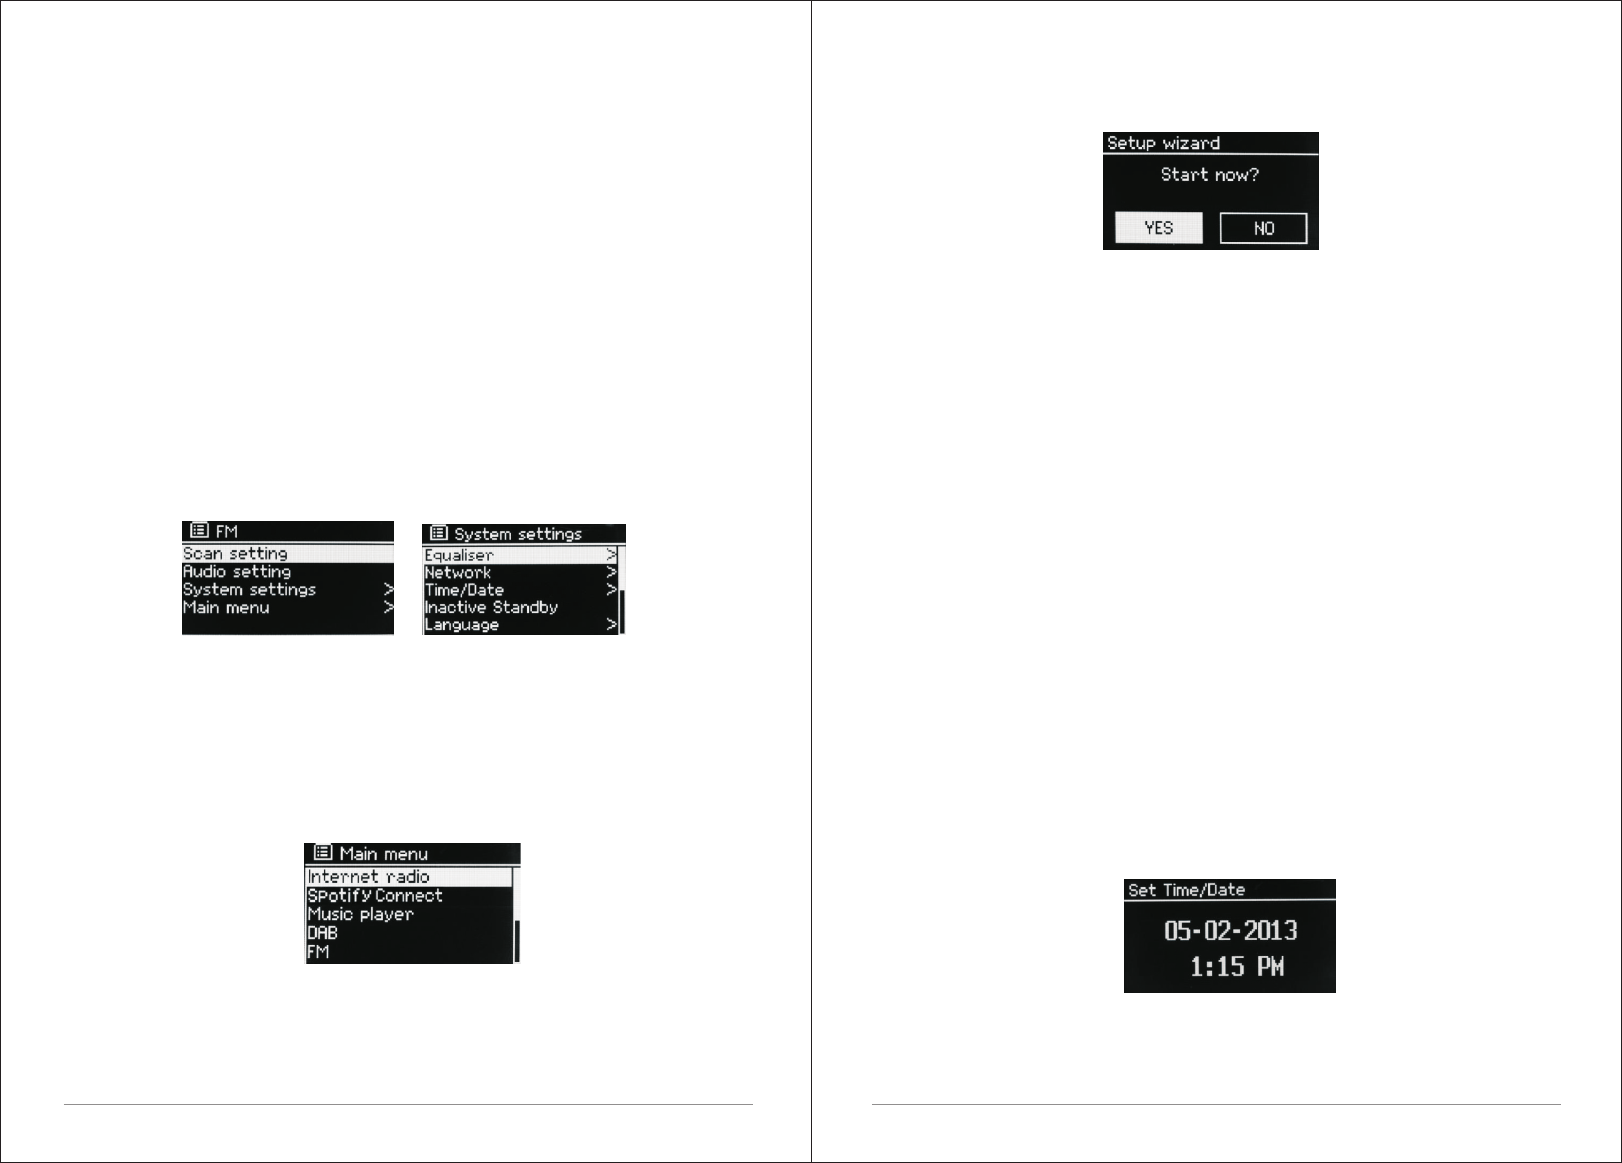
2.5 Menu navigation
The primary control for moving through menus and options is the Select
Control. Rotate the control to move up or down a menu. Once the required
option or value is highlighted press the Select Control. All menus and lists act
as loops such that turning the control to go beyond the first or last entry in a
menu or list takes you to the opposite end of the menu or list. So going up from
the first entry in a menu will take you to the last option in the menu, etc.
A “>” appears on the right of the screen if there are more options above
or below those visible.
To enter the menu tree in a particular mode press Menu. To move back a menu
level press Back . To exit the menu system, press Menu again. Each mode has
a Mode menu, with options specific to that mode.
For example, the FM mode menu has two mode specific options: Scan setting
and Audio setting.
In addition, each mode menu has two final options: System settings > and
Main menu >. The ">" indicates options leading to further menus.
The System settings menu presents system setting functions to allow the user
to setup how the unit behaves. This includes Equalizer, network ,time/date,
language, factory reset and software update.
The Main menu presents an alternative method for selecting listening modes
plus sleep and alarm functions.
3. Started and setup
M2+ is easy to use. To play DAB or FM radio, all you need is a power source (a
100-240 V mains supply); For Music Player mode, you need a wired/wireless
Ethernet network and a UPnP music server (e.g. a PC). For Internet
-connected modes such as Internet radio, you also need a broadband Internet
connection.
3.1 Setup wizard
When M2+ is started for the first time, it runs through a setup wizard to
configure settings for date/time and network. Once this has finished, the
system is ready to use in most modes.
Note: To change these settings later, select Menu > System settings >.
To run the setup wizard again, select Menu > System settings > Setup wizard.
Select Yes to start the setup wizard.
If you choose No, the next screen asks if you would like to run the wizard next
time M2+ is started. The system then starts without configuring time/date and
network settings and enters the Main Menu.
Note: If power is removed while the wizard is in progress, the wizard will run
again next time M2+ is started.
3.1.1 12/24 hour display
To change between 12 and 24 hour display, select Set 12/24 hour and then
select your preference.
3.1.2 Set Time/Date (wizard)
The date and time are displayed as dd-mm-yyyy and hh:mm AM/PM with the
first value, dd, active (flashing).
Adjust each value with the Select control. As each value is set by pressing the
Select control, the next value becomes active ready for adjustment.
Auto-update
Auto-update works with data sent over DAB, FM or the Internet. The clock is
only updated when in a corresponding mode, so it is best to select a mode you