
Installation Instructions

Installation: No tools required.
Installation: Pas d’outils requis.
Instalación: No se requieren
herramientas.
•Reducesblindspots
•
Shatter
proofglass
•Réduitl’anglemort
•Verreincassable
•
Reducelospuntosciegos
•Vidrioinastillable
ExternalSensorInstallation
InstallationDeLaSondeExtérieure
InstalaciónDelSensorExterno
A
B
Existing viewing area
Champ de vision actuel
Área de visión existente
Wide-angle viewing area
Champ de vision amélioré
Área de visión gran angular
1. Install the anti-theft washer.
1. Installer la rondelle anti-vol.
1. Instale la arandela anti-robos.
2. Tighten the sensors to the correct tire locations
(FL to front left, FR to front right, RL to rear left,
RR to rear right).
2. Serrer les sondes selon les emplacements
appropriés des pneus (FL = av
ant gauche,
FR = av
ant droite, RL = arrière gauche,
RR = arrière droite).
2.
Apriete los sensores en los sitios correctos de los
neumáticos (FL al frente a la izquierda,
FR al
frente a la derecha,
RL atrás a la izquierda,
RR atrás a la derecha).
3.
Use the wrench to tighten the washer and turn in
counter
-clockwise direction to lock into place.
3.
Serrer la rondelle au moyen d’une clé; tourner
vers la gauche pour verrouiller la sonde en place.
3.
Use la llave para apretar la arandela y gire en
sentido contrario a las manecillas del reloj para
asegurar en su lugar
.
B
C
AUTION: OBJECTS IN MIRROR
ARE CLOSER THAN THEY APPEAR
TO BE. OFF-ROAD USE ONLY.
ATTENTION: LES OBJETS QUI
APPARAISSENT DANS LE RÉTRO
SONT PLUS PRÈS QU’ILS NE
LE SEMBLENT. UTILISATION
TOUT-TERRAIN SEULEMENT.
¡CUIDADO!: LOS OBJETOS QUE SE
VEN EN EL ESPEJO ESTÁN MÁS
CERCA DE LO QUE APARENTAN.
PARA USO EXCLUSIVO EN TODO
TERRENO.
TPMS
REAR VIEW
MIRROR
POWERED BY SOLAR ENERGY
(Tire Pressure
Monitoring System)
TPMS
REAR VIEW MIRROR
POWERED BY SOLAR ENERGY
(Tire Pressure
Monitoring System)
PRECAUCION: FRAGIL. MANEJESE
CON CUIDADO.
MANTENGASE FUERA DEL ALCANCE
DE LOS NIÑOS.
• Pressure Monitoring
Sensors
• Sondes de Surveillance
de la Pression
• Sensores de Control de
Presión
• Control Buttons
• Boutons de Commande
• Botones de Control
• LCD Display
• Affichage LCD
• Pantalla LCD
• Powered By Solar
• Alimenté À L’énergie
Solaire
• Impulsado Con Energía
Solar
ESPEJO RETRO
VISOR
TPMS
IMPULSADO CON ENERGÍA SOLAR
(Siglas de Sistema de
Control de Presión de
Neumáticos)
ESPEJO RETROVISOR
TPMS
IMPULSADO CON ENERGÍA SOLAR
(Siglas de Sistema de
Control de Presión de
Neumáticos)
RÉTRO
VISEUR ET
SSPP
ALIMENTÉ À L
’ÉNERGIE SOLAIRE
(Système de Sur
veillance
de la Pression des Pneus)
RÉTROVISEUR ET
SSPP
ALIMENTÉ À L’ÉNERGIE SOLAIRE
(Système de Sur
veillance
de la Pression des Pneus)
•Lowpressurewarninginrealtime
•Displaysall4tirepressuresata
glance
•A
vertissement
bassepressionen
tempsréel
•Affichelespressionsdesquatre
pneusenuncoupd’œil
•Advertenciadebajapresiónen
tiemporeal
•Muestralapresióndelos4
neumáticosdeunvistazo
•Lowpressurewarninginreal
time
•Displaysall4tirepressuresat
a
glance
•A
vertissement
bassepression
en
tempsréel
•Affichelespressionsdes
quatre
pneusenuncoupd’œil
•Advertenciadebajapresión
en
tiemporeal
•Muestralapresióndelos4
neumáticosdeunvistazo
A
First surface plating
Métallisation spéculaire
de surface
Metalizado en la primera
superficie
Mirror glass
Verre de miroir
Luna del espejo
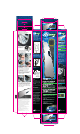
FIRST SURFACE MIRROR
PLATING
Reflective chrome layer is plated on
the front of the glass.
Less distortion from having to look
through
the thickness of the glass.
MÉTALLISATION SPÉCULAIRE
DE SURFACE
Une couche de chrome réfléchissant
est plaquée sur le devant du verre.
Moins de distorsion provoquée par
le besoin de regarder par l’épaisseur
du verre.
ESPEJO METALIZADO EN LA
PRIMERA SUPERFICIE
La ca
pa reflectora de cromo está
aplicada en la cara del espejo.
Se produce menor distorsión que
al mirar a través del espesor del
vidrio.
• All Parts Included
• Toutes Pièces Incluses
• Se Incluyen Todas
Las Piezas
SOLAR PANEL
PANNEAU SOLAIRE
PANEL SOLAR
RM011TPMS RM011TPMSRM011TPMS
RM011TPMS
RM011TPMS
This device complies with Part 15 of the FCC rules. Operation is subject to the
following two conditions: 1) this device may not cause harmful interference, and 2)
this device must accept any interference received, including interference that may
cause undesired operation.
Note: This equipment has been tested and found to comply with the limits for a Class
B digital device, pursuant to part 15 of the FCC Rules. These limits are designed to
provide reasonable protection against harmful interference in a residential installation.
This equipment generates uses and can radiate radio frequency energy and, if not
installed and used in accordance with the instructions, may cause harmful
interference to radio communications. However, there is no guarantee that
interference will not occur in particular installation. If this equipment does cause
harmful interference to radio or television reception, which can be determined by
turning the equipment off and on, the user is encouraged to try to correct the
interference by one or more of the following measures:
--Reorient or relocate the receiving antenna.
--Increase the separation between the equipment and receiver.
--Connect the equipment into an outlet on a circuit different from that to which the
receiver is connected.
--Consult the dealer or an experienced radio/TV technician for help.
Changes or modifications not expressly approved by the party responsible for
compliance could void the user’s authority to operate the equipment.
FCC Radiation Exposure Statement
This device complies with FCC RF radiation exposure limits set forth for an
uncontrolled environment. This transmitter must not be co-located or operating in
conjunction with any other antenna or transmitter.
FCC Statement