USER’S GUIDE V: 811-02 ITB133B 32” Bluetooth Tower Speaker For the most up-to-date version of this User’s Guide, go to www.iLiveElectronics.
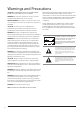
Warnings and Precautions CAUTION: TO PREVENT ELECTRIC SHOCK, MATCH WIDE BLADE OF PLUG TO WIDE SLOT, FULLY INSERT. WARNING: To reduce the risk of fire or electric shock, do not expose this apparatus to rain or moisture. AVERTISSEMENT: Pour réduire le risque d’incendie ou de choc électrique, ne pas exposer cet appareil sous la pluie et l’humidité. CAUTION: Use of any controls or adjustments or performance of procedures other than those herein specified may result in hazardous radiation exposure.
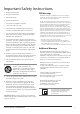
Important Safety Instructions 1. Read these Instructions. 2. Keep these Instructions. 3. Heed all Warnings. 4. Follow all instructions. 5. Do not use this apparatus near water. 6. Clean only with a dry cloth. 7. Do not block any ventilation openings. Install in accordance with the manufacturer’s instructions. 8. Do not install near any heat sources such as radiators, heat registers, stoves, or other apparatus (including amplifiers) that produce heat. 9.
ITB133B Includes Features • • • • • • • Supports Bluetooth v2.1 Supports Enhanced Data Rate (EDR) Supports profile A2DP (Advanced Audio Distribution Profile) Negative LCD display Built-in FM wire antenna Station memory presets (20 FM) Bass controls Treble controls • • • • • • • • Digital volume control Digital FM radio (PLL) Remote 3.
Table of Contents Warnings and Precautions . . . . . . . . . . . . . . . . . . . . . . . . . . . . . . . . . . . . . . . . . . . . . . . . . . . . . . . . . . . . . . . . . . . . . . . . . . . . . 2 Important Safety Instructions. . . . . . . . . . . . . . . . . . . . . . . . . . . . . . . . . . . . . . . . . . . . . . . . . . . . . . . . . . . . . . . . . . . . . .
Introduction Source Press to switch between Bluetooth, Line In, AUX, and FM Radio modes. Power Press to turn the unit on or off. Clk Set/Play/Pause In off mode, press to begin setting the clock. Press to play or pause a connected Bluetooth device. Skip/Search Tune (+/-) Press to skip between tracks . Press and hold to search through an individual track. Press to tune the FM radio. Press and hold to search for the next available station. PM MUTE STEREO MONO PROGRAM Volume Turn to adjust the volume.
Power Press to turn the unit on or off. Source Press to switch between Bluetooth, Line In, AUX, and FM Radio modes. Play/Pause Press to play or pause a track. Skip/Search Tune (+/-) Press to skip between tracks . Press to tune the FM radio. Press and hold to search for the next available station. Memory In FM Radio mode, press to browse preset stations. EQ Press to set the EQ. Volume Press to adjust the volume. Bass Press to adjust the bass.
Setting the Clock & Stereo RCA Inputs Setting the Clock 1. If powered on, press the Power button to turn the unit off. 2. Press the Clock Set button. When connecting two products using an RCA Cable, match the colored ports with the same colored connection. 3. Press the Tuning+/- buttons to adjust the hour. 1. Connect the RCA Cable to the RCA Stereo Inputs located on the back of the unit, and to the audio outputs on the television. 4. Press the Clock Set button. 2.
Radio and Line In Tuning the FM Radio 1. Press the Power button to turn the unit on. Using the Line In 3.5 mm line input cable not included. 2. Press the Source button repeatedly to switch the unit to FM Mode. 1. Plug one end of a 3.5 mm audio input cable into the Line In on the unit. 3. Press the Tuning+/- buttons on the unit or the remote to scan for the next available station. 2. Plug the other end of the cable into the audio output/headphone output on an MP3 Player or other audio source. 4.
Bluetooth Pairing a Bluetooth Device for the First Time Playing Audio Wirelessly 1. Power on the unit by pressing the Power button. 1. Follow the instructions for Pairing a Bluetooth Device. 2. Press the Source button repeatedly to enter Bluetooth mode. The display will show “BT”. 3. Press the Pairing button on the top of the unit. The Pairing Indicator will flash blue quickly. When pairing, remain within 3 feet of the unit. 4.
Stand Attaching the Stand 1. Align the holes in the bottom of the unit to the holes in the base. 2. Use a philips-head screwdriver to tighten or remove the screws. Using an power drill could damage the TV stand.
Company Information International Support Green Initiative To download this User’s Guide in English, Spanish, and French, or to get answers to frequently asked questions, visit the support section at: www.iLiveElectronics.com Para descargar este Manual del Usuario en inglés, español y francés, o para obtener respuestas a preguntas frecuentes, visite la sección de apoyo en: www.iLiveElectronics.