
Instruction Manual

3
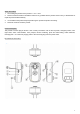
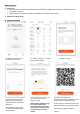
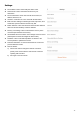
MicroSD Card Installation
The camera supports microSD cards capacity from 8GB to 32GB (class 6 or faster). Please insert the
microSD card into the microSD card slot according to the following illustration.
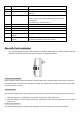
One-touch Call Out Button
When the person at the camera end wishes to reach the app owner, press the button to send out the request for
two-way audio. When the app owner accepts the request, the camera will be activated. This feature can be used
for some emergency cases.
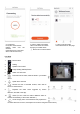
Color Night Vision
This camera is equipped with a special image sensor that brings color night vision except the following circumstances.
1. When the camera is in a complete dark environment, no night vision image will be seen.
2. When the camera is in very low light environments, it will switch to black and white night vision to avoid excess
image noises.
Camera Angle Adjustment
The camera is equipped with a manually angle adjustable lens. Please set the lens at your preferred angle.
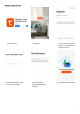
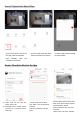
No.
Name
Functions & Remarks
1
MicroSD Card slot
8GB~32GB (class 6 or faster)
2
Reset Hole
For resetting the camera (Please gently pin into it for 3~5
seconds).
3
Power Plugs
To turn on the camera, insert the power plugs to a power
outlet. To turn off the camera, remove the camera from the
power outlet.
(US version plugs: AC 100V~240V)
4
Camera
Angle adjustable
5
Built-in Speaker
6
Built-in Microphone
7
On-touch Call Out Button
Please see the details in “On-touch Call Out Button”
8
Red LED working
indicator
Flashing: Waiting for Wi-Fi pairing and connection
9
Blue LED working
indicator
(a) Flashing: During Wi-Fi pairing and connection.
(b) Solid lit: Connected to Wi-Fi successfully.