
User's Manual

29
30
*
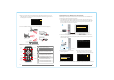
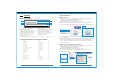
4. Select "The same on both displays (Clone) " or "Configured independently from each
other (Dualview) ", click "Apply";
5. When computer screen shown on the display device, click "Yes" to save the setting.
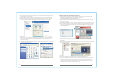
6. As below picture show, select the "Change resolution" option, you can modify the
computer output resolution as dragging the "Display Resolution" progress bar.
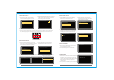
7. Open the Control Panel, run the "Sounds and Audio Devices" as follows: Click the
"Audio" tab in the "Sounds and Audio Devices" properties card, change the "Default
device" of "Sound playback" to "NVIDIA High Definition Audio", then click "OK" to
complete the setup.
*8. This step is for HDMI audio output settings, you can skip this step if you are using VGA
interface of HD transmitter.
Windows XP System (ATI Graphic Card Series)
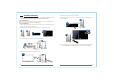
1. When the device is properly connected and the network has been connected, OSD
information on display device screen will be prompted as:
" NETWORK CONNECTED, VIDEO CONNECTING... ";
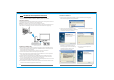
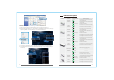
2. Right-click the mouse on the desktop, select "Catalyst( TM ) Control Center", open the
ATI graphics settings;
3. Select "Displays Manager" which listed in the graphics settings as refer to follow picture:
4 .Below “Attached displays currently disabled”, there will be a gray display in the display
box, if no gray display appear, please right-click "Detect Displays" or unplug and then
plug the HDMI cable;
5. Right-click the gray display, select the "Extended Main onto HDTV" or "Clone Main
with HDTV";
6. When the video image appears on the display screen, select "Yes" on the pop-up dialog
box to save the settings;
7. Click the "Desktop Area" option, change the computer's output resolution;
8. Open the computer control panel, run the "Sounds and Audio Devices";
9. This step is for HDMI audio output settings, you can skip this step if you are using VGA
interface of HD transmitter. Click the "Audio" tab in the "Sounds and Audio Devices
" properties card, change the "Default device" of "Sound playback" to "ATI HD Audio
rear output", then click "OK" to complete the setup.