
User's Manual


7
3 CABLE CONNECTION
3.1 Before Connecting
Before connecting your monitor to the computer, change the display screen settings
(Resolution and frequency) in accordance with the charts below.
Note:
- The lower display modes like 640x 480, automatically enlarge to the maximum display
mode (1600x 1200), and some lines of the characters may become fuzzy.
- When your computer and display support VESA DDC, the suitable resolution and the
refresh rate are set by just plugging your display into the computer without any manual
settings.
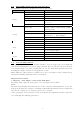
The monitor supports the following resolutions.
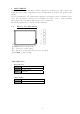
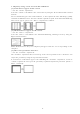
3.2 Connecting the Cables
Note: Be sure that the power switches of both the computer and the monitor are OFF.
Power cable connection:
Connect the power cord to the AC outlet, and connect the power to the monitor
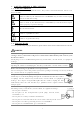
DVI cable connection (Optional):
Plug the DVI signal cable to the DVI connector in the rear of the PC system, and plug the
other end to the monitor. Secure cable connectors with screws.
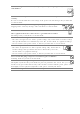
VGA cable connection:
Plug 15-pin VGA signal cable to the VGA connector in the rear of the PC system, and plug the
other end to the monitor. Secure cable connectors with screws.
Plug the power cord into the power connector on the rear of the monitor. Then, plug the
other end of the cord into a power outlet.
Resolution Refresh rate Dot Frequency
Remark
720 x 400 70Hz
PC Mode
640 x 480 60Hz VGA
800 x 600 60Hz VESA
1024 x 768 60Hz VESA
1152 x 900 76Hz VESA
1280 x 1024 60Hz VESA
1600 x 1200 60Hz VESA
1600 x 1200 75Hz
202MHz
(Max.)
VESA
AC IN DVI D-SUB