
User's Manual

Answering System Operation
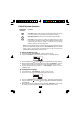
IMPORTANT: To ensure the proper operation of your Answering System:
1. Plug the AC ADAPTOR into the POWER-IN CONNECTION JACK.
2. Press the RESET button at the back of the BASE UNIT before initial use.
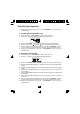
Setting the Day/Time Stamp
Press and hold down the SET button until you hear the announcement “Time is off,
please enter new time.” Then, enter the current day and time.
1. Day Setting
Press and release the DAY button. The
corresponding day will be displayed
and announced. Press and release the
DAY button repeatedly until the desired
day is displayed and mentioned.
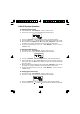
2. Hour Setting
Press and release the HOUR button. The
corresponding hour will be displayed
and announced. Press and release the
HOUR button repeatedly until the desired
hour is displayed and mentioned.
3. Minute Setting
Press and release the MIN button. The
corresponding minute will be displayed
and announced. Press and release the
MIN button repeatedly until the desired
minute is displayed and mentioned.
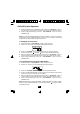
Press the SET button to confirm the selected day and time. The system will
announce the set day and time.
NOTES:
1. The HANDSET and BASE UNIT clock are independent from each other.
Set the HANDSET clock by following the time setting steps on page 23.
2. In case of power failure, reset the time setting on the BASE UNIT clock.
Recording Your Outgoing Messages
Your Answering System provides one PRIMARY MAILBOX and four individual
MAILBOXES (1, 2, 3, 4) which can receive their own Incoming Messages (ICM).
Before using your Answering System, it is suggested that you record an Outgoing
Message (OGM). This is the announcement callers will hear when the system
answers a call.
29
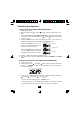
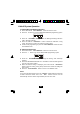
In Use On/Off
Ans
Chg
ON/OFF
SKIP
OGM
ERASE
PAGE
MB-1
MB-2 MB-3
MB-4
HOUR
MINUTE DAY
MEMO
CODE SET
PLAY
REPEAT
ANS
STOP