Caller ID System Operation Caller ID System This telephone automatically displays incoming caller's name and telephone number together with the date and time of the call. it records up to 80 calls and stores the data in Memory. IMPORTANT: You must subscribe to the Caller ID service from your local telephone company to utilize this feature. Viewing Caller Information During Incoming Calls 1.
Caller ID System Operation Call Waiting When you subscribe to Call Waiting service from your local telephone company, this telephone will display the name and number of the second caller while you are having a conversation. 1. When you are having a conversation, this #9 [IM CARY telephone will automatically display the name 800-2-10-8950 and number of the second caller. UN SECLUDE 2. Press the button to answer the second 2ND CALLER caller. The first caller's name and number will be displayed. oa 3.
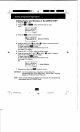
i TCH EY 2, Press oD button to select from the latest record, or press the @@ button fo select from the first record. 3. Press the OPTION button to select call number Press OPTION button key for i. If area code matched, Press OPTION key; a. One time to dial 7 digits b. Two times to dial 10 digits c. Three times to dial area code +7 digits d. Four times to dial 1 + area code + 7 digits il. If area code does not matched, Press OPTION key; a. One time to dial 10 digits. b. Two times to dial 1 + 10di 4.
Caller ID System Operation Deleting All Records in the Caller List 1. Press the (RIBS button at standby mode. 2. Press and hold the button around 2 seconds. 3. The LCD Screen will automatically return to STANDBY mode. ALL . _ , BEA mil Selective Deleting in the Caller List — 1. Press the or bitten to find the caller at STANDBY mode, ~ 2. Press and hold down the GED button, then the LCD Screen will display the next item in the directory. 3. Press the @B button to return to STANDBY mode.
Caller ID System Operation Saving in the DIRECTORY . Press the @&h button. 2. Press the (EB button. 3. Use the TELEPHONE KEYPAD button (0~9) to enter the name, (see page 30 for detail) you can store up to 15 characters. 4. Press the button once. 5. Enter the telephone number using the TELEPHONE KEYPAD bunion You can store up to 16 digits. 6. Press and hold down the BEB button. 7. Press the @lB button to go back to STANDBY mode.
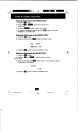
Caller ID System Operation Editing Name and Number in the DIRECTORY 1. Press the [0] button, 2. Press the @B or button to find the one you want to edit. > LEY BROWNIE 58435542 Press the button to edit the name. EA CAPACITOR bs ERIE o0%555 cursor is Inking 4. Press the SHIFT LEFT @® or RIGHT@ button to move the cursor to the letter or number ant to change. To erase, press the button. To add, use the TELEPHONE KEYPAD bunions (see page 30 for details.) + 5. Press the UP or DOWN button to edit the number. + 6.
Caller ID System Operation Editing the Number in the DIRECTORY before Dialing 1. Press the @&B button. . Press the [1] button to find the caller. 2. 3. Press the (EE button to edit the name. 4. i «= cursor is blinking 5. Press and hold the SHIFT LEFT (@ or RIGHT @ button to move the cursor to the number you want to change. To erase, press the button. To add, use the TELEPHONE KEYPAD buttons. 6. Press the OPTION button to select call number. 7.
Caller ID System Operation Placing Calls from the DIRECTORY 1. Press the BI button. 2. Press the iG --FR button to find the one you want to call. 3. Press the J button to select call number. 4. To end your conversation, either press the button or place the HANDSET on the BASE UNIT. Deleting All Records in the DIRECTORY 1. Press the EB button. 2. Press and hold down the EBB button at STANDBY mode. 3. Press the @BIB button to return to STANDBY mode. + Selective Deleting in the DIRECTORY + 1.
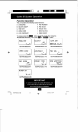
Caller ID System Operation Function Operation This unit contains the following special functions: A. LANGUAGE B. SILENT ON/OFF C. TIME SET D. AREA CODE E. LCD CONTRAST To access, press the EB TELEPHONE KEYPAD (1~9} or the F. PBX NUMBER . PBX MODE .
Caller ID System Operation A. LANGUAGE This telephone offers English, Spanish and French languages for your convenience. 1. Press the &n button. 2. Press the TELEPHONE KEYPAD #1 button. 3. Press the ED button. 4, . Press the &@ or CoE button to select the language you desire. English is the preset language. . Press and hold down the (RIE) button. 6. Press the an button to go back to standby mode. B.
| ET 4 Caller ID System Operation D. AREA CODE 1. Press the HRD button. 2. Press the TELEPHONE KEYPAD #4 button. 3. Press the bunion. 4. Use the TELEPHONE KEYPAD button to enter the AREA code. 5. Press and hold down the button. 8. Press the EED button to go back to STANDBY m. CONTRABASSOON This unit enables you fo select 3 brightness levels for the Large LCD display. 1. Press the (& J button. 2. Press the TELEPHONE KEYPAD #5 button. 3. Press the EB button. 4.
Caller ID System Operation G. PBX MODE This unit enables you to tum ON/OFF the PBX system depending on the telephone system you are using. 1. Press the §B button. 2. Press the TELEPHONE KEYPAD #7 button 3. Press the @& nh button. a, Press the EIB or PBX MODE OFF set for direct line access. The preset PBX mode is OFF. PBX MODE ON When connected to a switchboard system. 5. Press and hold down the button. 6.
Caller ID System Operation TELEPHONE KEYPAD Characters The TELEPHONE KEYPAD buttons (1~9) are used to enter the characters when entering names. Press the appropriate KEYPAD button to get the following characters. KEYPAD CHARACTERS BUTTONS SPACE & E.1 ABC DEF GHZ JELLS MOS HDQRS? TUBS WXYZ9 E 0 # For example, if you want to enter the character “C", press the “2° KEYPAD button, the first character displayed will be "A". Press the "2" button again to display “B”, and press again to display the letter "C".
Security Security System Your cordless telephone uses a digital coding security system to prevent unauthorized use of your telephone line by another nearby cordless telephone. The system has its own identifying signal created by microcomputers in both the BASE UNIT and HANDSET. Security Code This telephone has an internal security code with 65,536 possible combinations.
Problem Solving Problem Solving Section For your assistance, we have listed below a few common problems. Phone does not work, check the following: 1. BASE UNIT is plugged into power source. 2, HANDSET is charged. 3. TONE/PULSE switch is in the right position. 4. TELEPHONE LINE CORD is plugged into the telephone jack. Ne dial tone, check the following: 1. TELEPHONE LINE CORD plugs are connected to the TELEPHONE JACK and TELEPHONE LINE CONNECTION JACK. 2. BASE UNIT is plugged into power source. 3.
Technical Information Technical Information This cordless telephone uses radio frequencies to allow mobility. There are certain difficulties in using radio frequencies with a cordless telephone. While these are normal, the following could affect the operation of your system. Noise Electrical pulse noise is present in most homes at one time or another, This noise is most intense during electrical storms.
FCC Requirements A FCC NOTICE The FCC requires that you be advised of certain requirements involving the use of this telephone. 1. 2. © CATCALL MANUAL (FCC Useless 34 i 97-615, 14:68 &This telephone is hearing aid compatible. This equipment complies with Part 88 of the FCC rules. On the bottom of this equipment is a label that contains, among other information, the FCC registration number and Ringer Equivalence Number (REN) for this equipment.
4 EEE EE. | FCC Requirements A INDUSTRY CANADA CERTIFIED RINGER EQUIVALENCE NUMBER NOTICE: The ringer equivalence number (REN) assigned to each terminal device provides an indication of the maximum number of terminals allowed to be connected fo a telephone interface. The termination on an interface may consist of any combination of devices subject only to the requirement that the sum of the ringer equivalence numbers of all the devices does nat exceed 5.
FCC Requirements communications. ® Reorient of relocate the receiving antenna. receiver is needed. the user's authority to operate this equipment &reduce or eliminate the interference. NOTE: This equipment has been tested and found to comply with the limits for a Class B digital device, pursuant to Part 15 of the FCC Rules. Tess limits are designed to provide reasonable protection against harmful interference in a residential installation. This equipment generates.