
User's Manual
36882 English I/B ver. 11202A-1
11202A-1
10
OWNER’S MANUAL # 36882 ver. 11202A-1
Page : 10 ENGLISH VERSION
received. Lights up when the Speakerphone
function is in use.
SCROLL UP-DOWN, SHIFT LEFT-
RIGHT Buttons (SCROLL UP-DOWN) -
Allows you to scroll through the stored list
of incoming calls and function menus.
(SHIFT LEFT-RIGHT) - Used for moving
to the next character / digit when entering
information during EDIT mode.
Speaker phone Button – Press to place a
call and receive a call without using the
handset.
Base Unit Temporary Tone (4) Button -
Press to temporarily change the dialing
mode from PULSE to TONE for rotary
service users. (Press once before entering
numbers to access the answering system or
electronic banking services, etc.)
Ringer ON/OFF Switch – For normal use,
set switch to ON. To disable the ringer on
the base unit, set switch to OFF position.
DEL (Delete) Button - Press and hold
down to delete items or individual
characters.
SAVE/ REDIAL Button - (SAVE) Press
and hold to save the changes on the listed
items. (REDIAL) Press to redial the last
number you dialed. (You will need the
SAVE/REDIAL button to dial numbers that
use an alternative Long Distance Access
Code.)
EDIT/FLASH Button - (EDIT) Press to
edit listed items. (FLASH) Press to answer
a call if you have a Call Waiting.
DIR (Directory)/ HOLD Button –
(DIRECTORY) Press to access names and
numbers stored in the Directory (PHONE
BOOK). (HOLD) Press to put the call on
hold.
#/OPTION Button - (OPTION) Press to
change the displayed telephone number into
7, 10, or 11 digit DIALING mode during
Caller ID callback.
TEL (TELEPHONE) LINE Jack - An
RJ-11 connector where one end of the
telephone line cord connects.
INSTALLATION
CAUTION: USE ONLY THE
NICKEL CADMIUM (Ni-Cd) BATTERY
TYPE INCLUDED WITH THIS UNIT.
USE OF OTHER BATTERY TYPES
MAY CAUSE INJURIES OR DAMAGE.
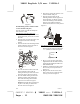
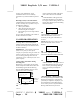
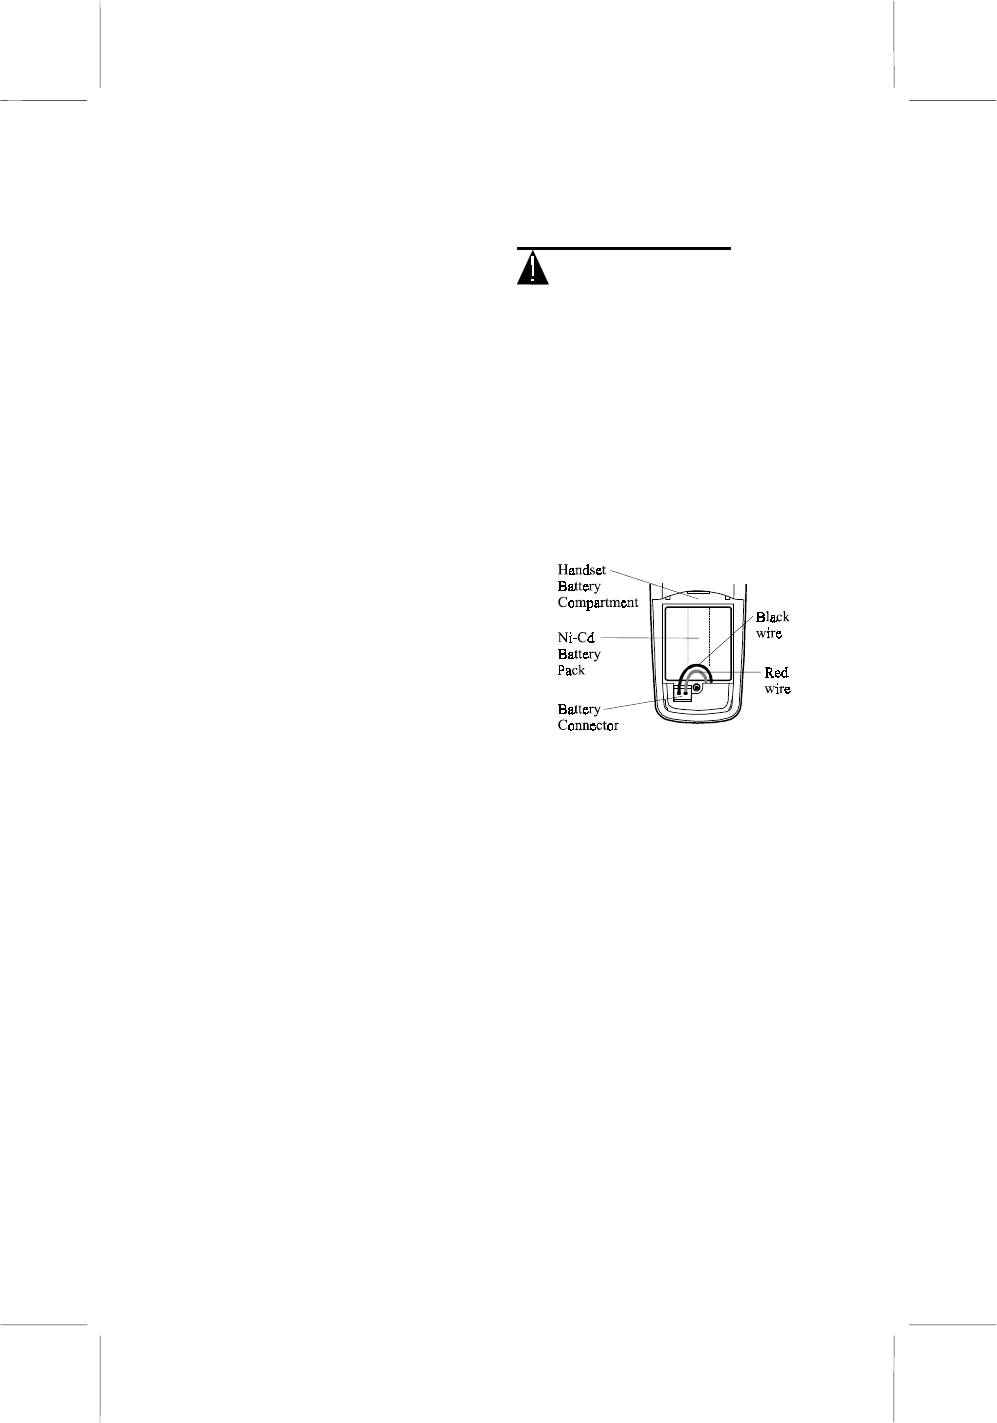
Battery Installation
1. Remove the battery compartment cover
of the handset by pressing the top of
the cover and sliding it down.
2. Connect the Ni-Cd battery pack plug
along the slot into the handset’s battery
connector as shown below.
(Figure 1)
3. Insert the Ni-Cd battery pack into the
battery compartment. The LCD panel
will turn on in standby mode.
4. Replace the battery compartment cover
by sliding it up towards the handset.
NOTE: Use the type and size of Ni-Cd
battery pack, 3.6V, 600mA. It is
recommended that the Ni-Cd battery pack
should be fully charged overnight prior to
initial use.
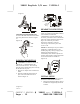
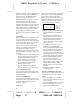
Belt Clip Installation
With the back of handset facing up, insert
one side of the belt clip hook into the
matching slots at the top side of the
handset as shown in Figure 2. Slide the
other hook until it locks into place from
the opposite side of the handset.