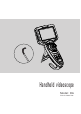
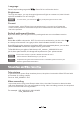
Handheld videoscope Model: DA FCC ID: 2A3A7-DA
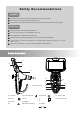
Safety Recommendations DANGER This device must not be used for medical or veterinary purposes. Do not use this item in explosive atmospheres. Do not look into distal end with naked eyes, eyesight maybe harmed by strong light. WARNING Keep the device out of reach of children. Do not try to modify or disassemble the unit. Do not pull hard or twist the insertion tube. Serious impact may bring breakage of lens components at distal end.
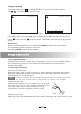
Quick Setup 1.Detachable Panel Take apart: Screw off the bolt on the back of panel, then push the panel upwards, which will be taken apart from the main body. Fig01. The reverse operation to combine the two parts together. 2.Ready for use At shutdown status, plug in Micro SD in direction. Fig03 Fig03. Long press button , the status indicator turns green, the device enters preview mode, real time image shows on the screen and at he same time, some icons and time information will be seen at top location.
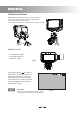
Through button to adjust illumination, steer the joystick to control distal end to bend. Locker is to tighten or release joystick in order to distal end stay at a certain angle. Fig05 . Lock On Lock Off Fig05 MENU set up S w i tch on device and enter preview mode, press MENU to access menu interface, use to select item and with OK to confirm.
Language Select required language with , Press OK to confirm the choice. Brightness T hrough this menu, you can change brightness of light on camera end, total 4 levels optional, and off to turn off the light. NOTE In most cases, you should use key to adjust brightness more often. Format In some cases, micro SD card can not work properly, you can try to format the c ard to fix the problem. Please back up files in advance due to the data could be lost in the process.
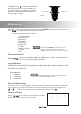
Image viewing In preview mode, press , the image last picture or video will present, please use to find the image wanted. Fig07. IMG_0000002 .JPG VID_20210116_110110.MOV OK: OK: : : Fig07 Press OK to play video, press OK again to pause, press OK once more return to play. Press speed. to fast-forward, to back-forward, repeatedly press the key to get 2x 4x 8x Delete files When you find targeted picture or video, press MENU to delete files, press OK to choose delete current single one or all files.
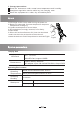
3. Storage precautions Store the instrument under normal room temperature and humidity. Straighten angulation section while lay into carrying case. Store the equipment at a clear,dry and stable place. Q & A Q: No image on the screen after turning the power on A: Battery is exhausted. Connect the panel to the power adapter and recharging. Q: Unable to take photo or record video A: SD card absent, wrongly inserted, full or faulty.
This device complies with part 15 of the FCC Rules. Operation is subject to the following two conditions: (1) This device may not cause harmful interference, and (2) this device must accept any interference received, including interference that may cause undesired operation. Any changes or modifications not expressly approved by the party responsible for compliance could void the user's authority to operate the equipment.