
User's Manual


5
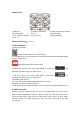
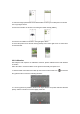
IR sensor on/off
6
Quick takeoff/landing
7
Select a shooting/recording mode: 4 modes available
8
Wi-Fi signal
9
Battery level
10
Settings
11
Start shooting/recording
12
Switch the nose direction
13
Album
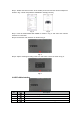
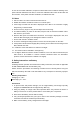
IV. Charging
The battery level is indicated by the battery level icon on the APP. Follow the figure below
to charge the battery when the battery level icon shows less than one bar of power:
Battery Charging Base
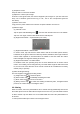
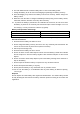
V. Battery Installation
Insert the battery into the battery compartment as directed by the 8 pins as shown below:
VI. Flight
1. Flight Environment
An indoor environment with calm air is recommended.
Indoor flight:
(1) Considering the optical flow positioning and all-round IR obstacle avoidance, clear
marks are required below the flight area.
(2) An indoor flight requires adequate light (illuminance>15lux), like normal fluorescent
lighting.
(3) No strong Wi-Fi interference is allowed.
2. Preflight Checks
(1) Check if the UAV has any structural damage.
(2) Check the battery level of the UAV (refer to the battery level icon on the APP).
(3) Check the battery level of the mobile phone (20% or higher).
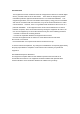
3. Preparations for Light
Insert the battery into the
special charging base.
Blue: charging status indicator.
Flash slowly: charging…
Remain on: fully charged.