
Product Instruction

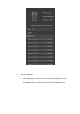
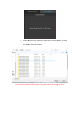
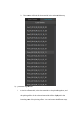
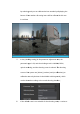
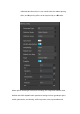
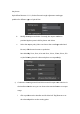

Table Of Contents

ii.
Similarly, click the "flag" button on the right to set the sele
location to the termination point
iii.
The area shown at this point is the selected stitching range of the
material
iv.
At this time, the [play] button can be used to automatically display
the piecing effect in the preview area of the stitching effect by
fra
me.You can also jump directly to the desired preview location by
manually entering the frame number
v.
Go to the output directory to see the corresponding panoramic
media file
d) menu features:
i. File -
new project: used to create a new project to facilitate t
management of the material and its Settings (not developed)
Similarly, click the "flag" button on the right to set the sele
location to the termination point
The area shown at this point is the selected stitching range of the
At this time, the [play] button can be used to automatically display
the piecing effect in the preview area of the stitching effect by
me.You can also jump directly to the desired preview location by
manually entering the frame number
Go to the output directory to see the corresponding panoramic
new project: used to create a new project to facilitate t
management of the material and its Settings (not developed)
Similarly, click the "flag" button on the right to set the sele
cted
The area shown at this point is the selected stitching range of the
At this time, the [play] button can be used to automatically display
the piecing effect in the preview area of the stitching effect by
me.You can also jump directly to the desired preview location by
Go to the output directory to see the corresponding panoramic
new project: used to create a new project to facilitate t
he
management of the material and its Settings (not developed)