
Installation Guide

B. Concrete Subfloors
1. New and existing concrete subfloors should meet the guidelines of the latest edition of ASTM F 710, “Standard Practice for
Preparing Concrete Floors to Receive Resilient Flooring” available from the American Society for Testing and Materials, 100
Barr Harbor Drive, West Conshohocken, PA 19428; 610-832-9585; http://www.astm.org
2. Floors shall be smooth, permanently dry, clean, and free all foreign material such as dust, wax, solvents, paint, grease, oils, and old
adhesive residue. The surface must be hard and dense, and free from powder or flaking.
3. New concrete slabs must be dry. Maximum moisture level per CaCl test method is 8 lbs. per 1000 in 24 hr. Maximum level for
ASTM 2170 In-situ Relative humidity test method - 85%.
4. Do no install over concrete with a history of high moisture or hydrostatic conditions.
5. Maximum acceptable ph level of 10 or less
6. The final responsibility for determining if the concrete is dry enough for installation of the flooring lies with the floor covering
installer.
7. Holes, grooves, expansion joints and other depressions must be filled with a Portland based patching and levelling product,
and troweled smooth and feathered even with the surrounding surface.
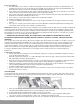
Radiant Heat:
Radiant heat components must have a minimum of 1/2" separation from the product. This is the only type of radiant heat
system that is approved. Radiant heat system must be on and operational for at least 2 weeks prior to installation to reduce residual
moisture within the concrete. Three days prior to installation lower the temperature to 65 degrees, after installation gradually increase
the temperature in increments of 5° F to avoid overheating. Maximum operating temperature should never exceed 85°F. Use of an in-
floor temperature sensor is recommended to avoid overheating.
!
WARNING! DO NOT SAND, DRY SWEEP, DRY SCRAPE, DRILL, SAW, BEADBLAST OR MECHANICALLY CHIP OR
PULVERIZE EXISTING RESILIENT FLOORING, BACKING, LINING FELT, ASPHALTIC “CUTBACK” ADHESIVES OR OTHER
ADHESIVES.
These products may contain either asbestos fibers and/or crystalline silica. Avoid creating dust. Inhalation of such dust is a cancer and
respiratory tract hazard. Smoking by individuals exposed to asbestos fibers greatly increases the risk of serious bodily harm. Unless
positively certain that the product is a non-asbestos-containing material, you must presume it contains asbestos. Regulations may
require that the material be tested to determine asbestos content and may govern the removal and disposal of material. See current
edition of the Resilient Floor Covering Institute (RFCI) publication Recommended Work Practices for Removal of Resilient Floor
Coverings for detailed information and instructions on removing all resilient covering structures. For current information go to
www.rfci.com
C. Existing Floor Coverings
VersaLock flooring can be installed over most existing hard–surface floor coverings, provided that the existing floor surface is
clean, flat dry and structurally sound.
Quarry tile, terrazzo and ceramic tile - Use caution with highly embossed tile. This type of tile plus grout joints should be filled
with a high quality cementitious patching product.
When the removal of the existing resilient floor covering is not an option then it must be covered with an embossing levelling
compound or an equivalent in order to provide a smooth subfloor surface. Otherwise, telegraphing may occur.
Existing sheet vinyl floors should not be heavily cushioned and not exceed more than one layer in thickness. Soft underlayment
and soft substrates will diminish VersaLock's inherent strength in resisting indentations.
Installation is NOT allowed over any type of carpet.
Never use solvents or citrus adhesive removers to remove old adhesive residue. Solvent residue left in and on the subfloor
may affect the new floor covering.
III. INSTALLATION
VersaLock plank flooring is designed to be installed utilizing the floating method only. Never secure the planks to the subfloor. Do not
install cabinets or fixed objects on top of the flooring. Proper expansion space is required. Undercut all doorjambs. Do not fasten wall
mouldings and or transition strips to the planks.
1. Before you start with the installation, it is important to determine the layout of the flooring. Proper planning and layout will prevent
having narrow plank widths at wall junctures or very short length pieces at the end of rows.
2. As with all plank products, install the planks parallel to the longest exterior wall.
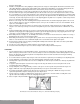
3. Determine if the starter row will need to be cut. If the first row of planks does not need to be trimmed in width, it will be
necessary to cut off the unsupported tongue so that a clean, solid edge shows towards the wall.
4. Installation of the product must start from the left side of the room, working to the right when working in front of the planks or
For reference purposes only if printed or downloaded.