
Installation Guide

IMPORTANT NOTE: Only use manufacturer's recommended
staples or cleats.
3/8” PRODUCTS
For products less than 5” the minimum length staple/ cleat is 1”
For products 5” or wider the minimum length staple/cleat is 1 ¼”
18 to 20 gauge staple, narrow 3/8” or less crown
20 gauge L shaped cleat
½” PRODUCTS
Minimum length fastener is 1 ¼” staple/cleat
18 gauge staple or cleat
For wide width products greater than 5” it is recommended to
use a combination glue down assist when using fasteners. Cut
back the vapor retarder and apply a urethane based adhesive or
PL type adhesive to the subfloor prior to installing the planks.
Fastener Schedule – All Products
Staples - 1”- 2” from ends and 3”-4” thereafter
Cleats – 1” – 2” from ends and 4” thereafter
Read and follow the manufacturer's instructions for complete set-up
and operation of equipment.
Getting Started
1. After the subfloor has been properly cleaned and prepped cover the
subfloor with 15lb. asphalt felt paper. This material will help to keep
the floor clean and help to retard moisture from below (there is no
complete moisture barrier system for staple or nail-down
applications).
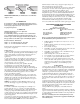
2. Select a starter wall. An outside wall is best: it's most likely to be
straight and square with the room. Measure out from this wall, at
each end, the overall width of the plank (board width + tongue + the
space needed (3/8” or ½”) for expansion).
3. Snap a chalk line from these points, parallel to that wall.
4. Install the first row of starter planks along the chalk
line/straightedge and secure into position with the tongue facing
away from the starter wall (toward you). Drill pilot holes through the
face of the plank every 6” (in the dark grain); approximately 1” from
the back edge of the board and secure planks with 1” finishing nails.
Countersink nails and fill with appropriate colored wood filler –
remove excess filler from surface.
5. Blind nail at a 45° angle through the tongue 1”-2” from the end
joints and every 6” in between along the length of the starter boards
(Predrill holes to make this easier). Depending on the width of the
flooring it may be necessary to do this for the first few rows prior to
using a pneumatic stapler/ nailer.
NOTE: Proper alignment is critical. Misaligned starter rows can
cause side and end gaps to appear in proceeding rows of flooring.
Installing the Floor
6. Continue to install the flooring making sure to nail/staple 1”-2”
from the ends and every (3”– 4” staples) or (4”Cleats) thereafter.
Make certain the tool is adjusted properly to ensure that the fastener
is at the proper angle and is flush within the nail pocket. As you
continue working across the floor try to maintain a six-inch minimum
space between end joints. Randomly install different lengths to avoid
a patterned appearance.
7. If needed use a tapping block to help engage the boards together
until the tongue-and-groove is flush and tight and no gaps are present
between adjacent planks. NOTE: Never use a rubber mallet or
hammer directly on the flooring to engage the tongue-and-groove.
This can damage the flooring and/or finish.
8. As you approach the end wall it may be necessary to cut the width
of the last row – be sure to allow for the expansion along the end
wall. Once the final cuts are made set planks into place.
9. The last few rows will need to be fastened by hand. To fasten the
final planks into place, you must either manually blind nail and/or
face-nail through the surface on the final planks. Drill pilot holes at a
45-degree angle to the floor and blind nail using l” finishing nails.
Alternatively, drill pilot holes in the face every 6” (try to drill holes in
darker portion of the wood) and install with 1” finishing nails.
Countersink nails and fill with appropriate colored wood filler –
remove excess filler from surface with a clean rag and proper cleaner.
FLOATING FLOOR INSTALLATION
GUIDELINES
(Products 3” or wider only)
Additional tools & material needed:
Shaw T&G Adhesive Hardwood Floor Cleaner/ Shaw
R2X
Terry Cloth towels 6 Mil Poly Plastic Sheeting
Foam underlayment Tapping Block & Spacers
Pry/Pull Bar 2in1 Underlayment
Before you begin using the following instructions, please refer to
the Pre-Installation Job Prep information above.
6 Mil Polyethylene not required over a vinyl, wood, or a wood
product sub floor.
6 Mil Polyethylene required over concrete type subfloors – on
grade or below grade.
Do not install over carpet.
If installing over vinyl, ensure that the vinyl is secure to the sub
floor. Do not install over perimeter glued vinyl.
If installing over an existing wood floor, install the flooring at
right angles to the wood floor.
Secure creaking and loose floorboards with screws.
Do not install over wood flooring glued to a concrete sub floor.
½” of expansion space required at all vertical surfaces.
Note: Larger rooms require additional expansion space. Add
1/16” to the width of the expansion space for every 3’ the room
extends beyond 25’. Dimensions exceeding 40’in length or
width – it is recommended to use a T-Molding for proper
expansion.
Getting Started
1. Remove all doors and shoe moldings. Undercut all door casings
1/16” higher than the thickness of the flooring and underlayment to
be installed. Place a scrap piece of plank and a sheet of underlayment
against the door casing to act as a guide and cut the door casing with
a hand saw or power jamb saw set to the correct height.
2. After determining the direction to run the planks, measure the
width of the room (the dimension perpendicular to the direction of
the flooring). The last row of the flooring should be no less than 1 ½”
wide; if it is less, cut the width of the starter row to avoid a narrow
last row.
3. Select a starter wall. An outside wall is best: it's most likely to be
straight and square with the room. Measure out from the wall, at each
end, the overall width of the plank plus ½” for expansion. If the first
row requires ripping then measure from the wall the width of the
ripped board plus ½” for expansion.
4. Snap a chalk line using a (brightly colored chalk) from these
points.
5. Install Underlayment: Unroll the 6 mil. Poly sheeting overlapping
edges 4” and seal seams with clear plastic tape. Allow the poly to run
2” up the wall and trim back after installation of flooring. Install 1/8”
foam underlayment.
Note: Use of a floating floor 2 in 1 underlayment may be used.
Follow manufacturer’s instructions for application installing the
2 in 1 underlayment.